IMG_1612.jpg

Blog

Death To Ugly Floral

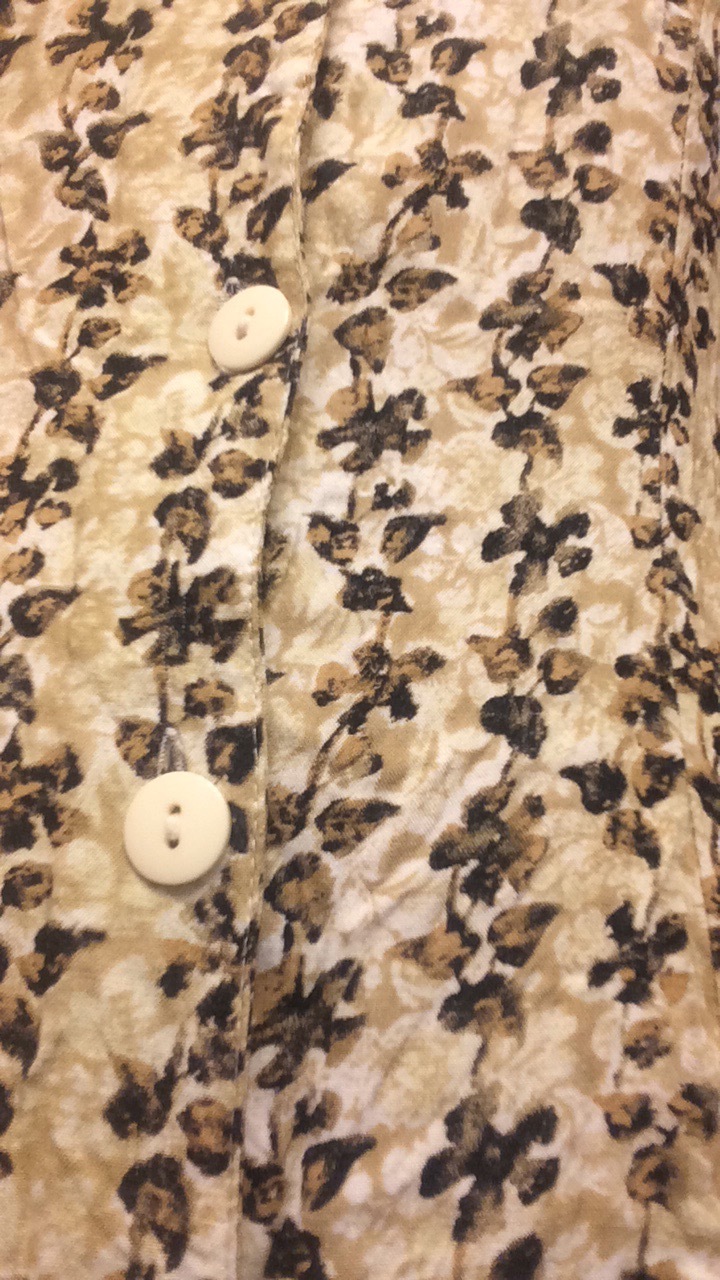
As someone who deeply appreciates a beautiful and elegant floral, few things irk and disgust me like ugly floral.  

I didn't know what I was getting into with this dress, I bought it on Etsy and it looked like it was perfectly beautiful, the model wearing it looked totally gorgeous in it, everything seemed fine until it arrived.

Now, if this floral is to your taste, that's fine.  Everyone has their own cups of tea, and I'm not here to yuck your yum- but it's my dress and therefore subjected to my tastes.

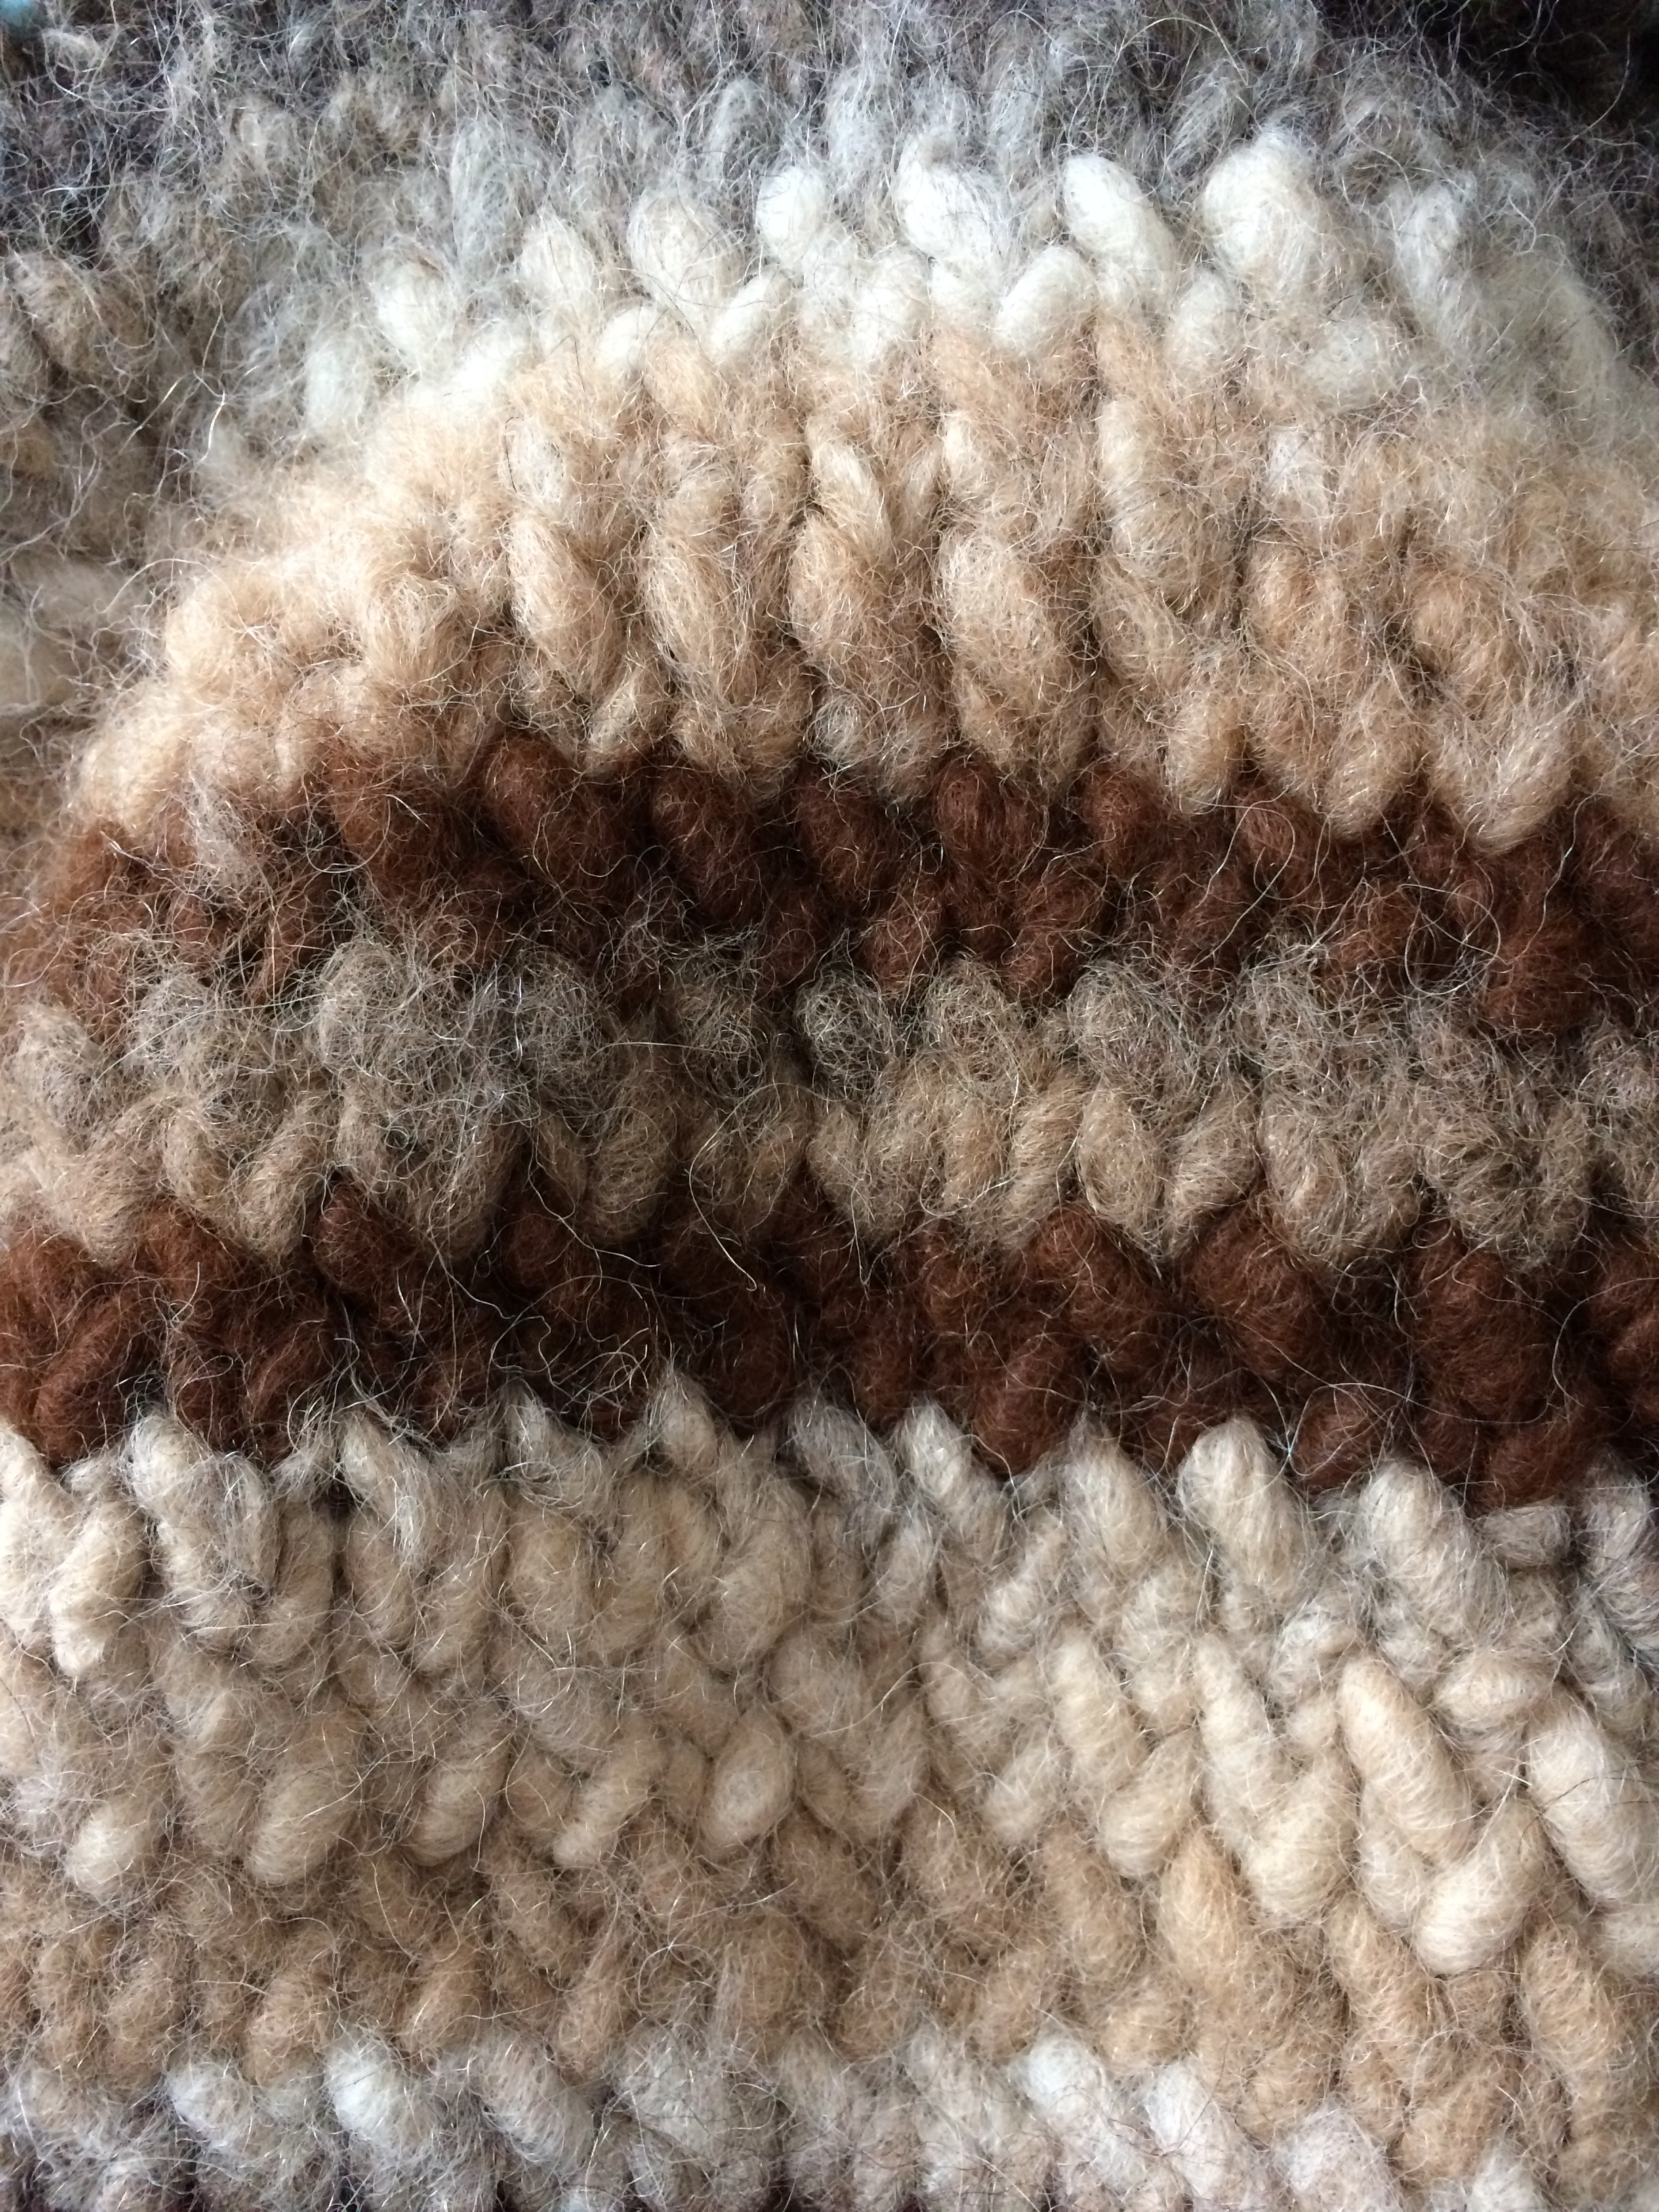
The first crime is it's beige.  Now, I don't have the level of loathing of beige that my mother does, but I'm still her child- and beige is often unacceptable.  

The second crime is that beige and I are rarely ever friends within our colour palette circles. This is especially the case because it washes me out entirely, and I look like I haven't had a healthy meal in a year.  

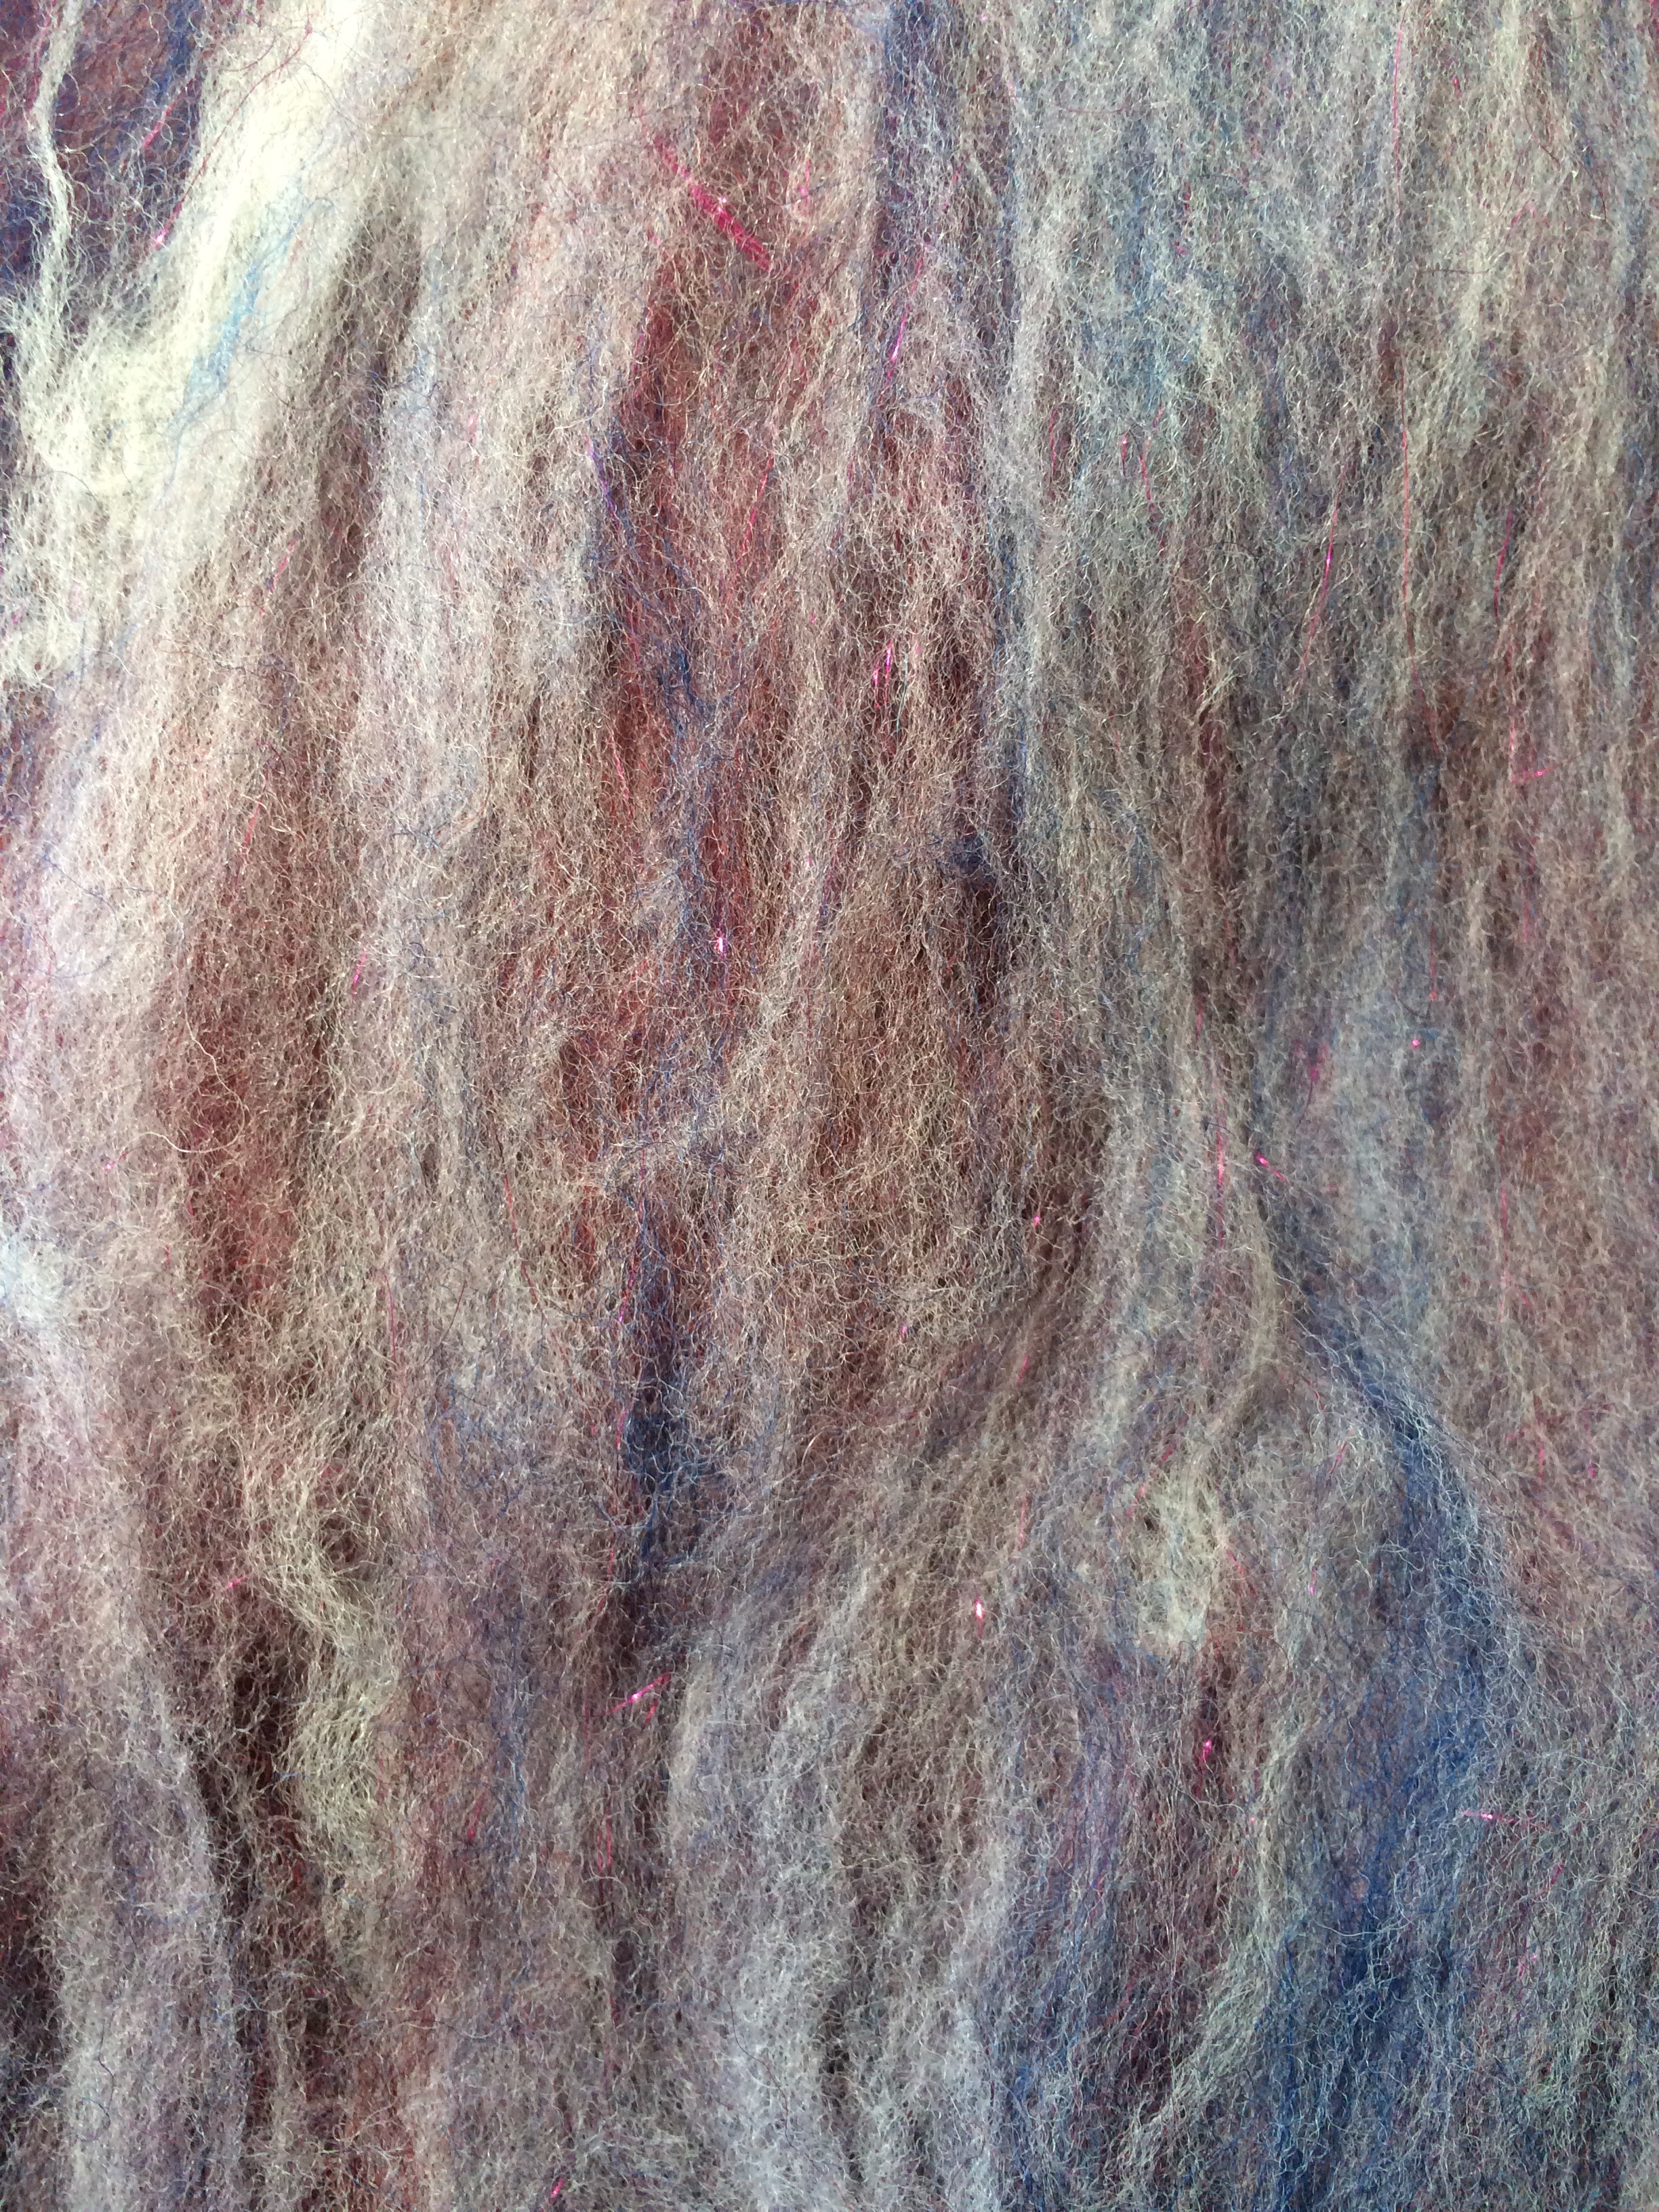
The third crime is the flowers.  They remind me of children's summer wear for the beach- and while that's perfectly acceptable for them, I am not a child and do not wish to dress like one.

So it is with this that I declare I must destroy the ugly.  Why am I going to this trouble?  The cut of the dress is perfect, and when you're shaped as uniquely as I am, you hold onto good fits as best you can.

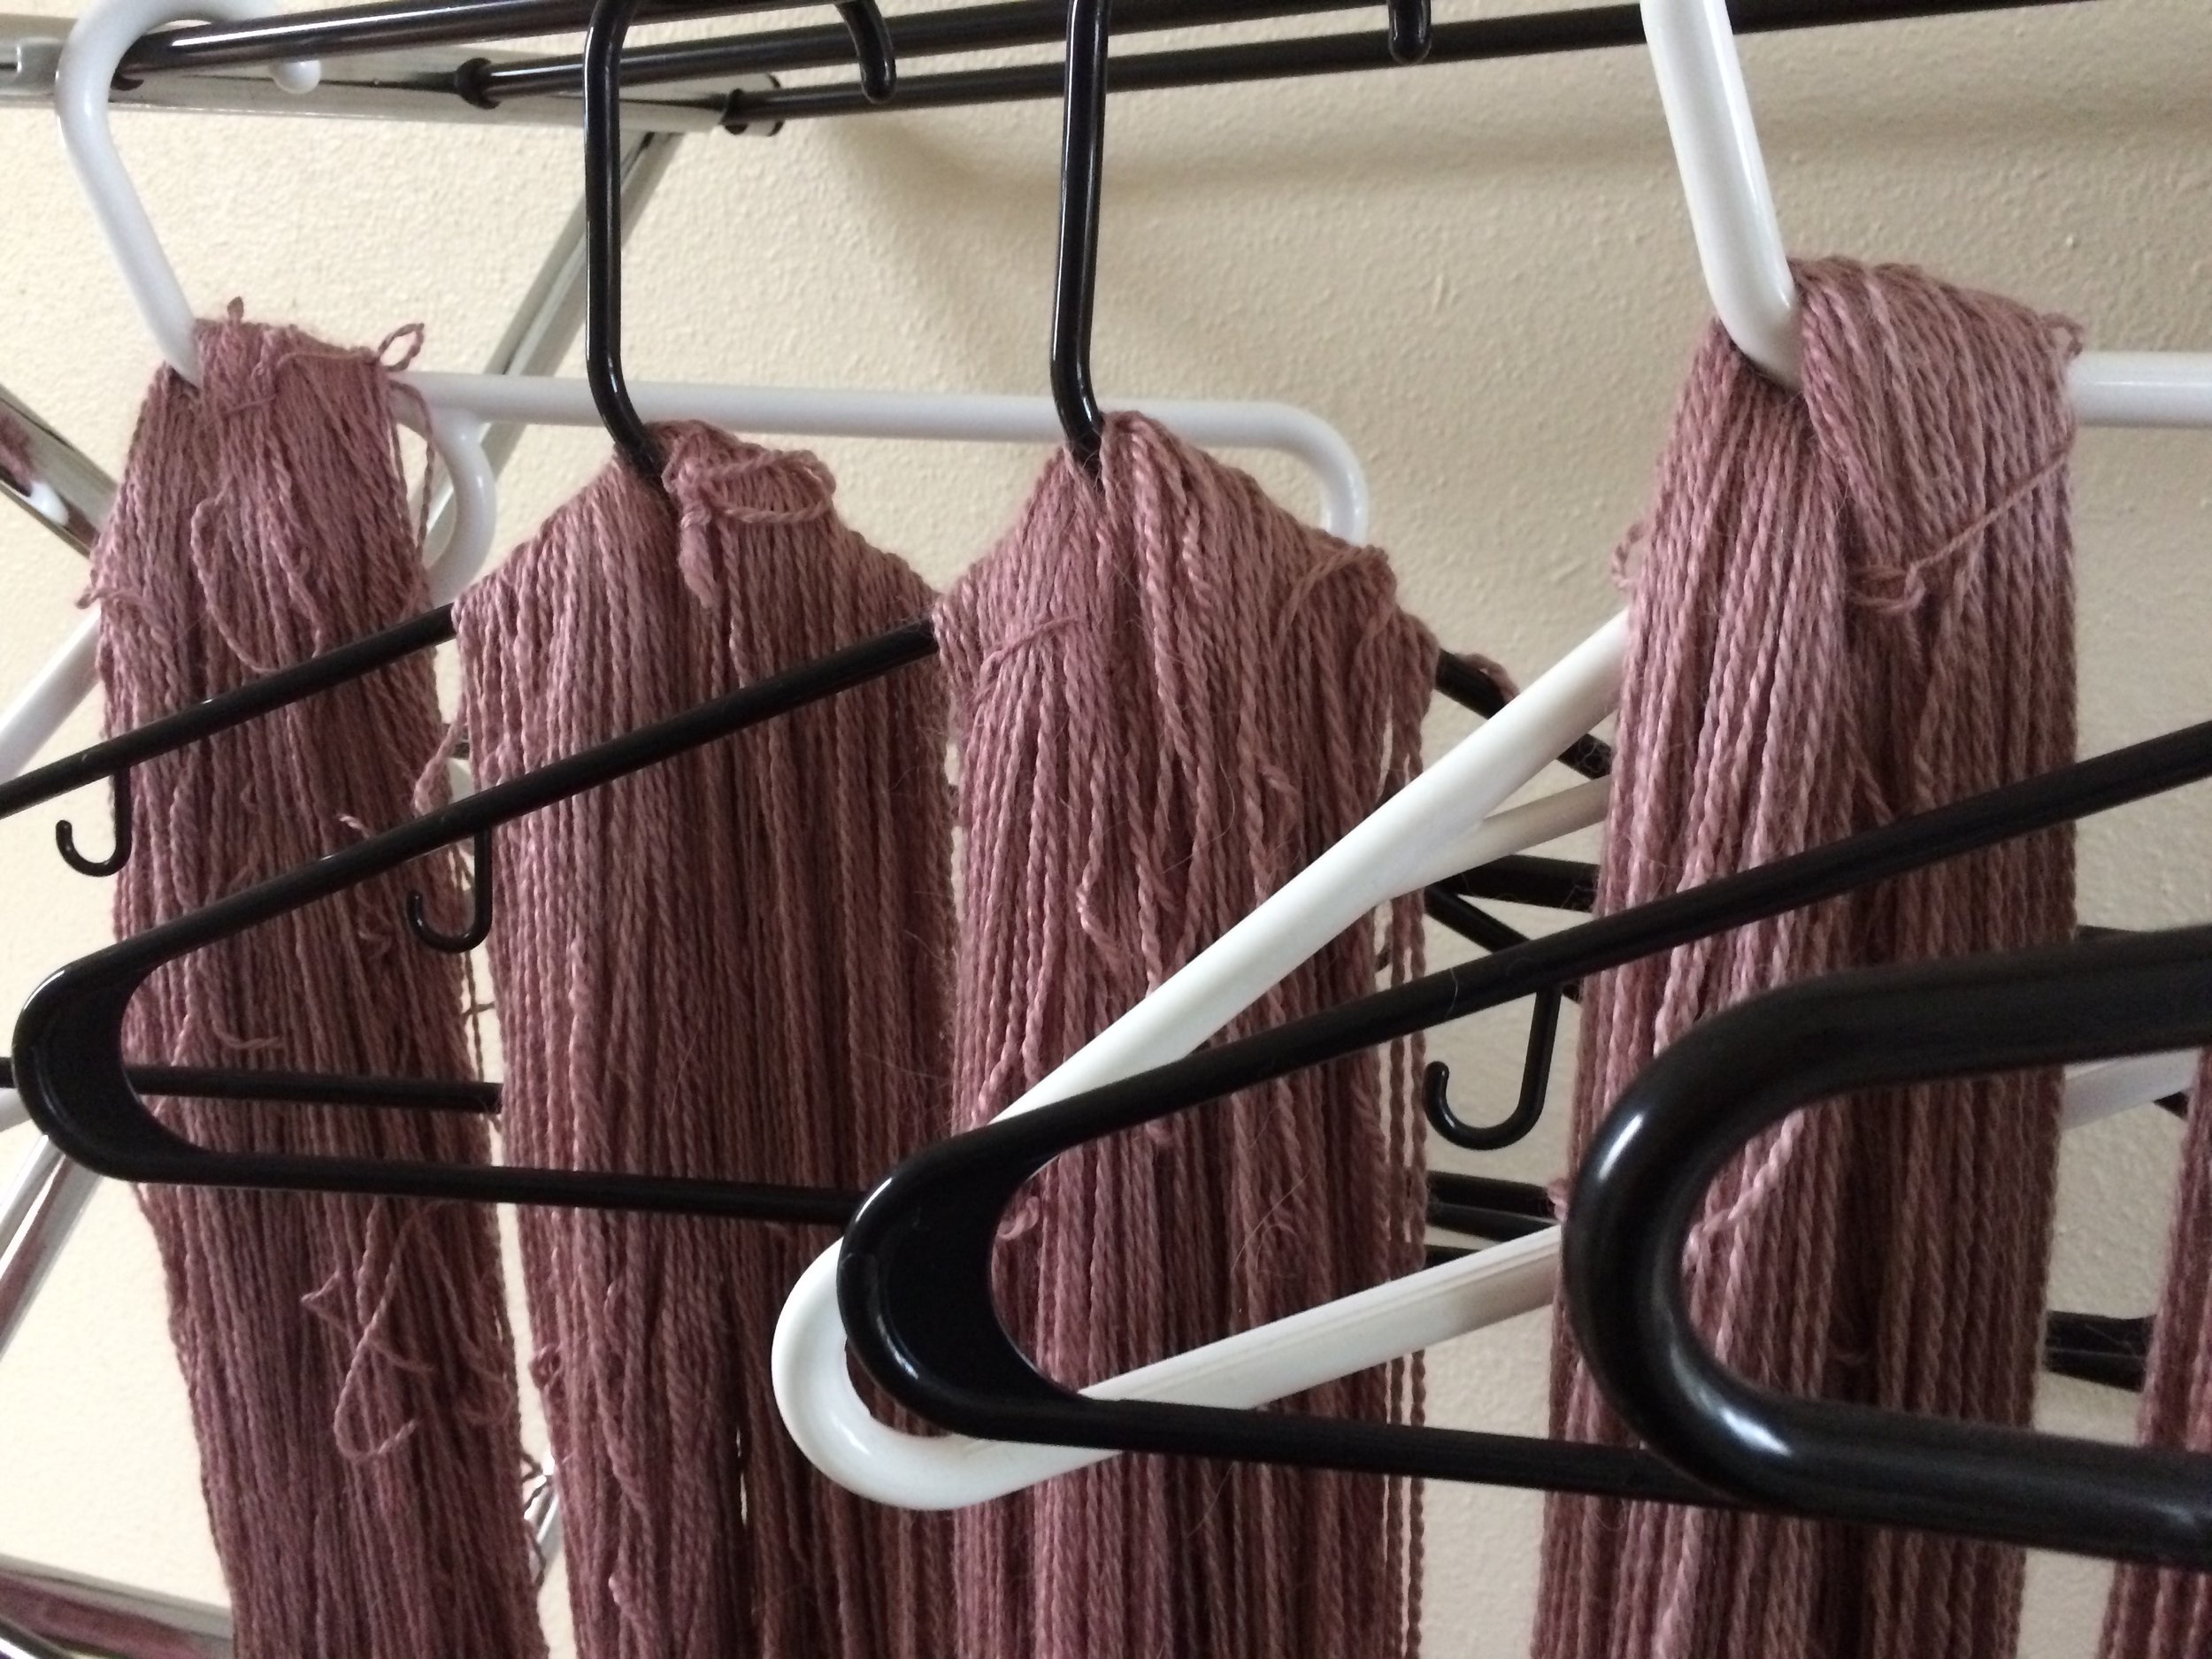
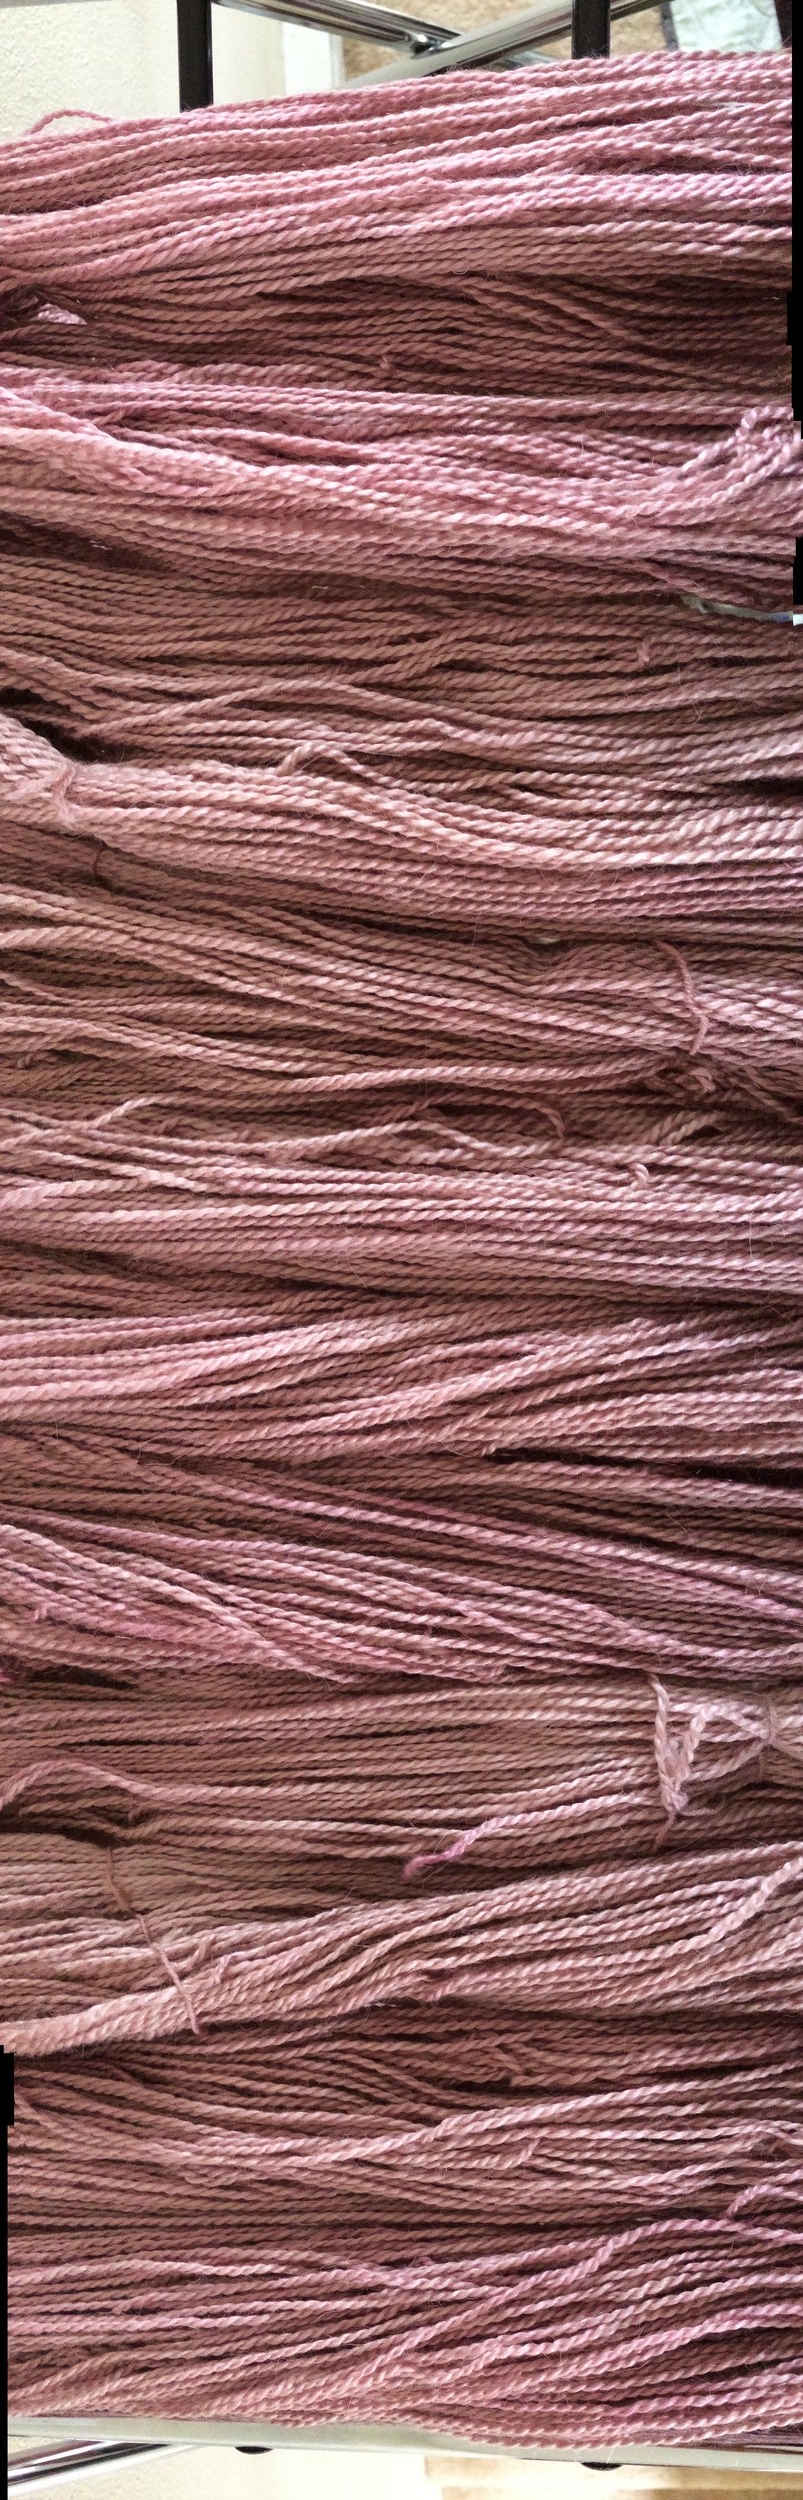
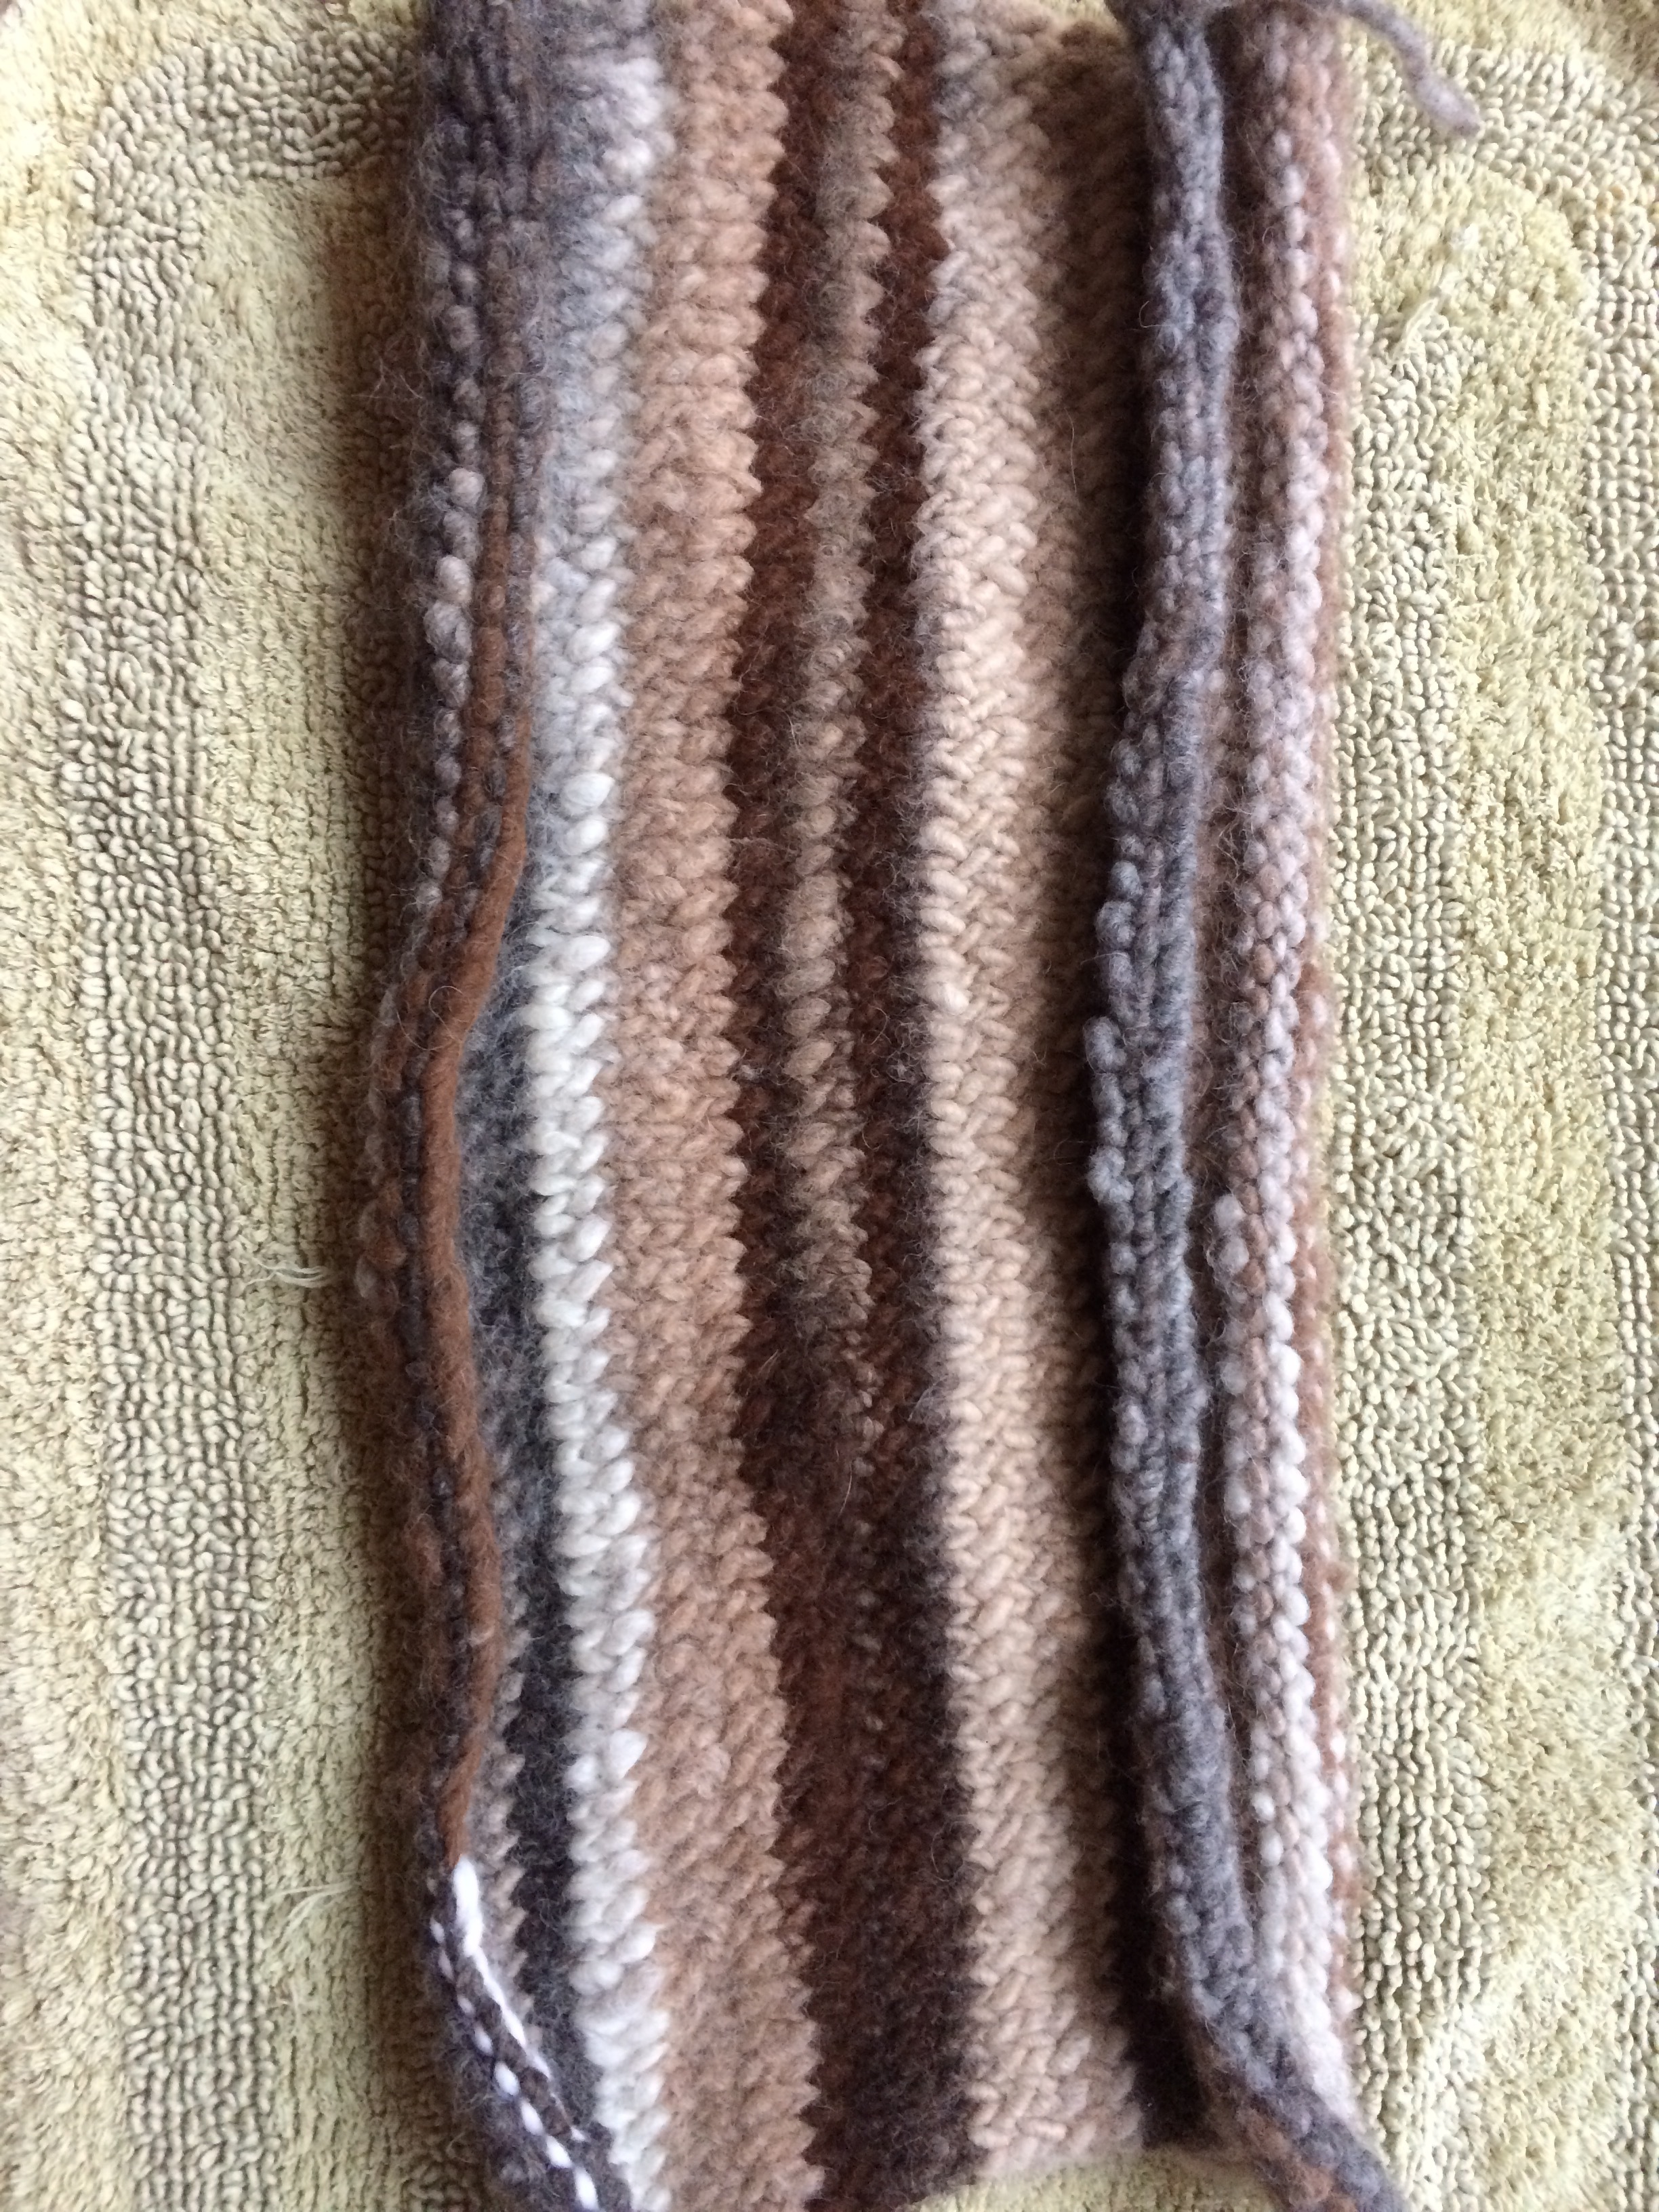
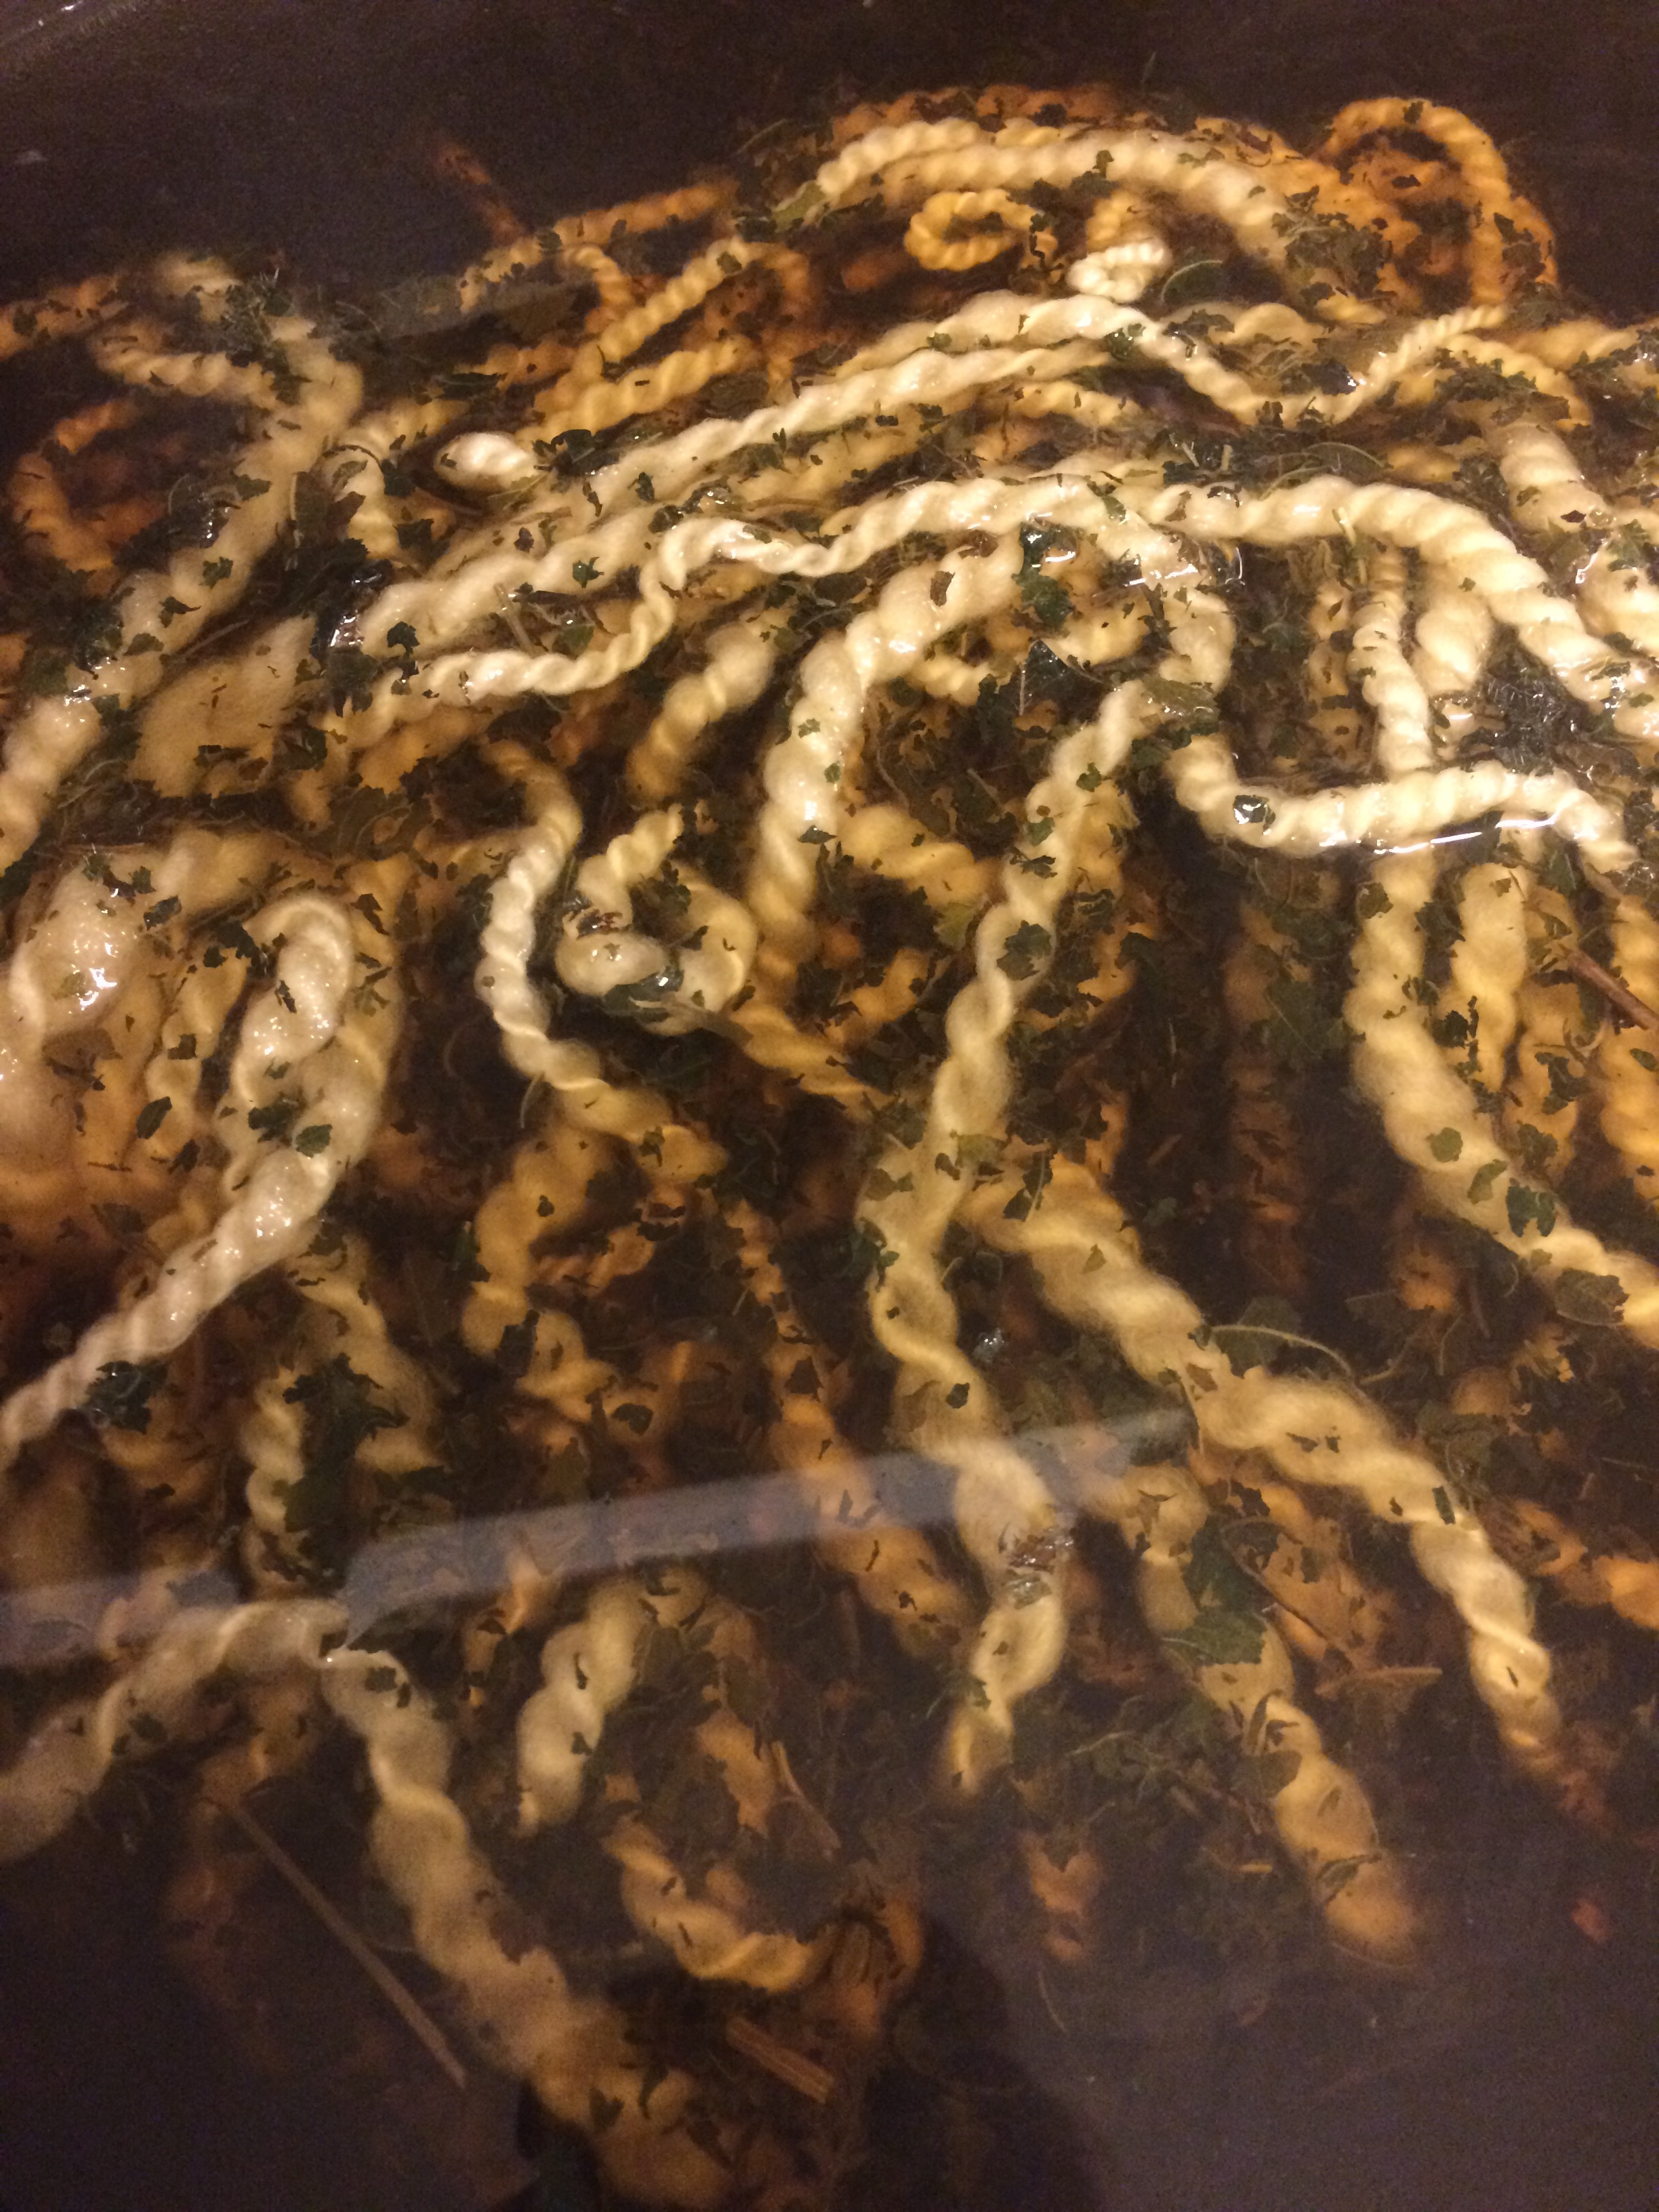
With 2 parts water to 1 part bleach, I began to obliterate the floral.

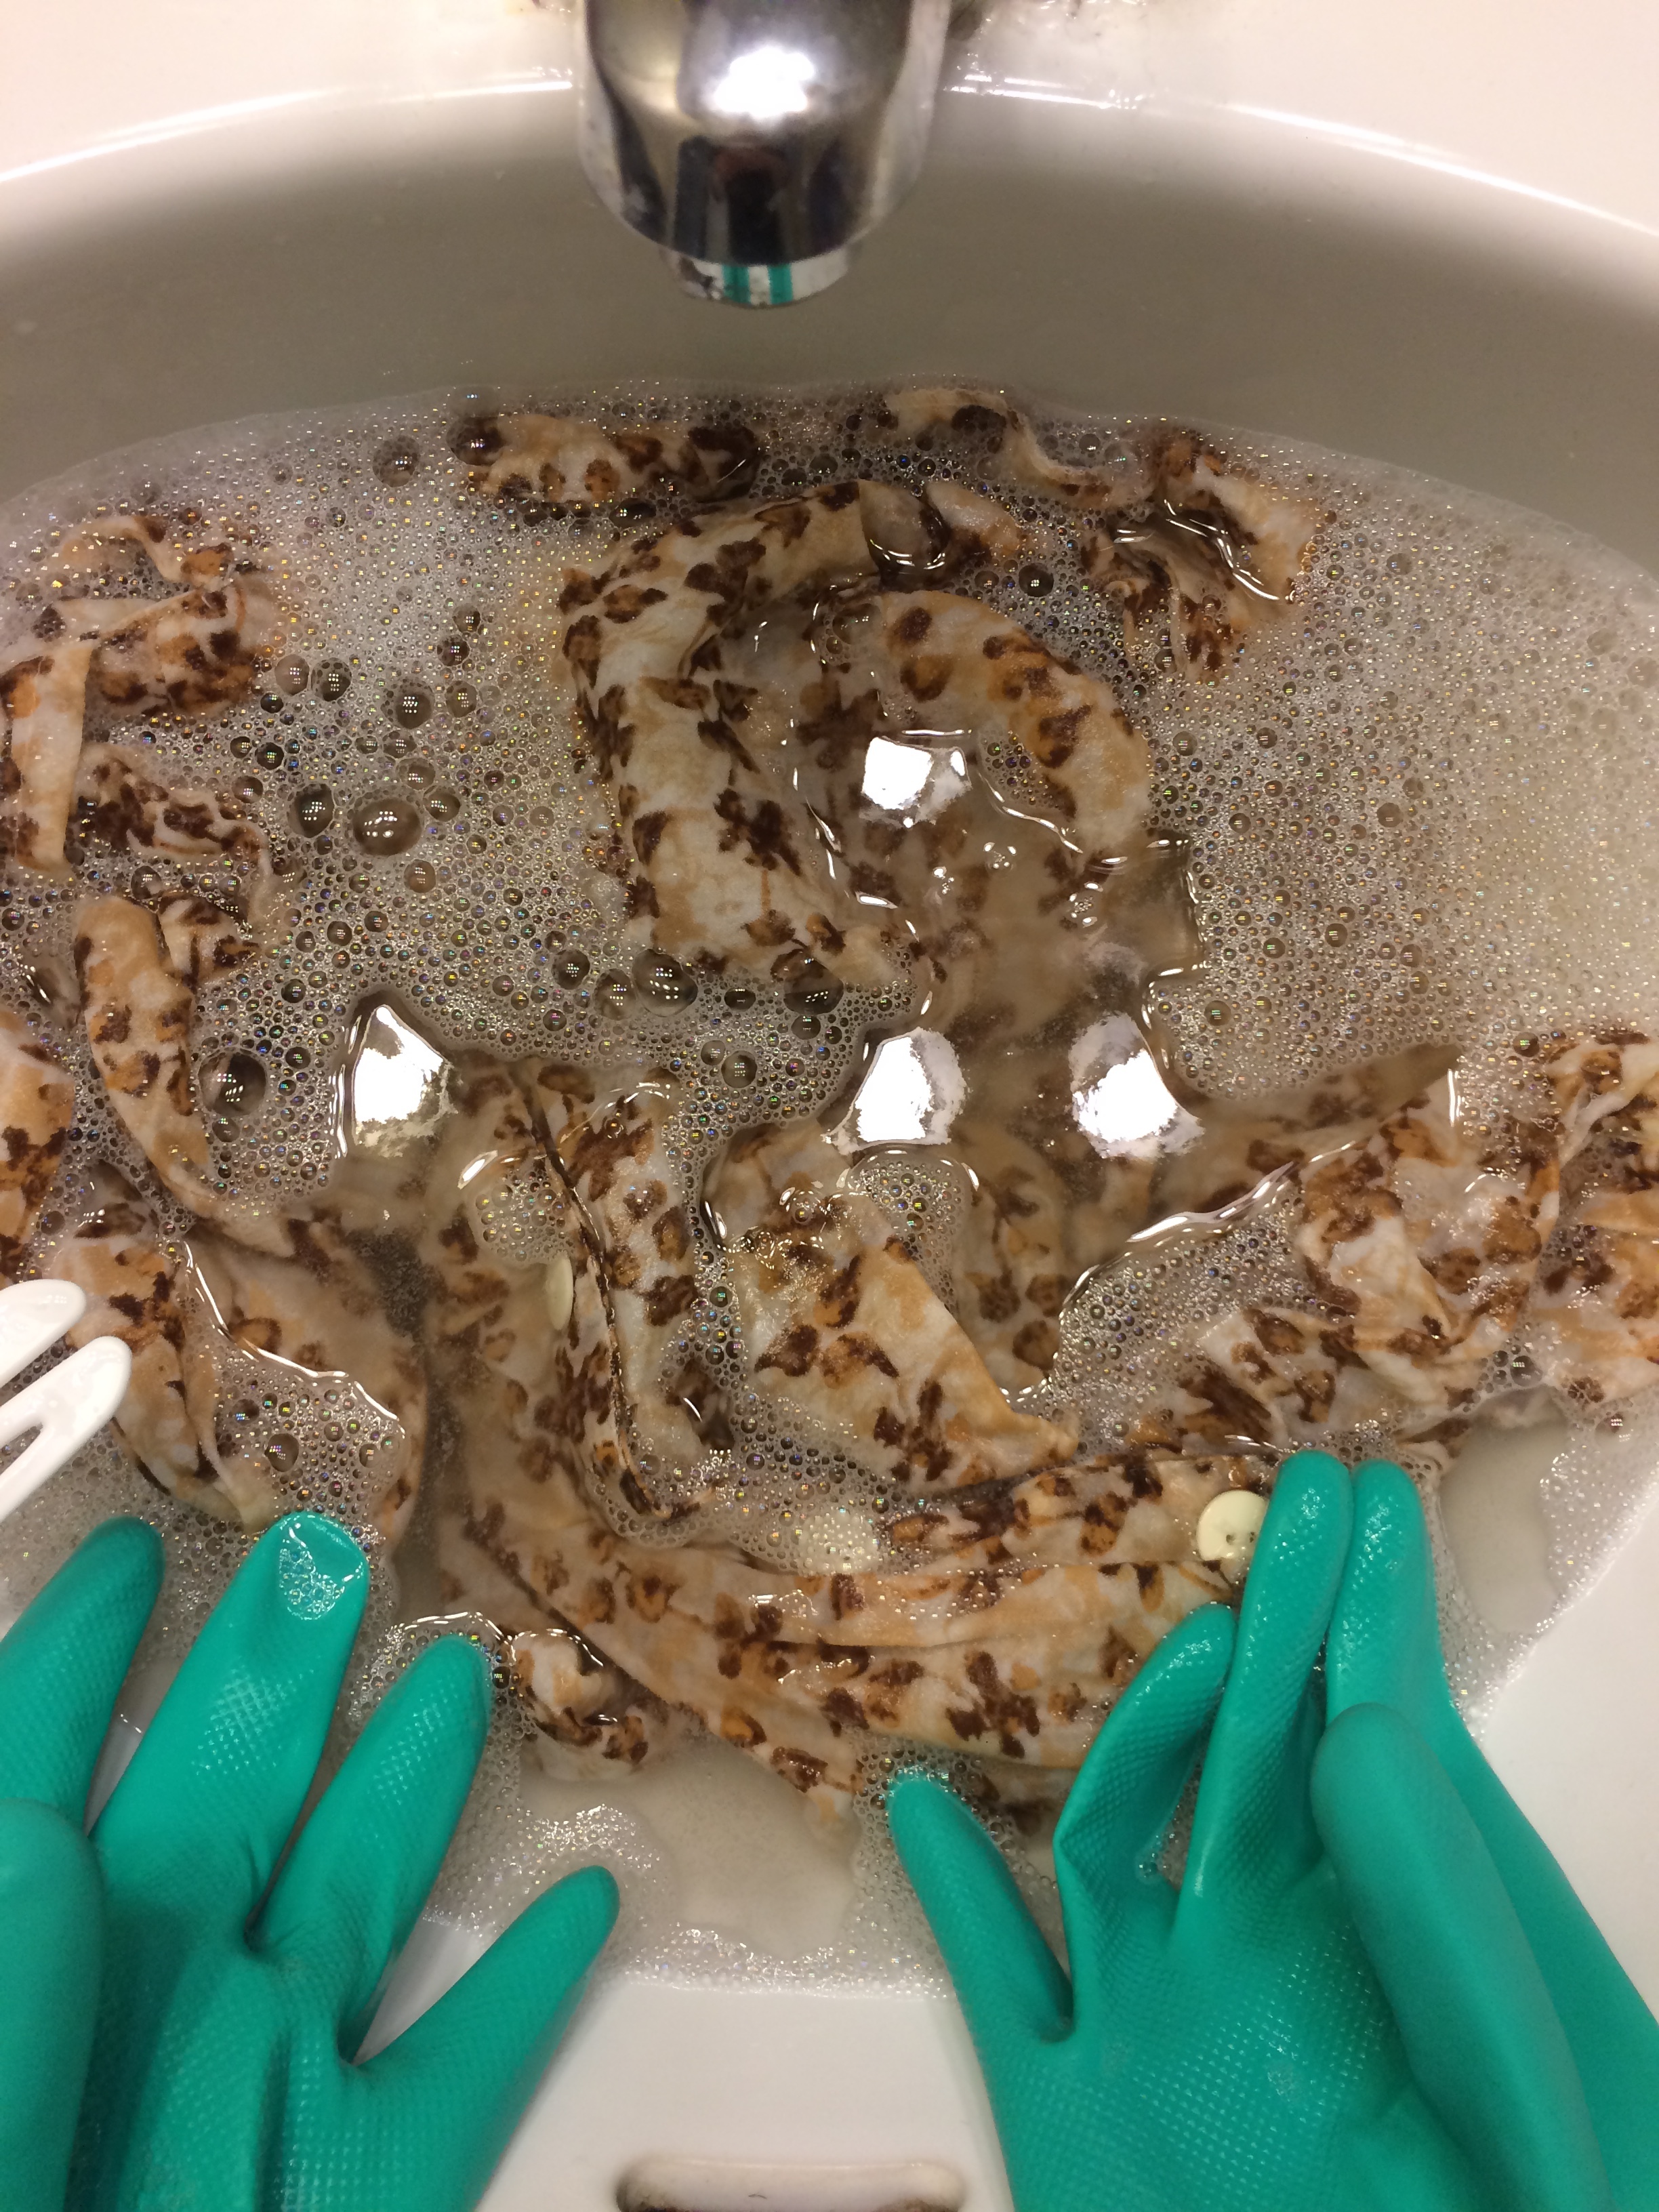
After several hours of sitting in bleach, I realised that this light pink and brown monstrosity was about as good as I was going to get without damaging the garmet.  

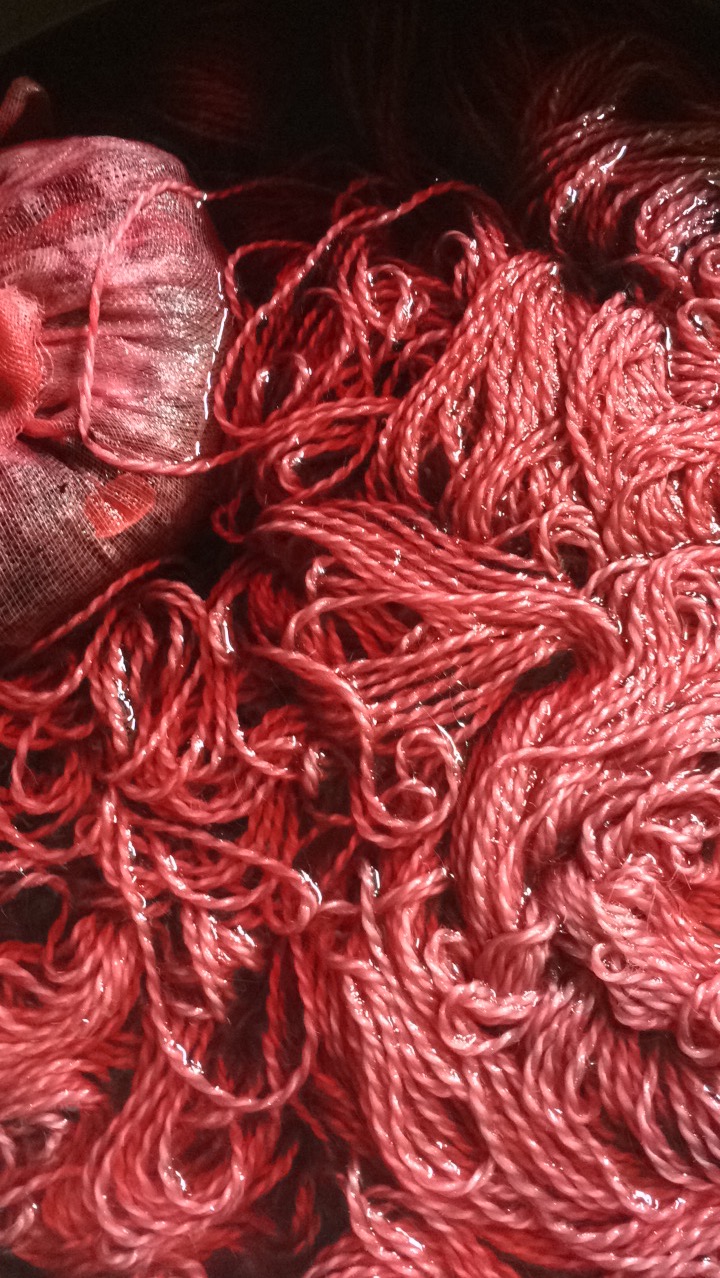
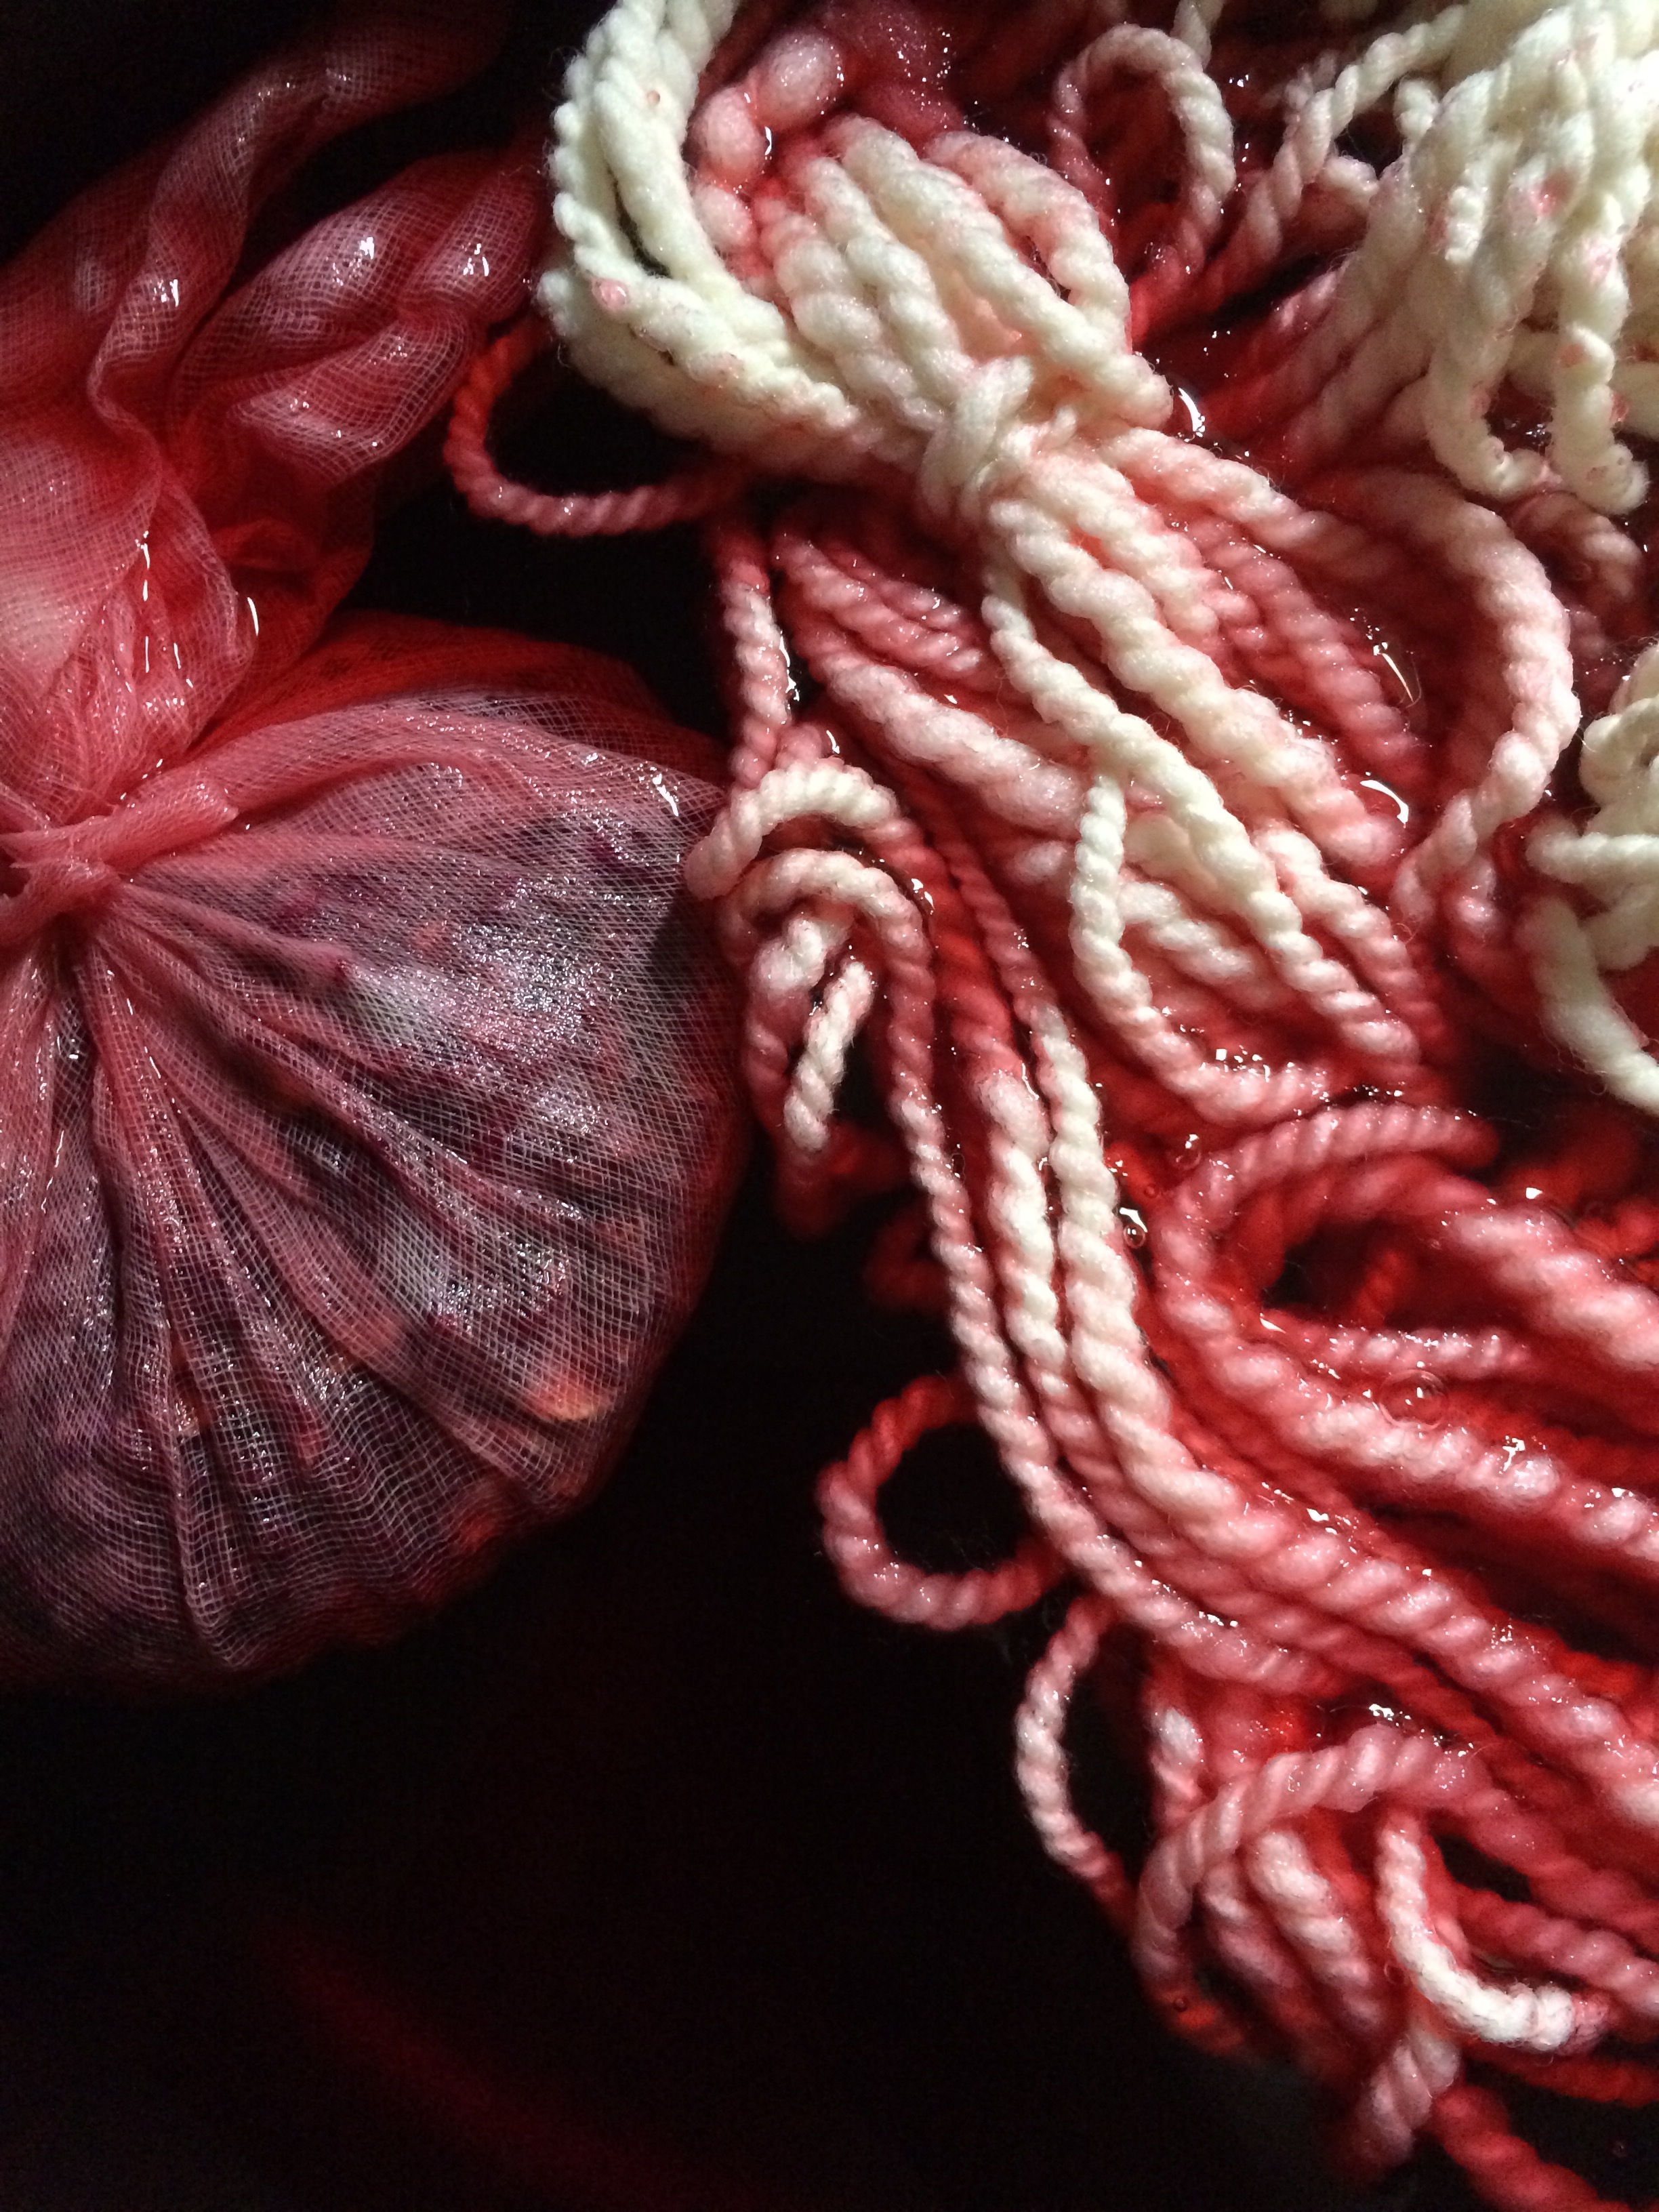
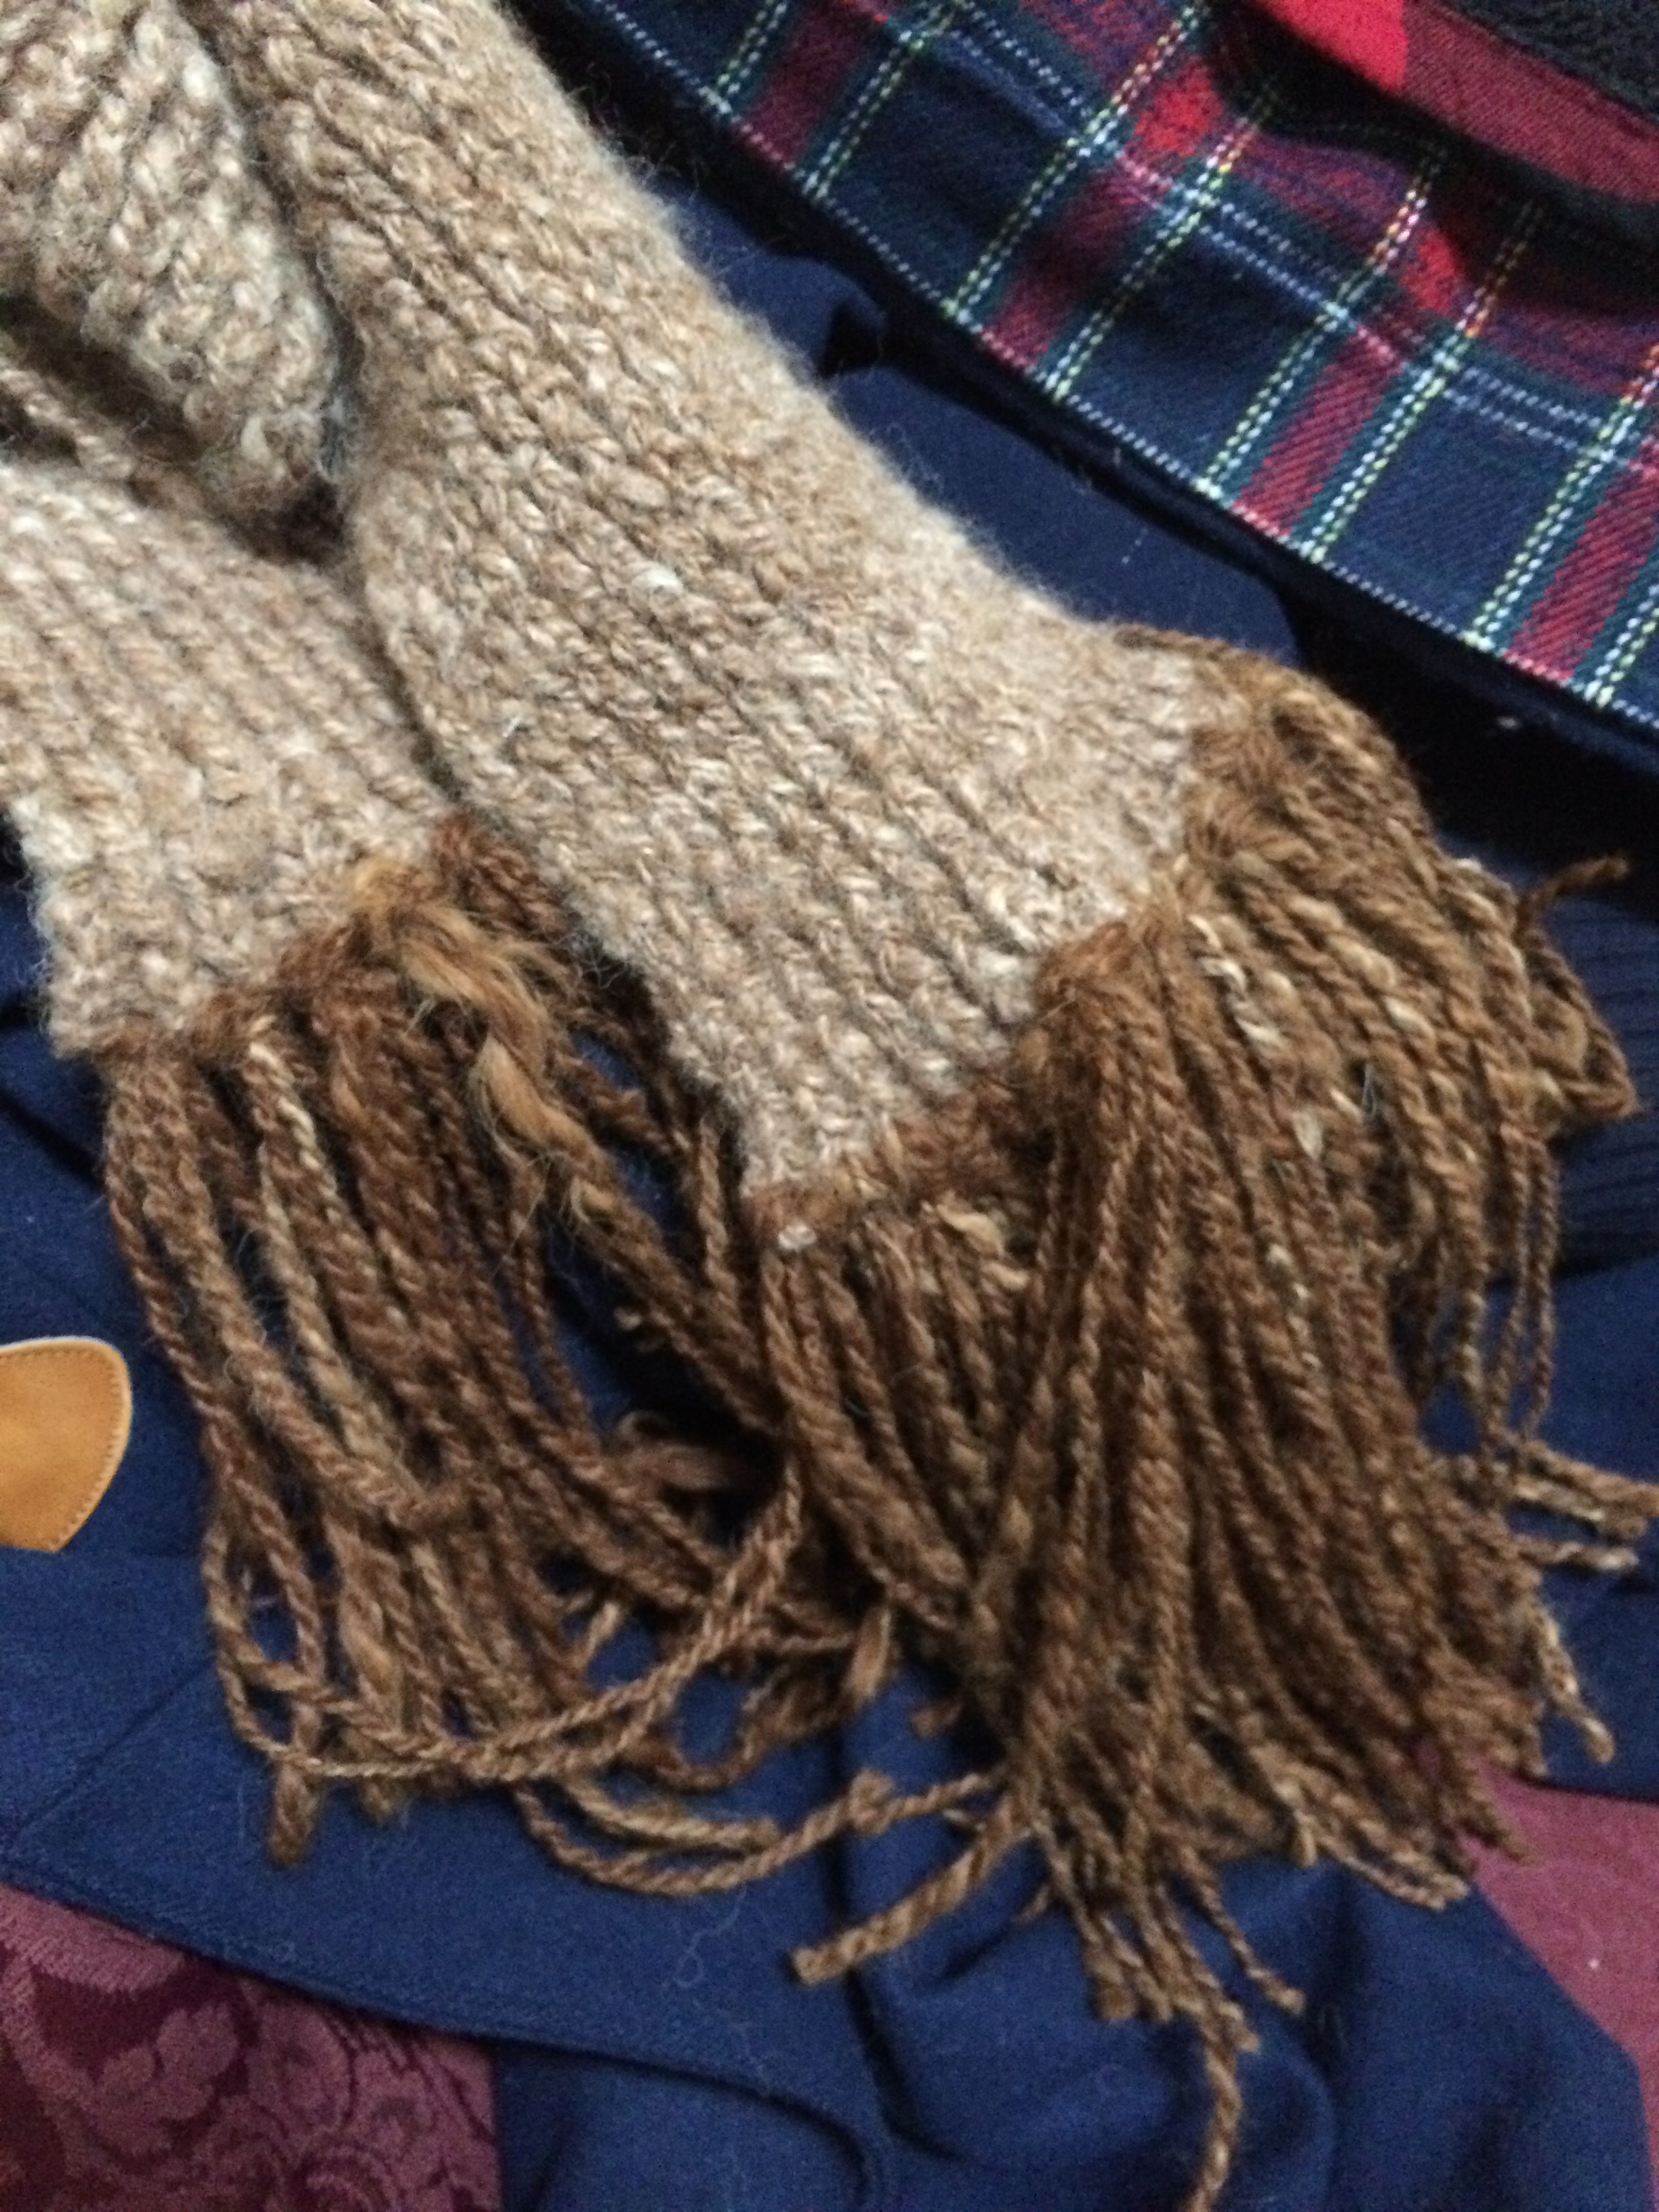
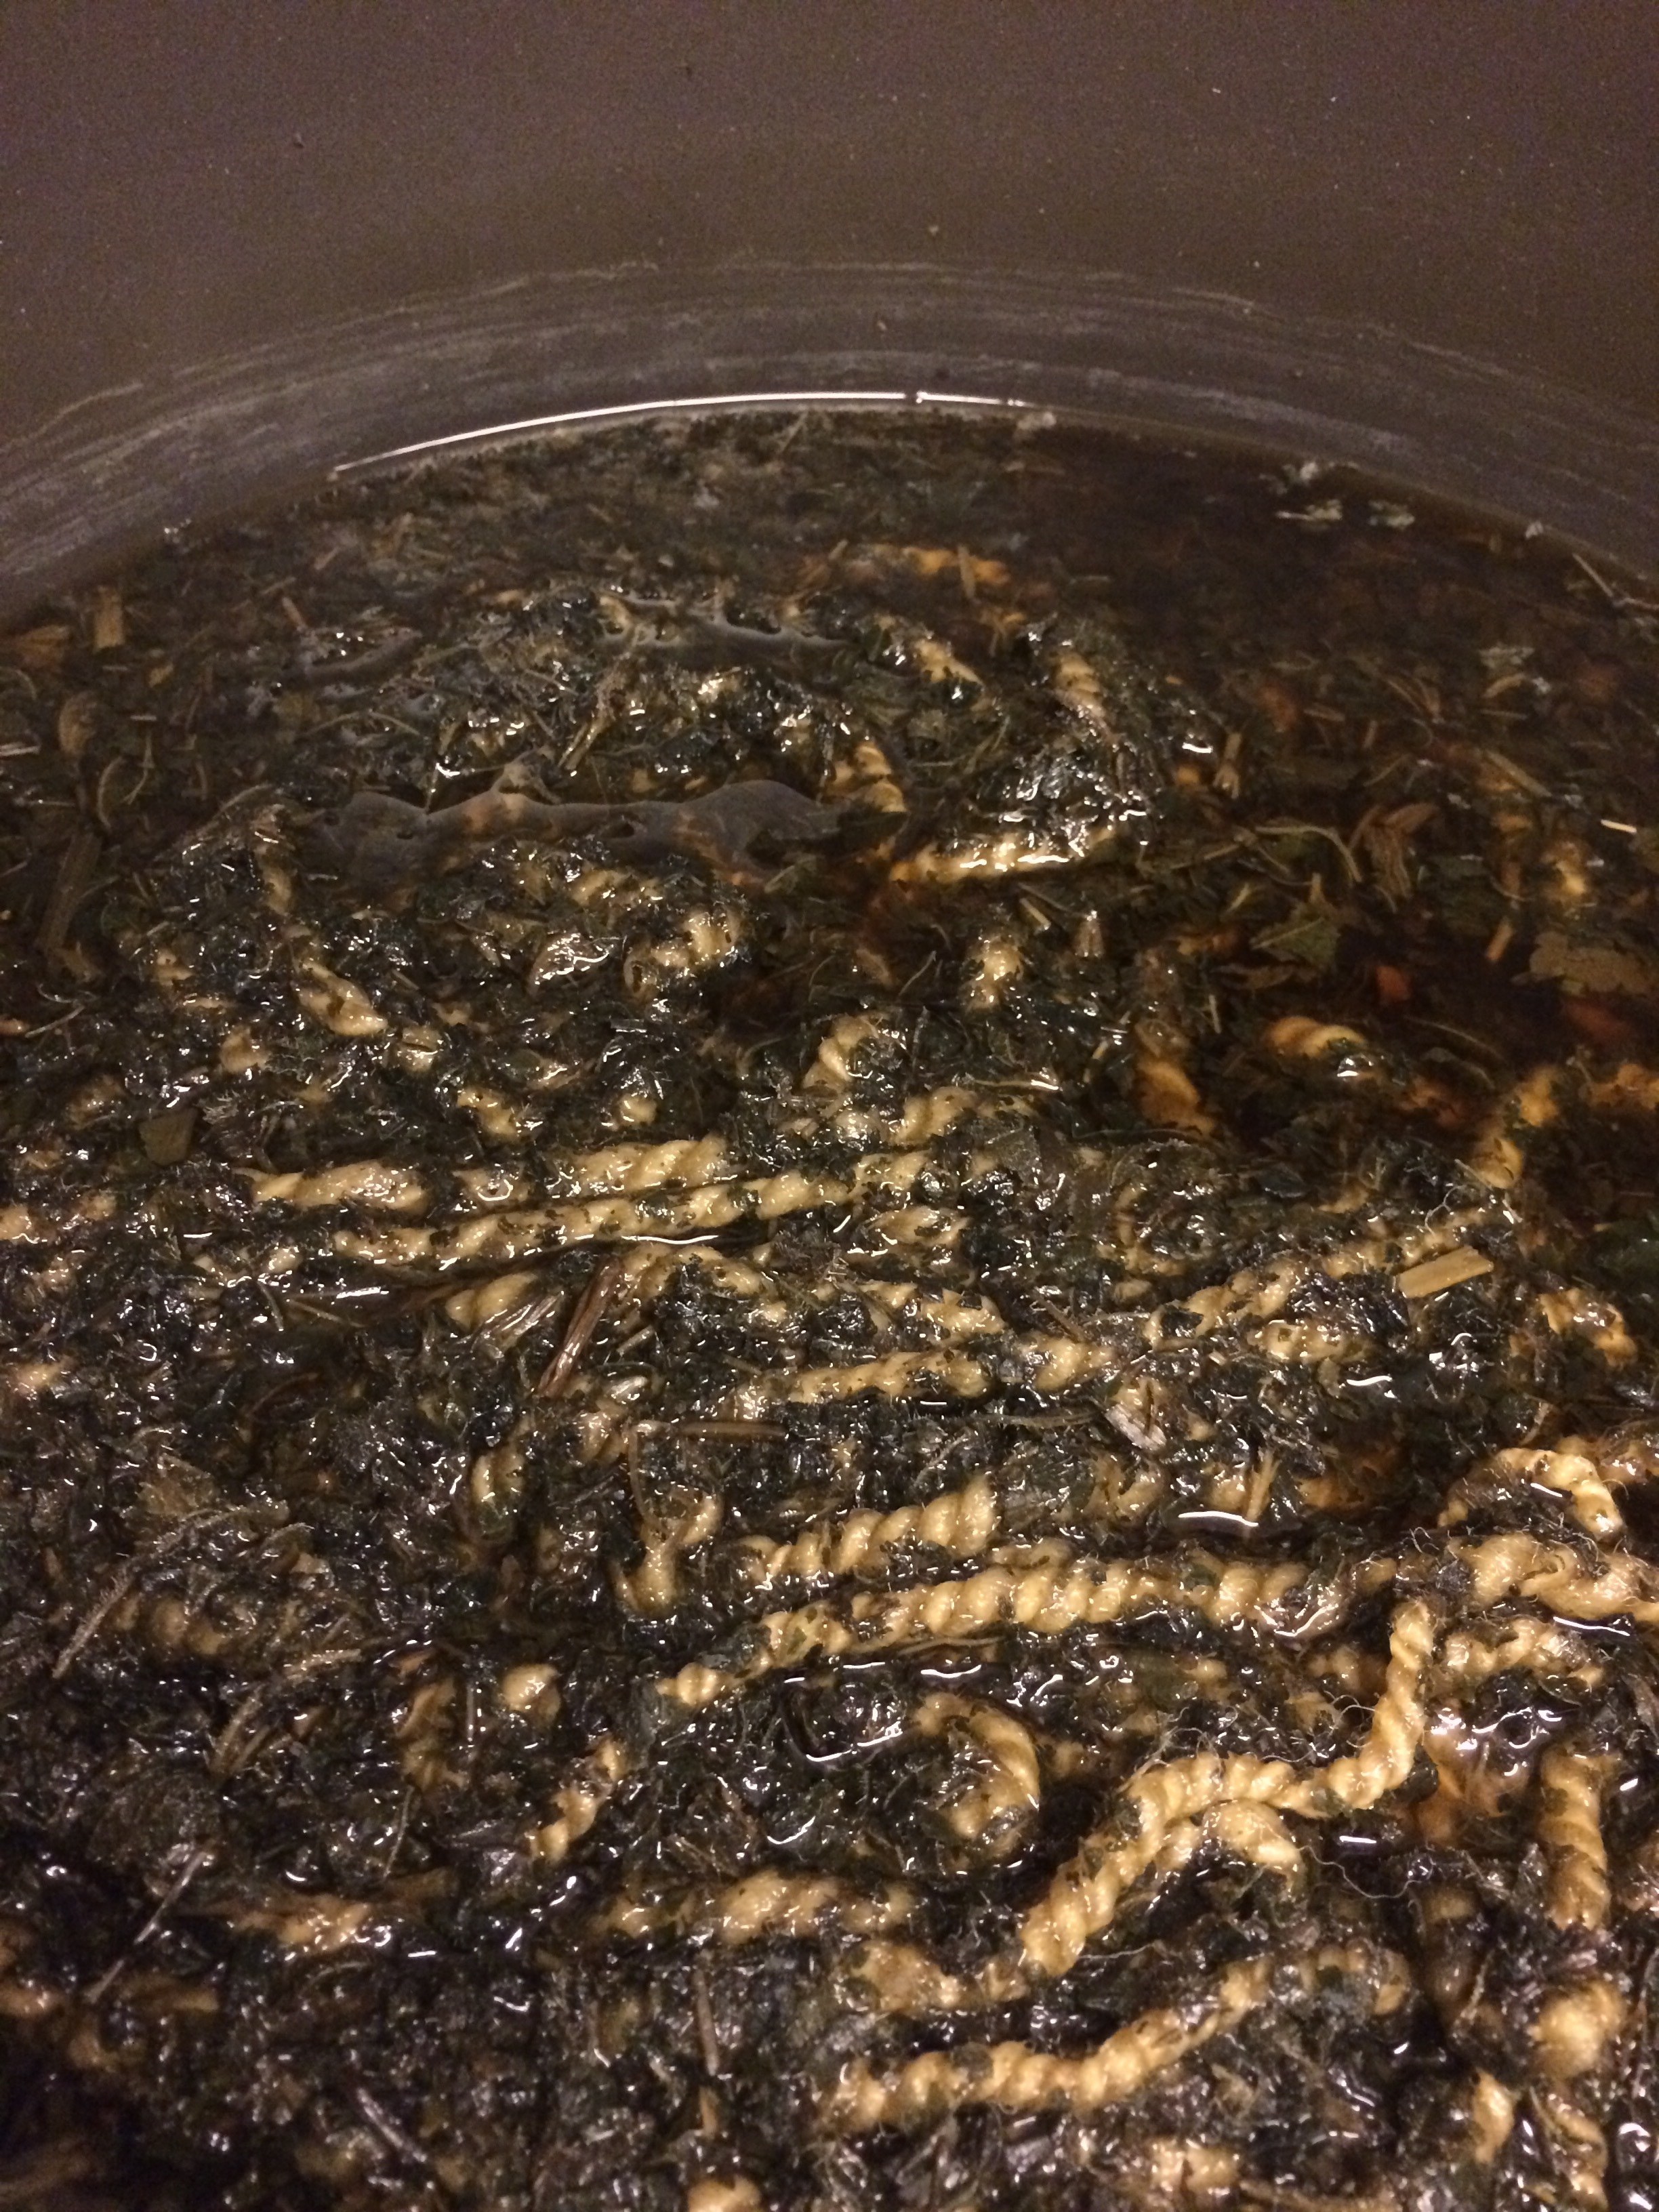
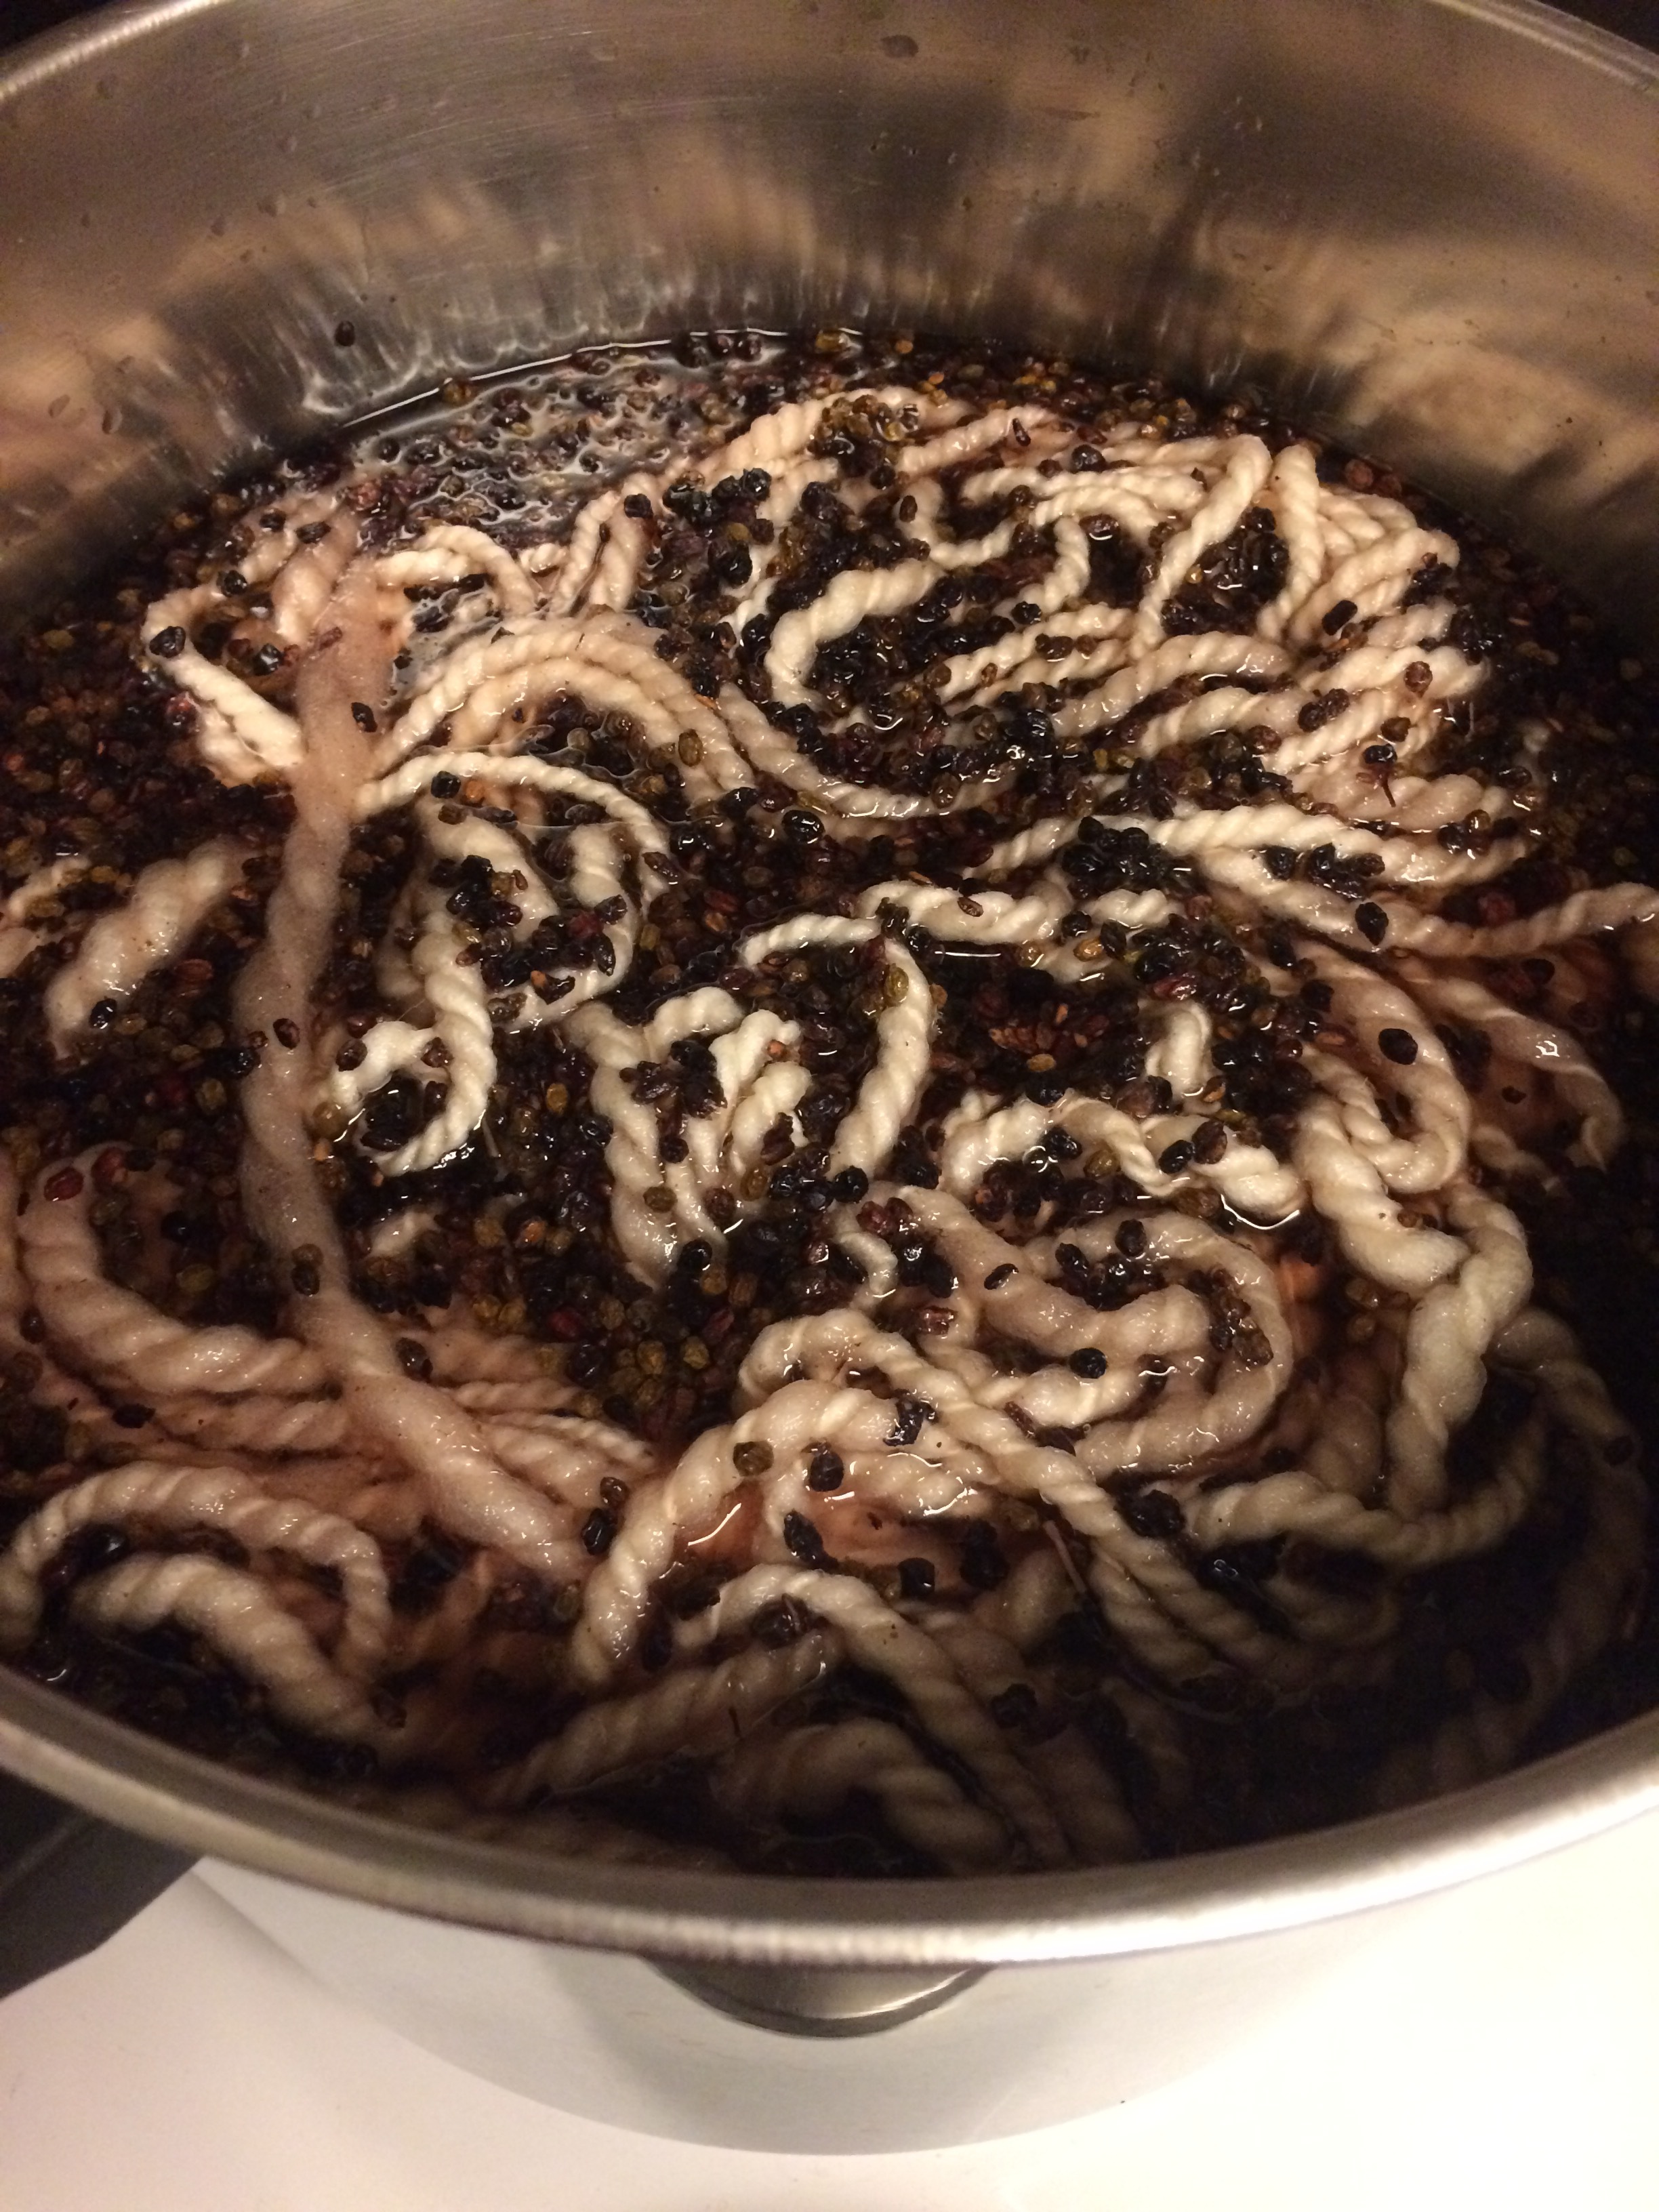
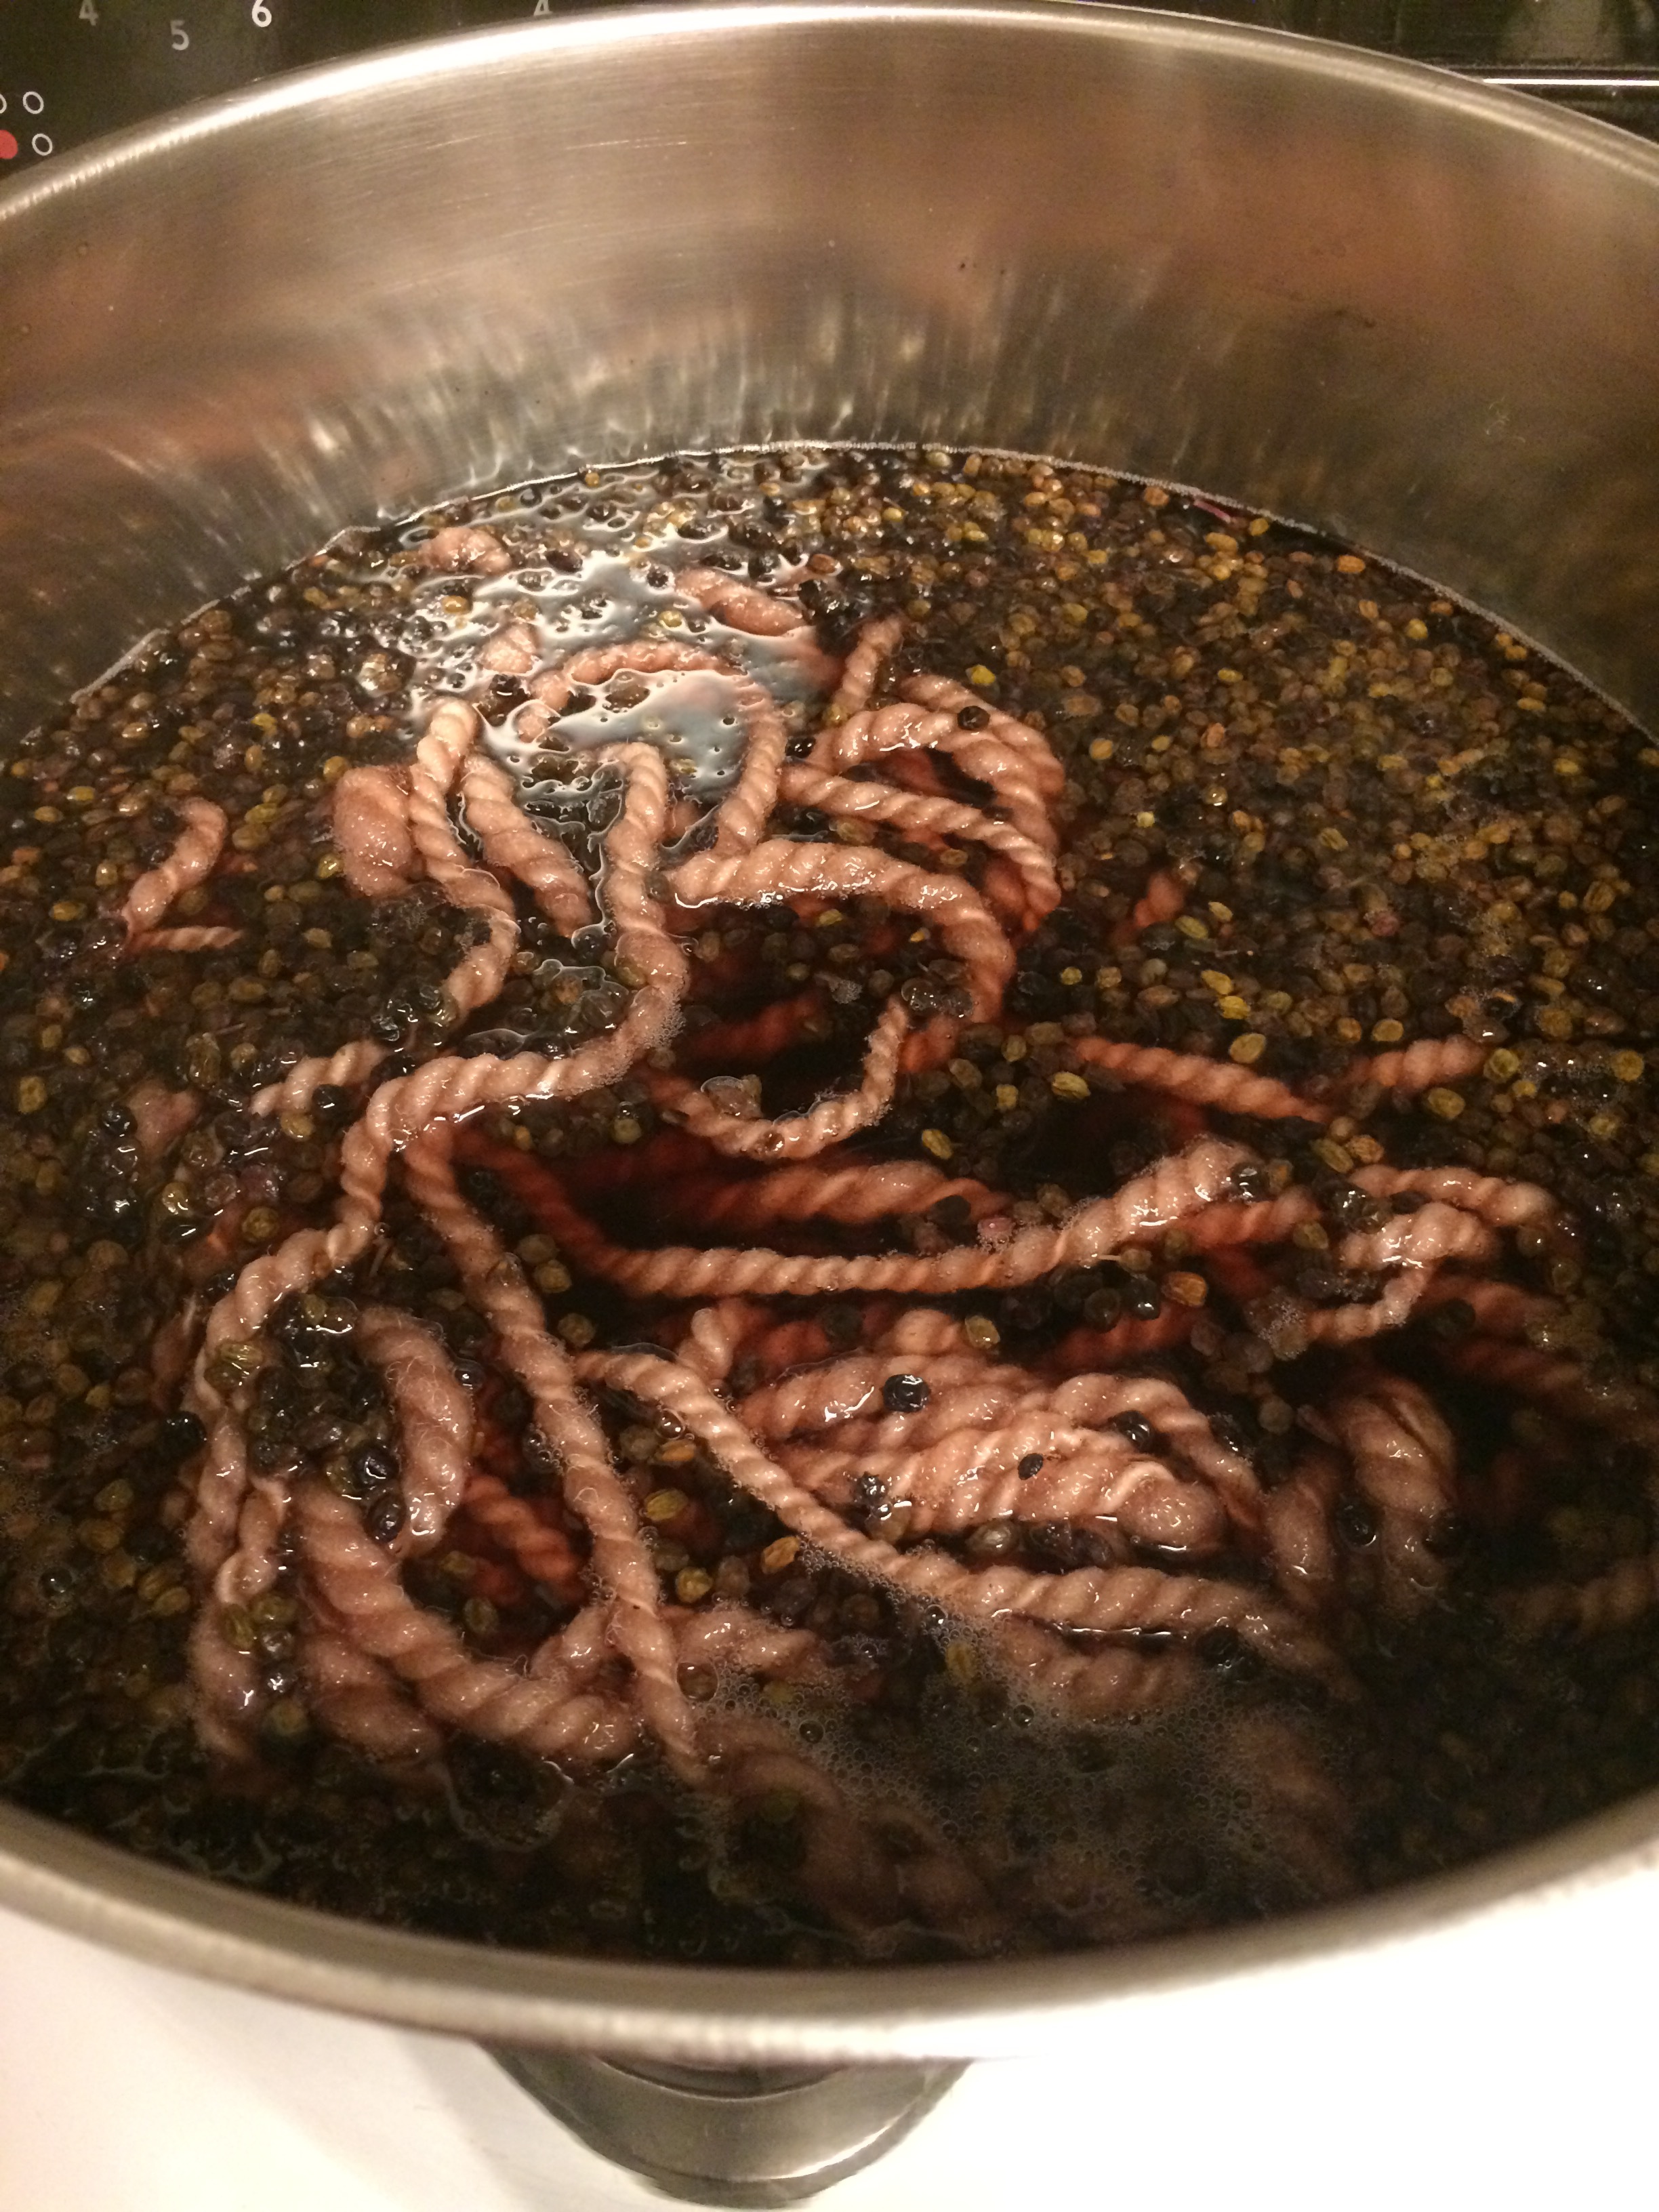
The dye I used was a risk to say the least.... I used fiber dye and a bit of vinegar because it was handy and it works with fiber, why wouldn't it work with fabric?  Right? 

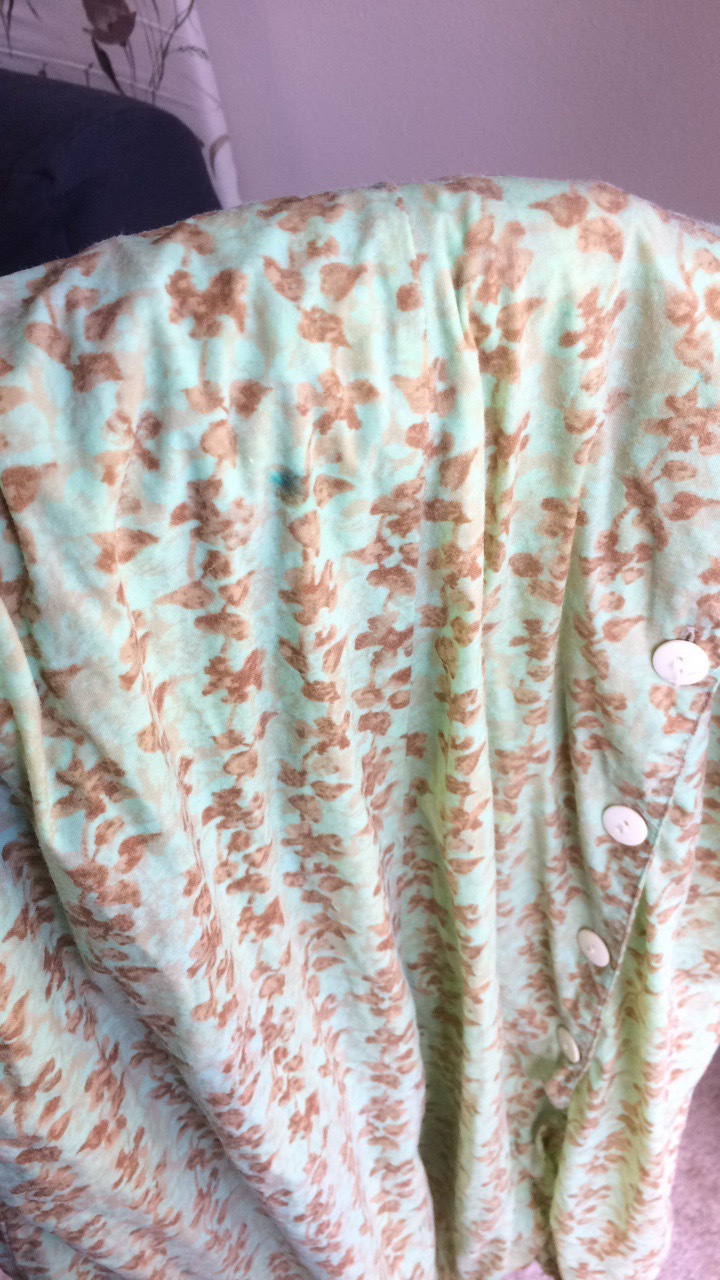
I begin to realise at this point that the green wasn't going to be as deep as I hope, but this kelly green was so cheerful, I could hardly be unhappy with it!

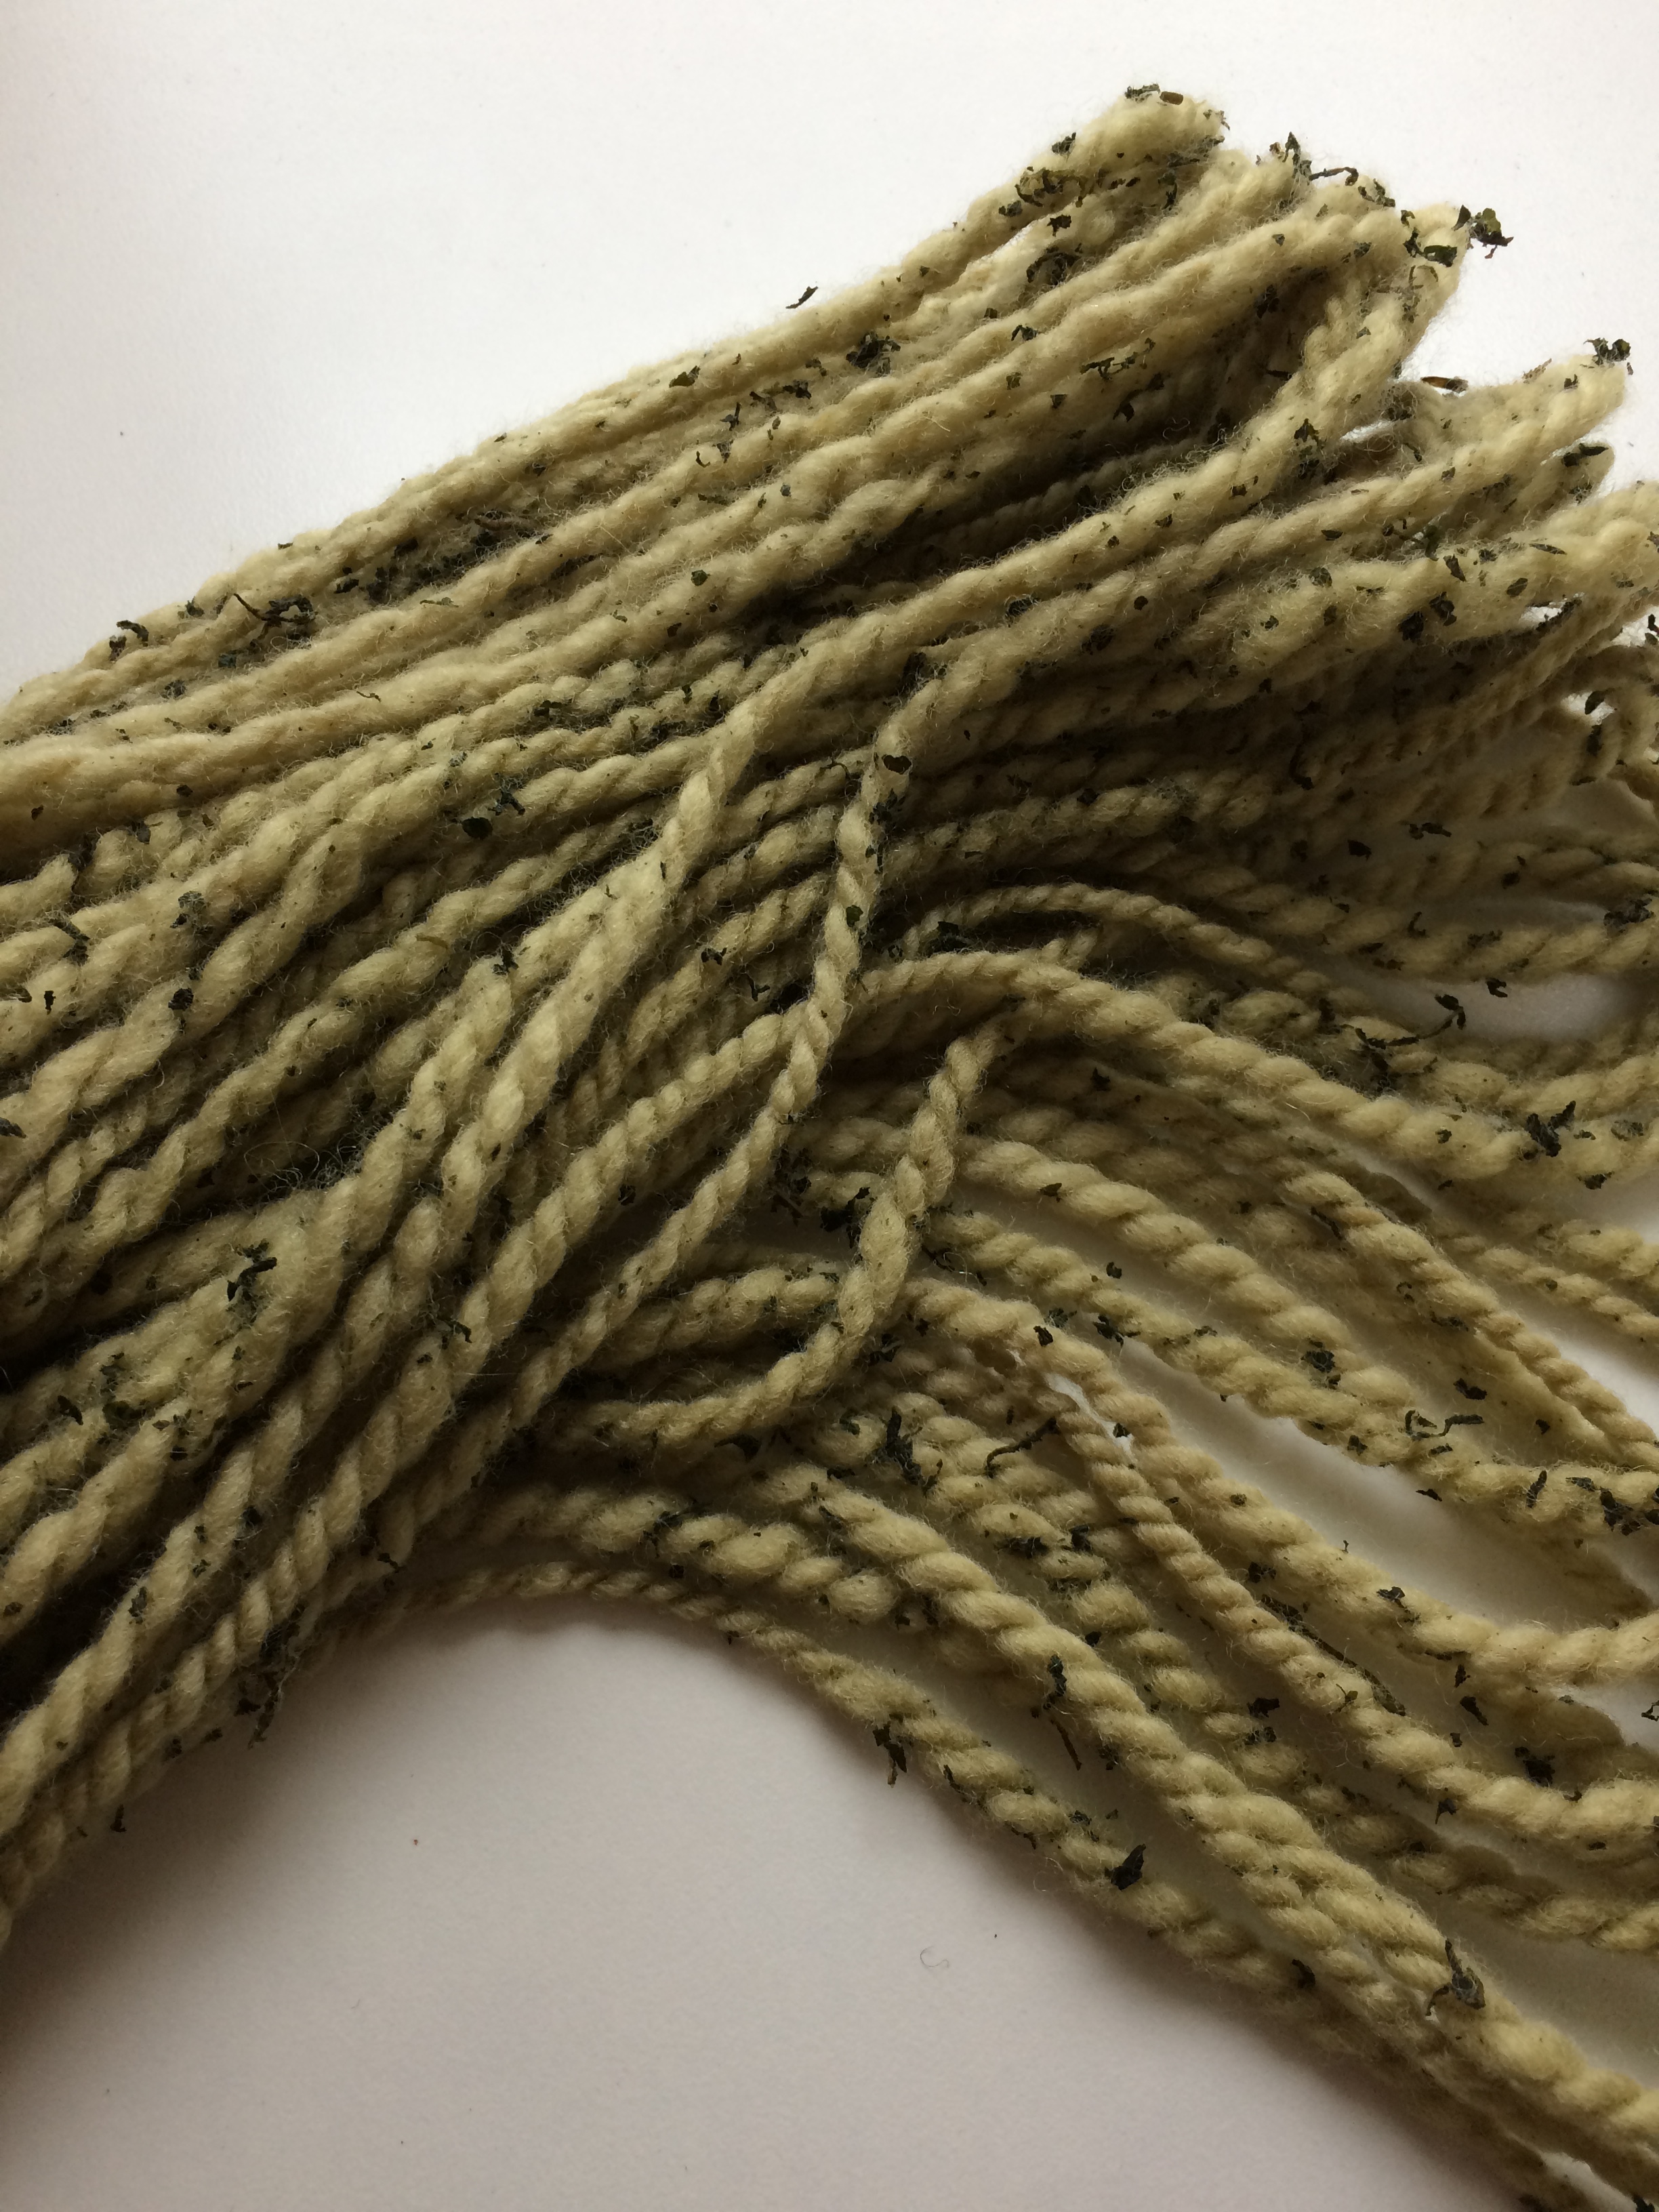
Until I rinsed and washed it of course.

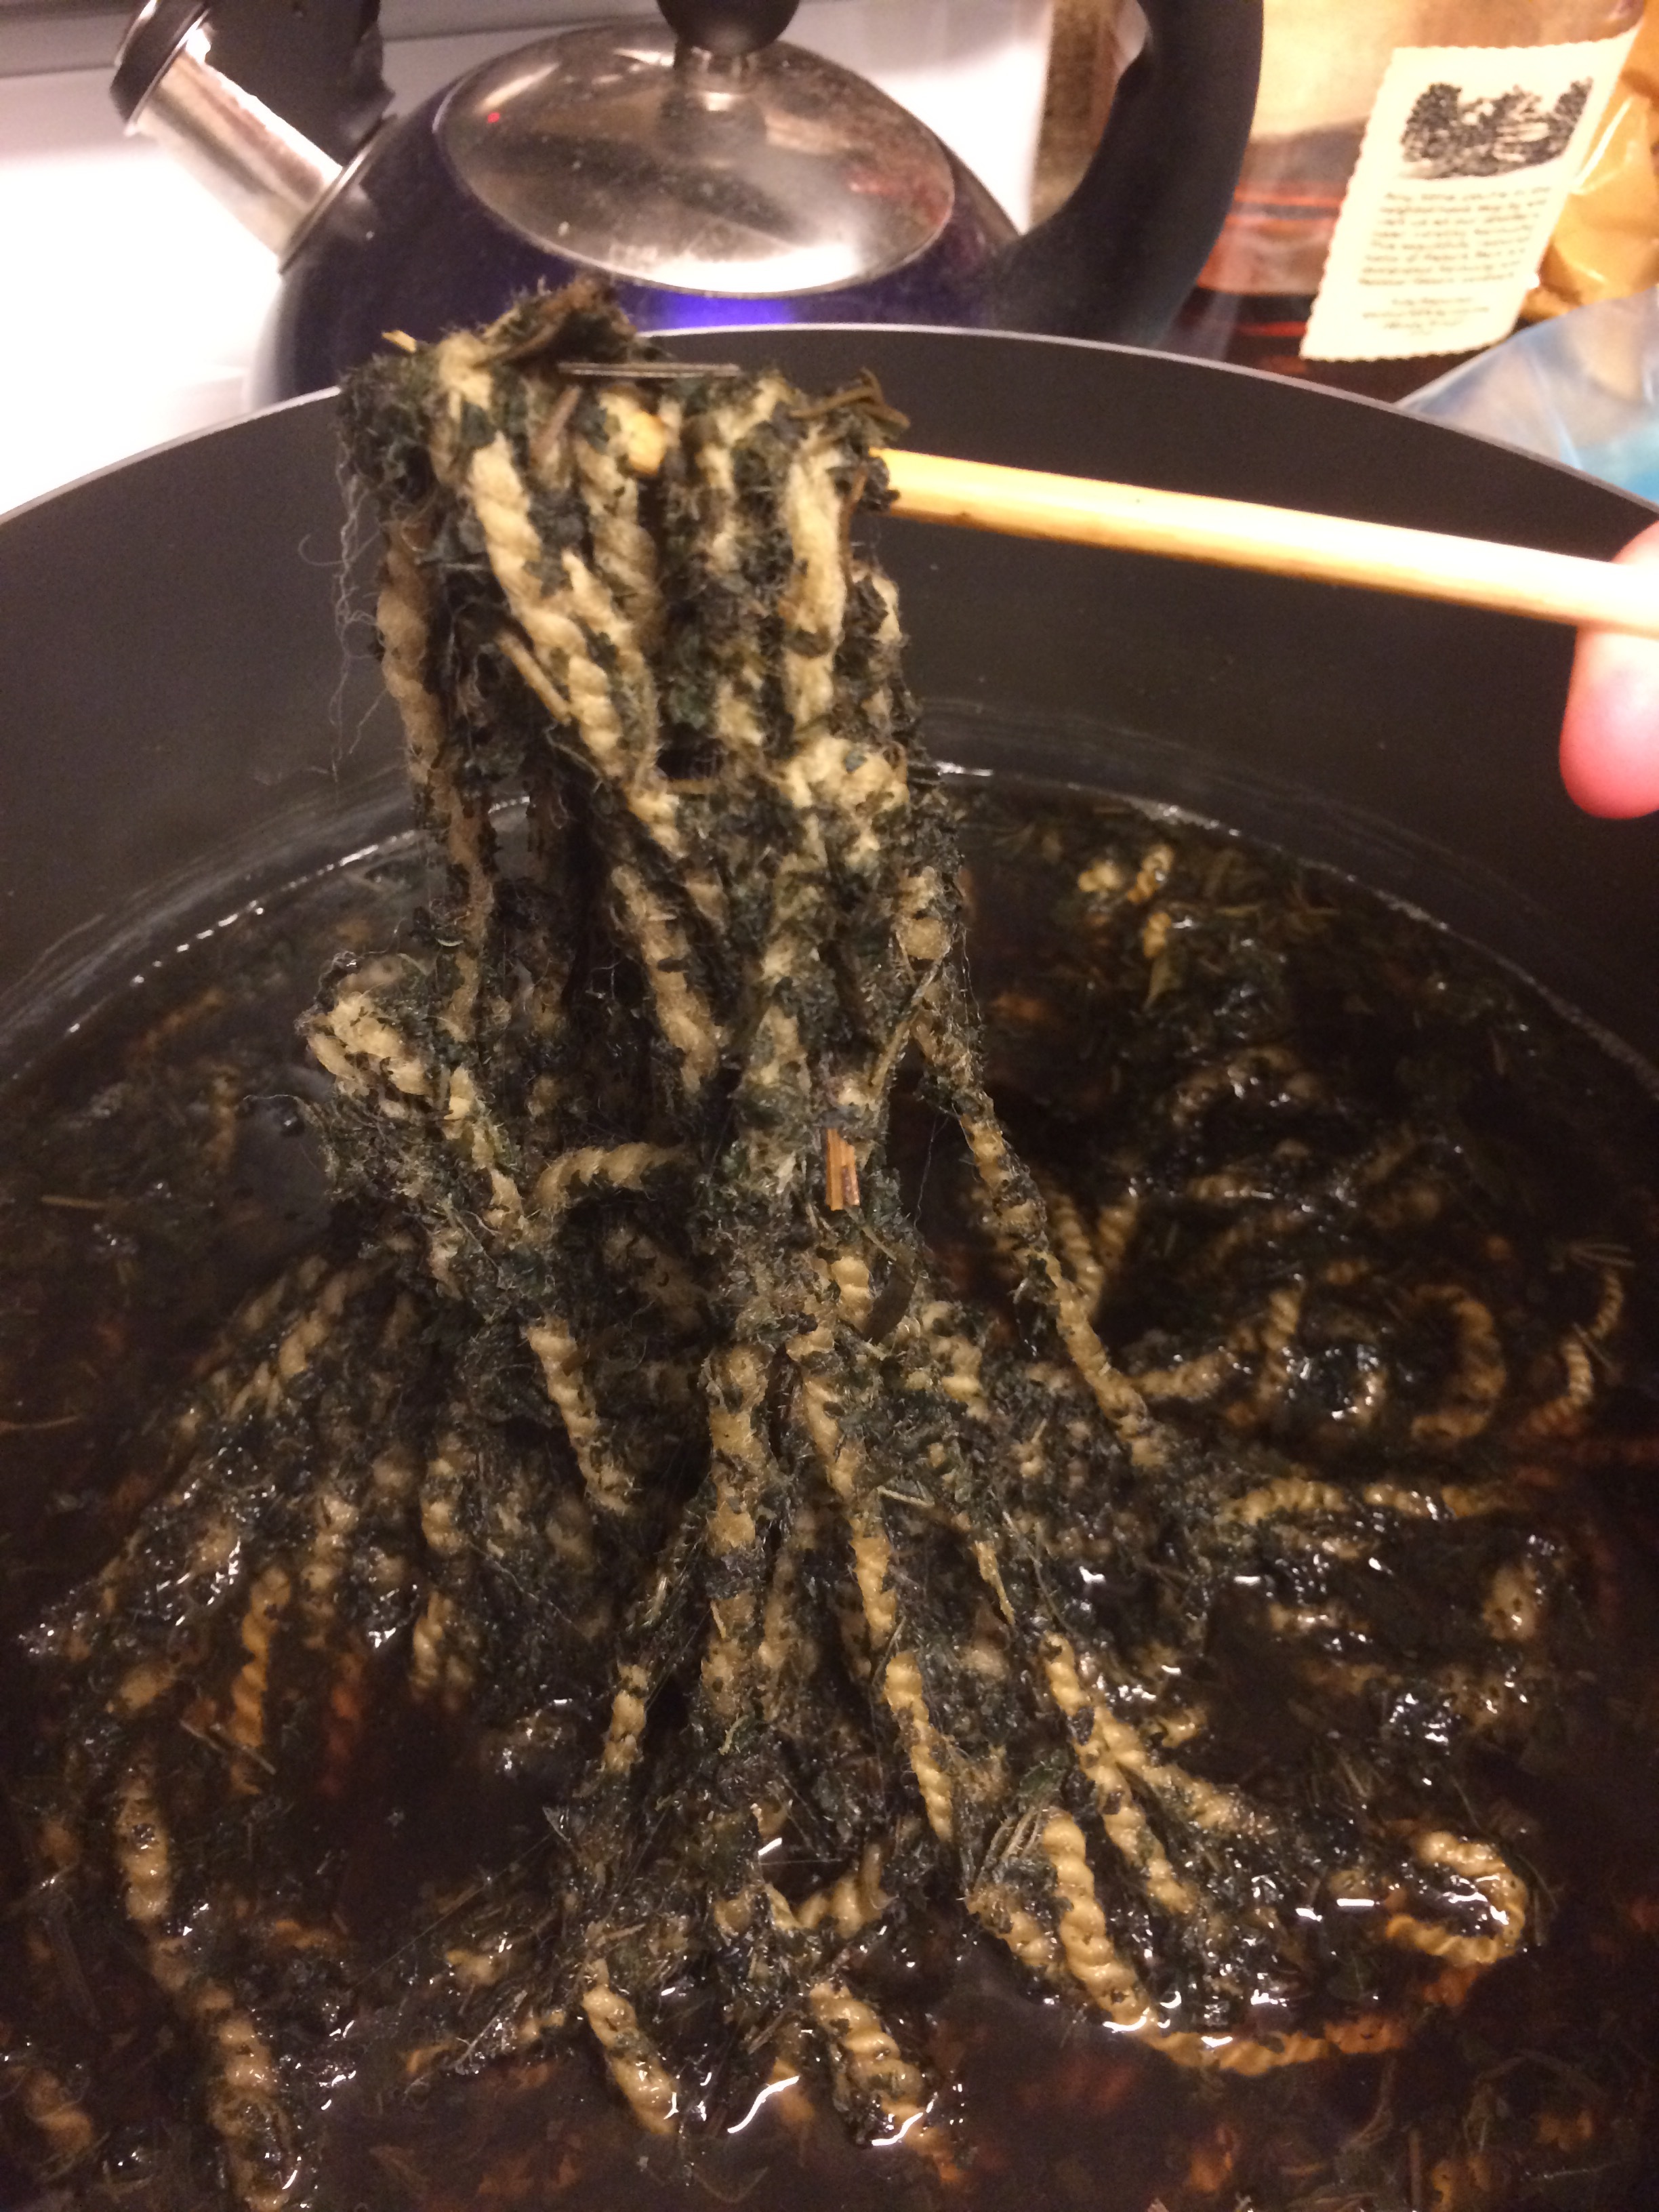
The picture actually makes it a little nicer looking, but it was a lime green and splotchy catastrophe.  I hung my head in defeat for the afternoon, and then promptly ordered a dark green FABRIC dye.

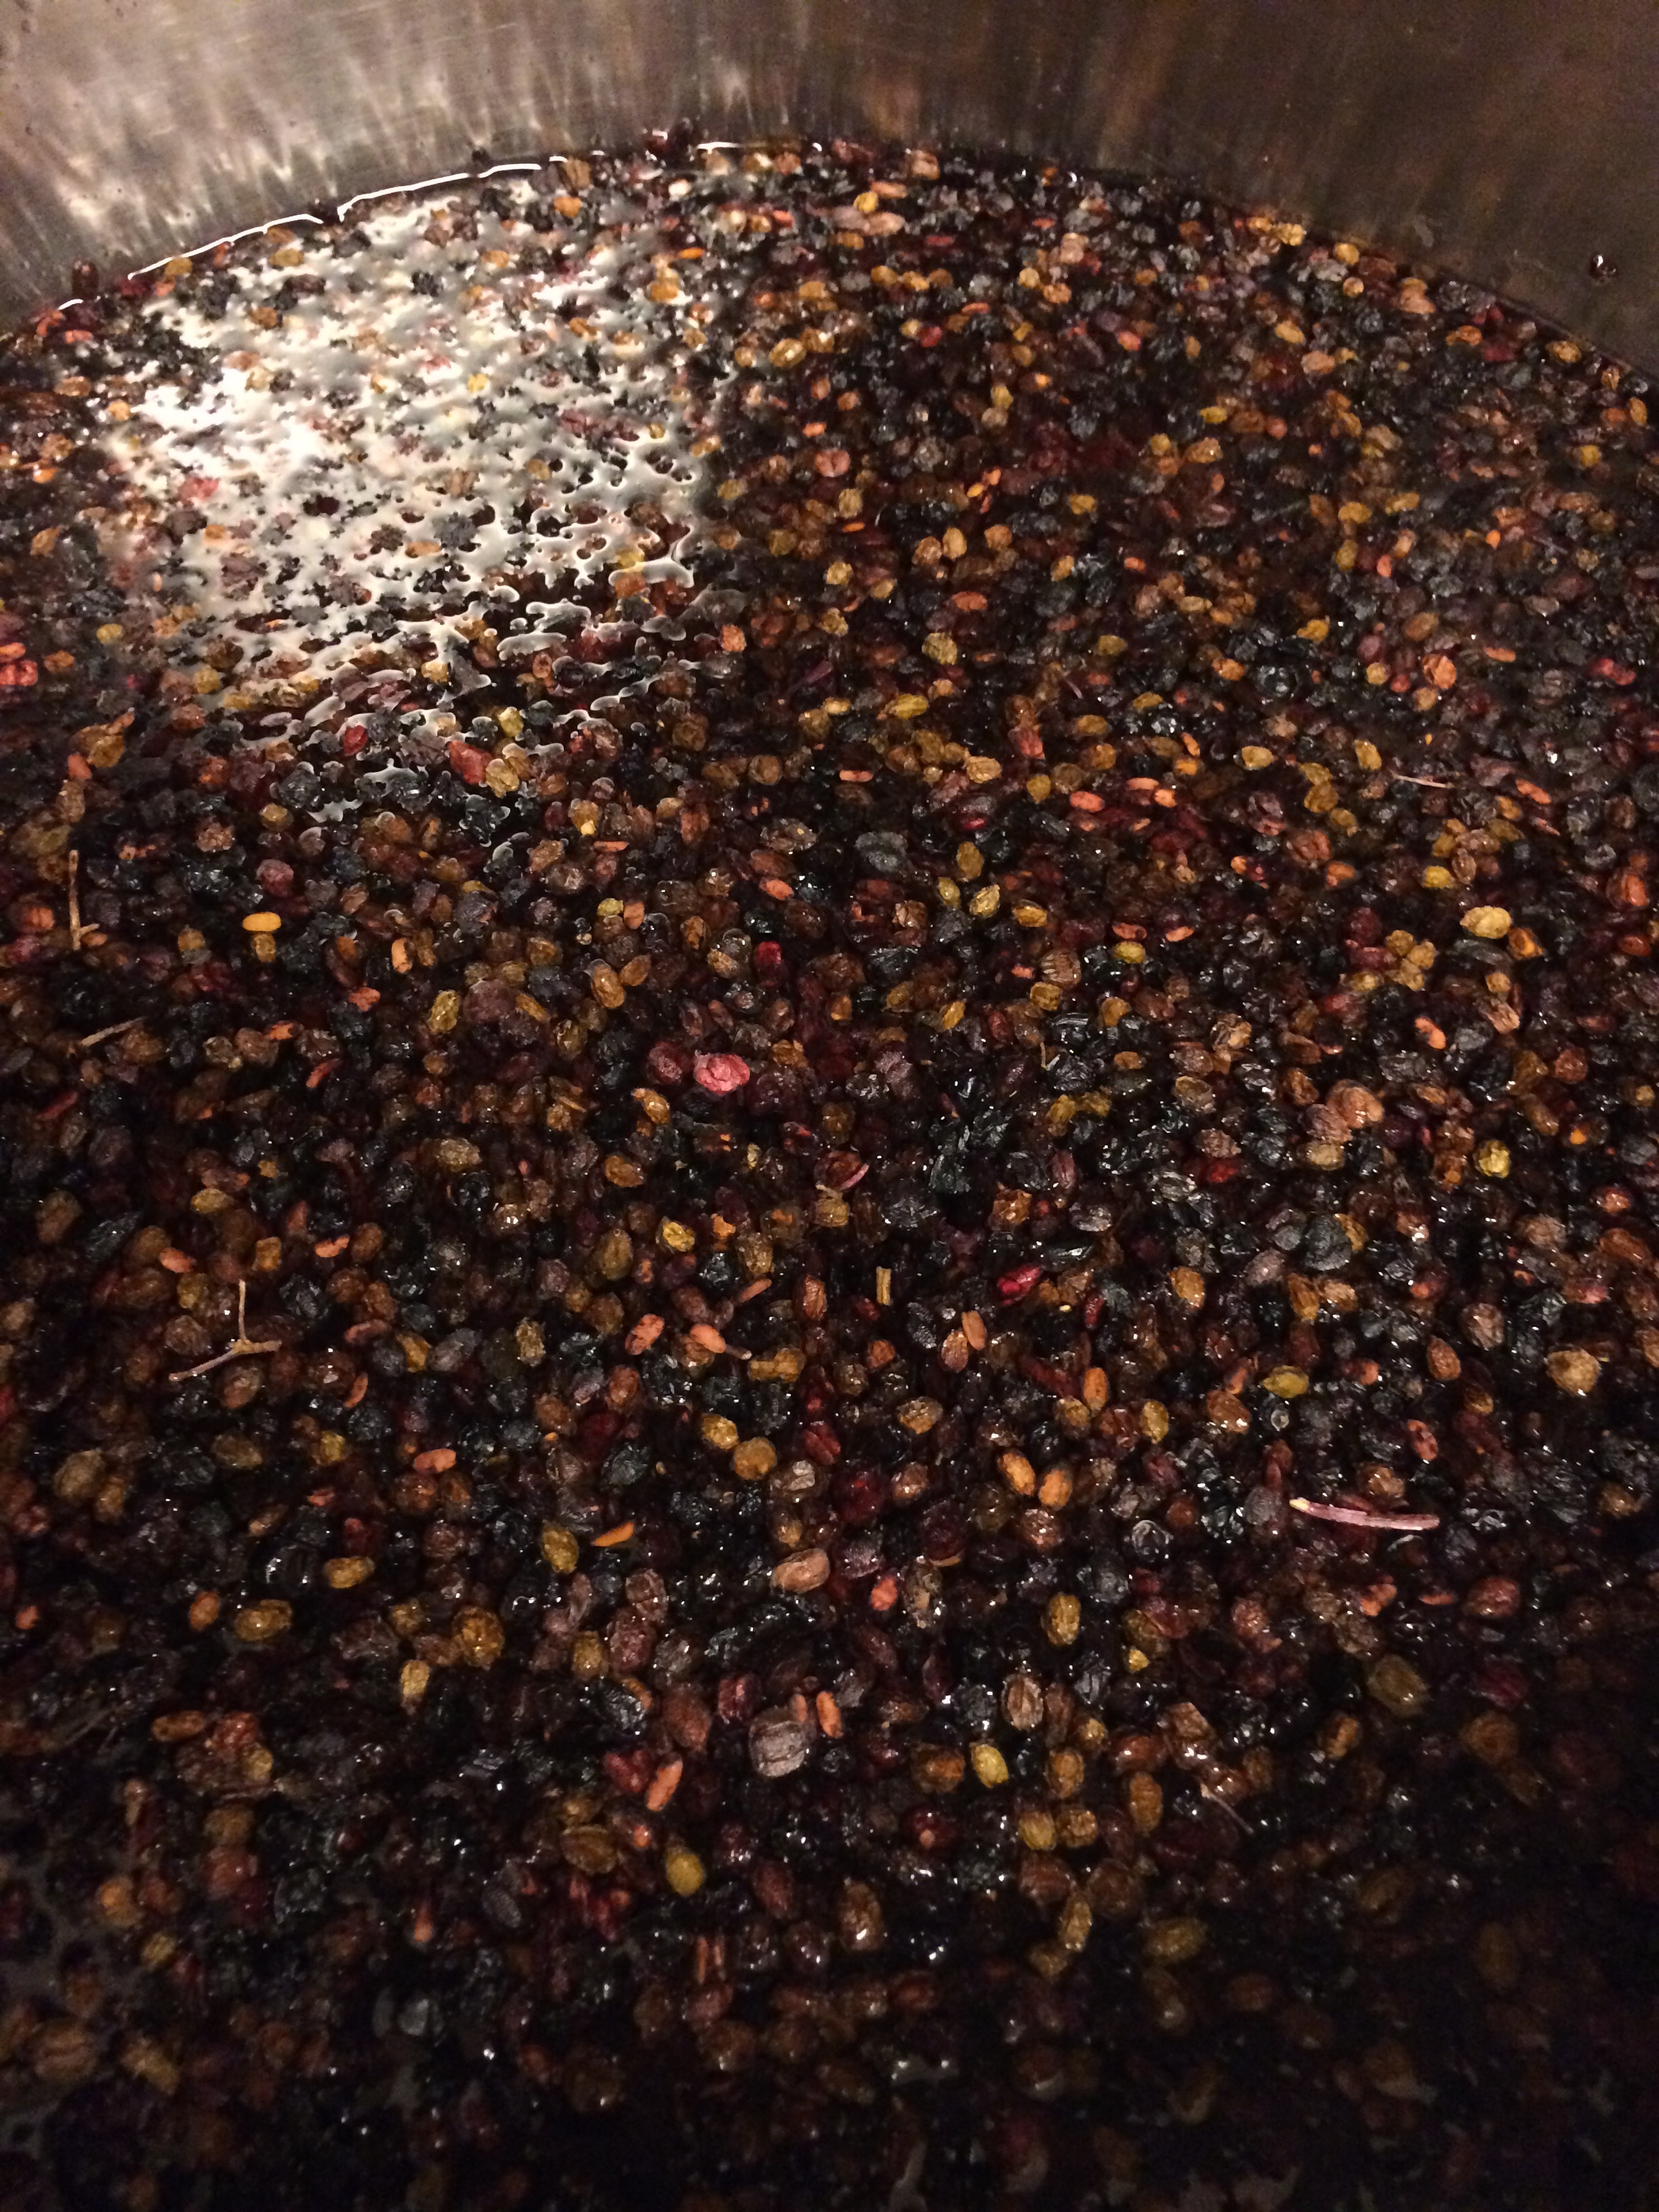
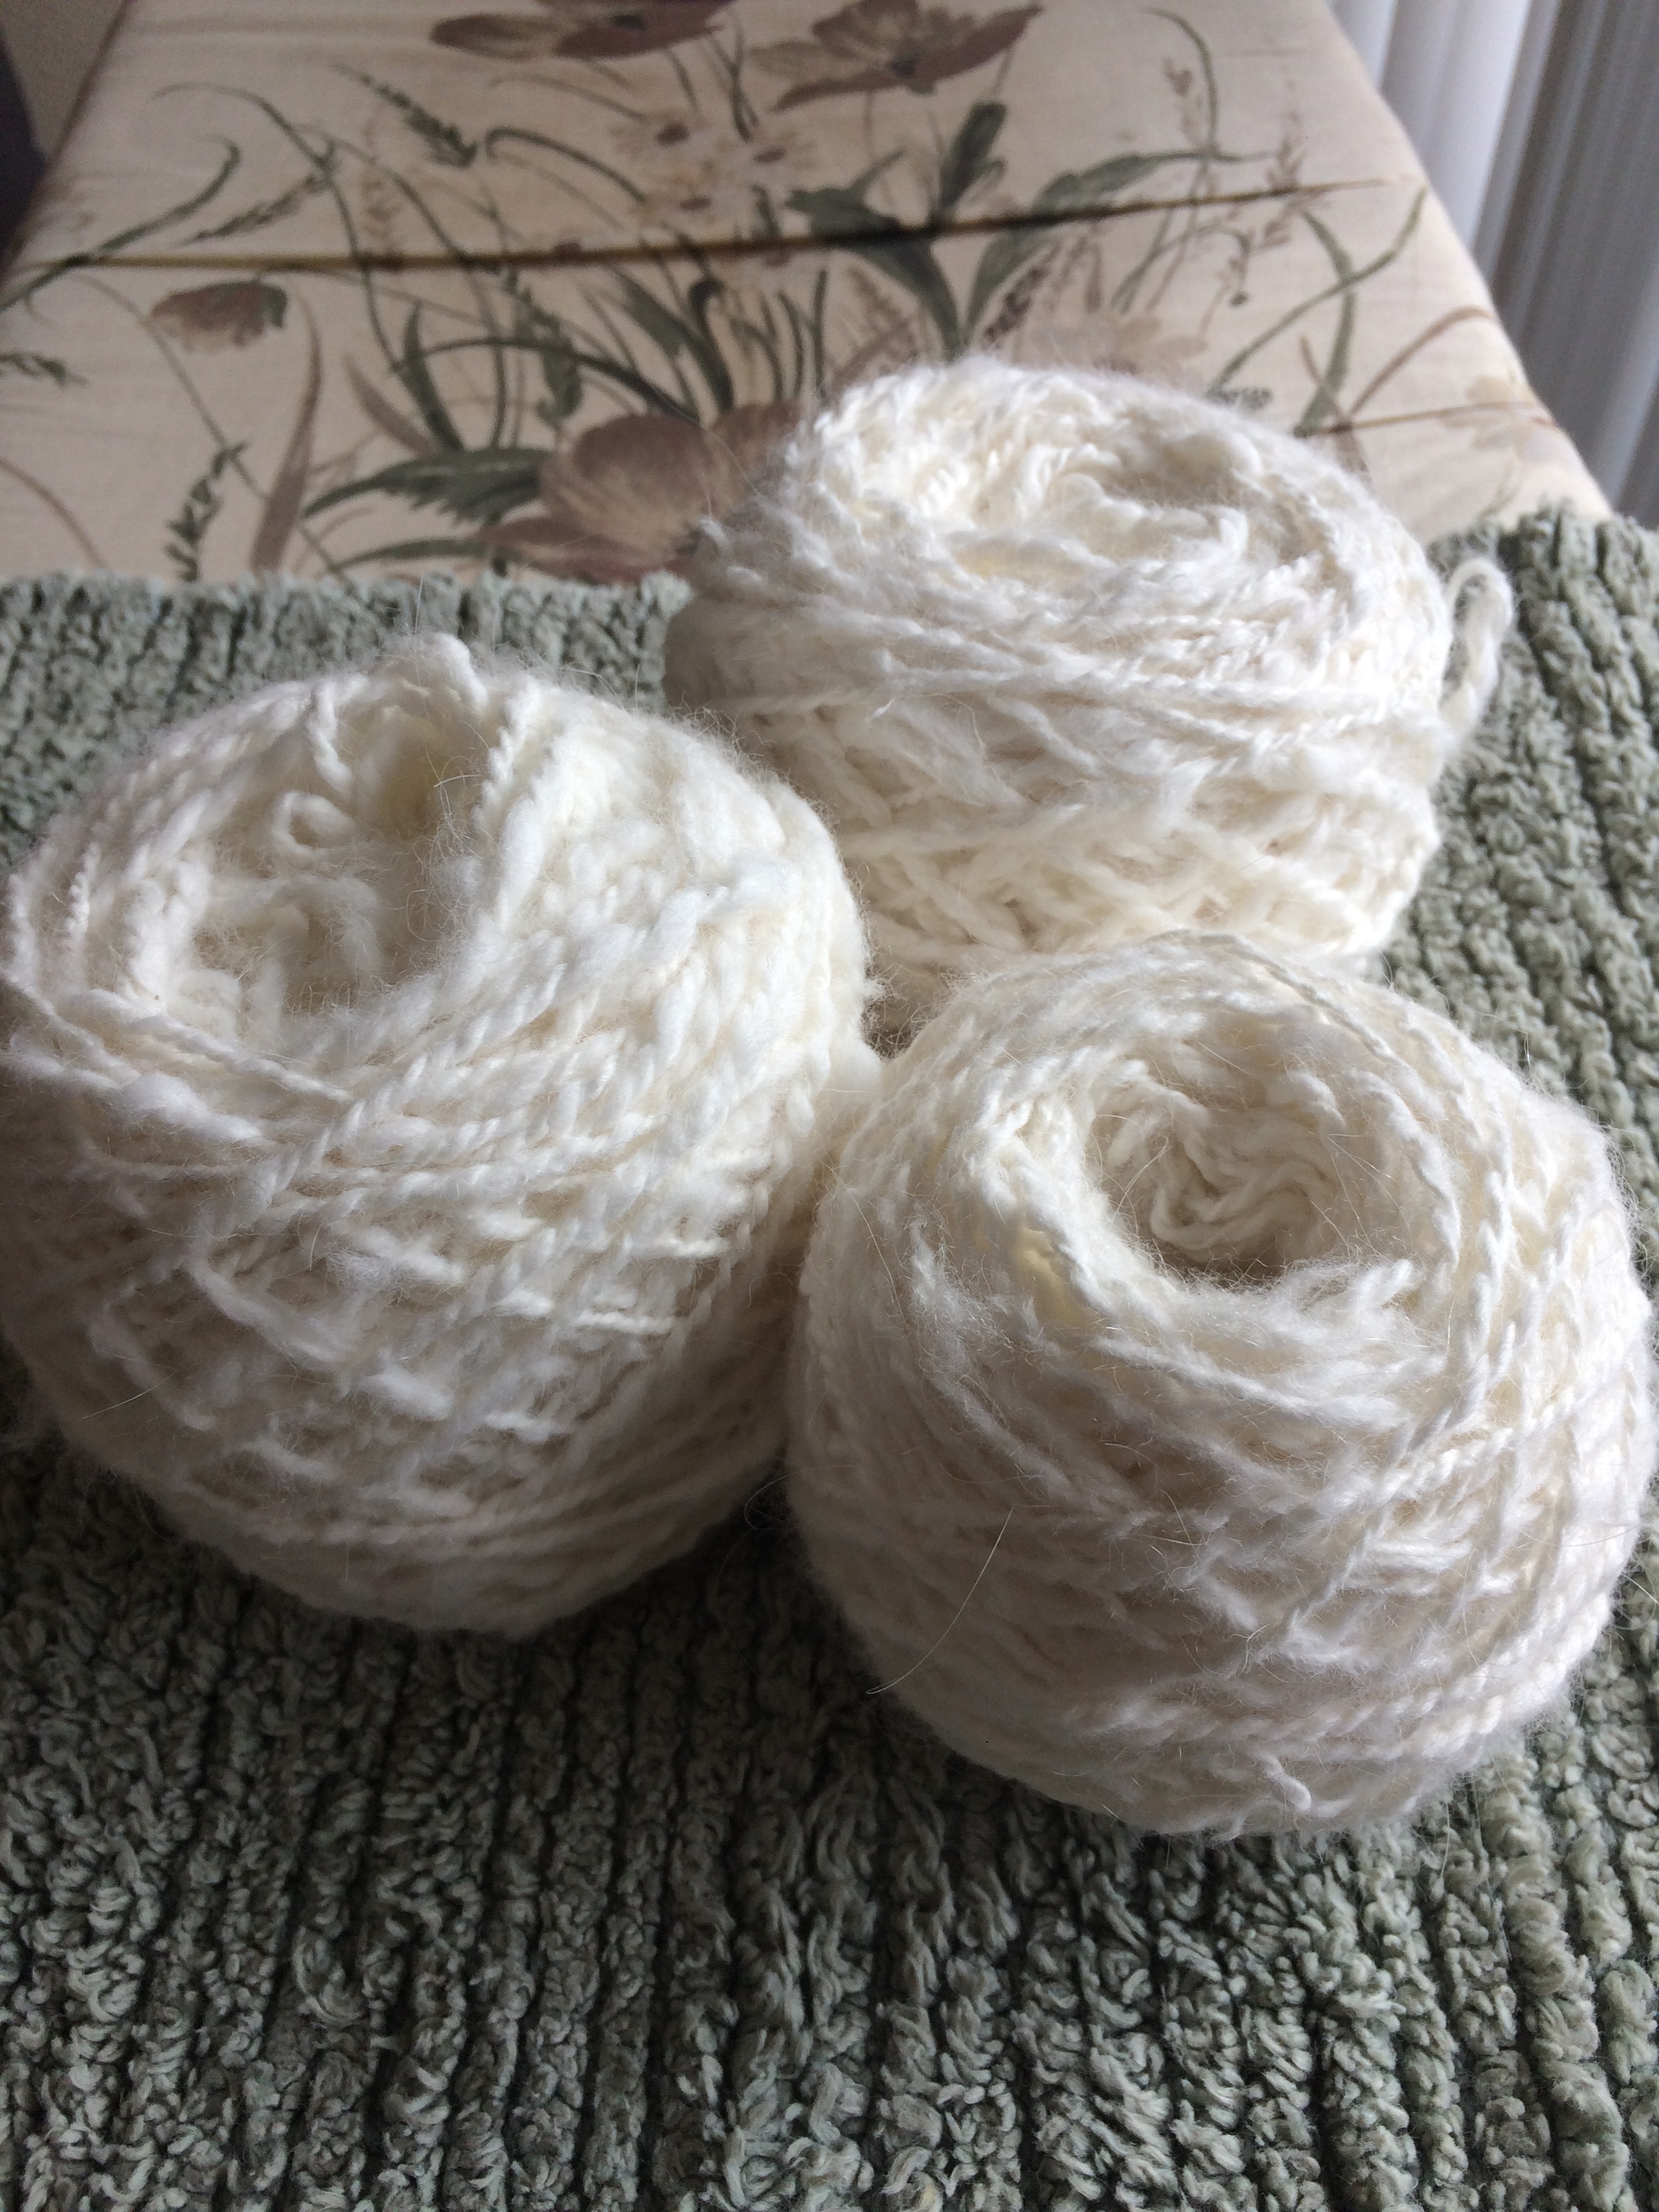
Thanks to Amazon it showed up in 2 days, and I tried my hand at saving my dress once again.

The instructions called for 1 cup of salt and half the bottle of dye.  The dye part seemed reasonable, but a full cup of salt seems like I'm trying to ward away the greater evils of the universe- which maybe ugly floral and beige belongs to.  Any which way you have it, I obeyed the instructions and waited eagerly.  

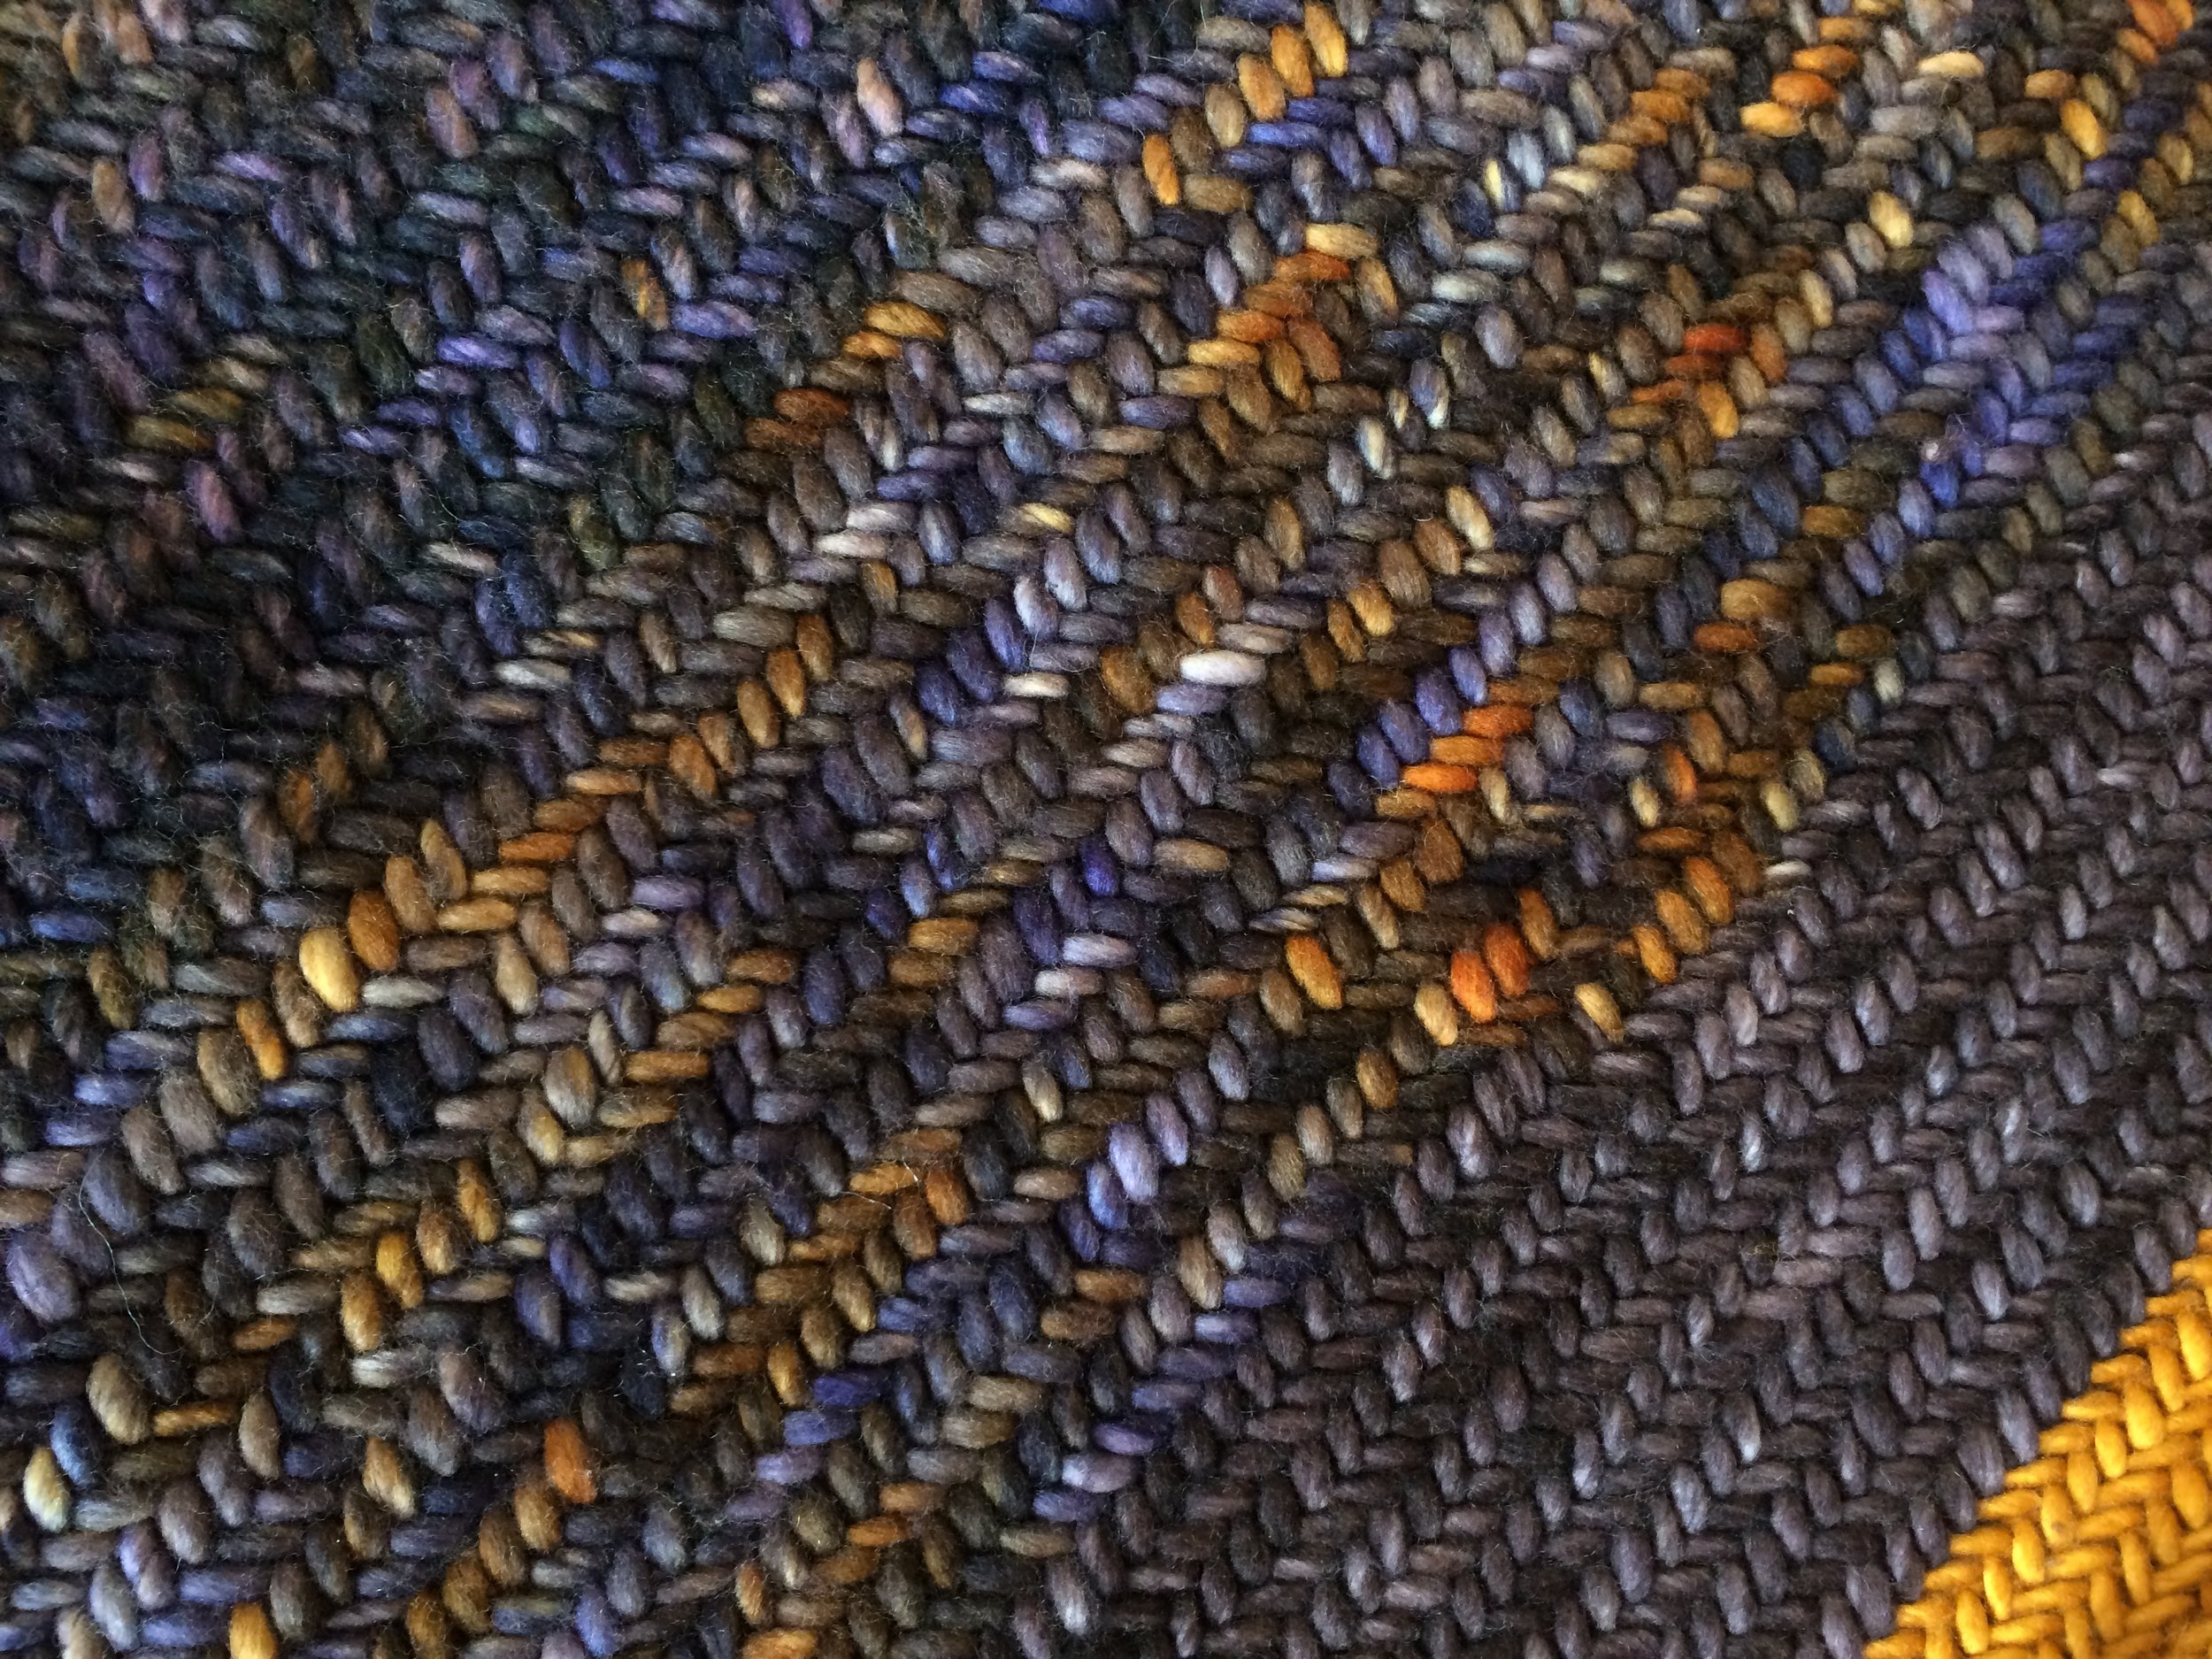
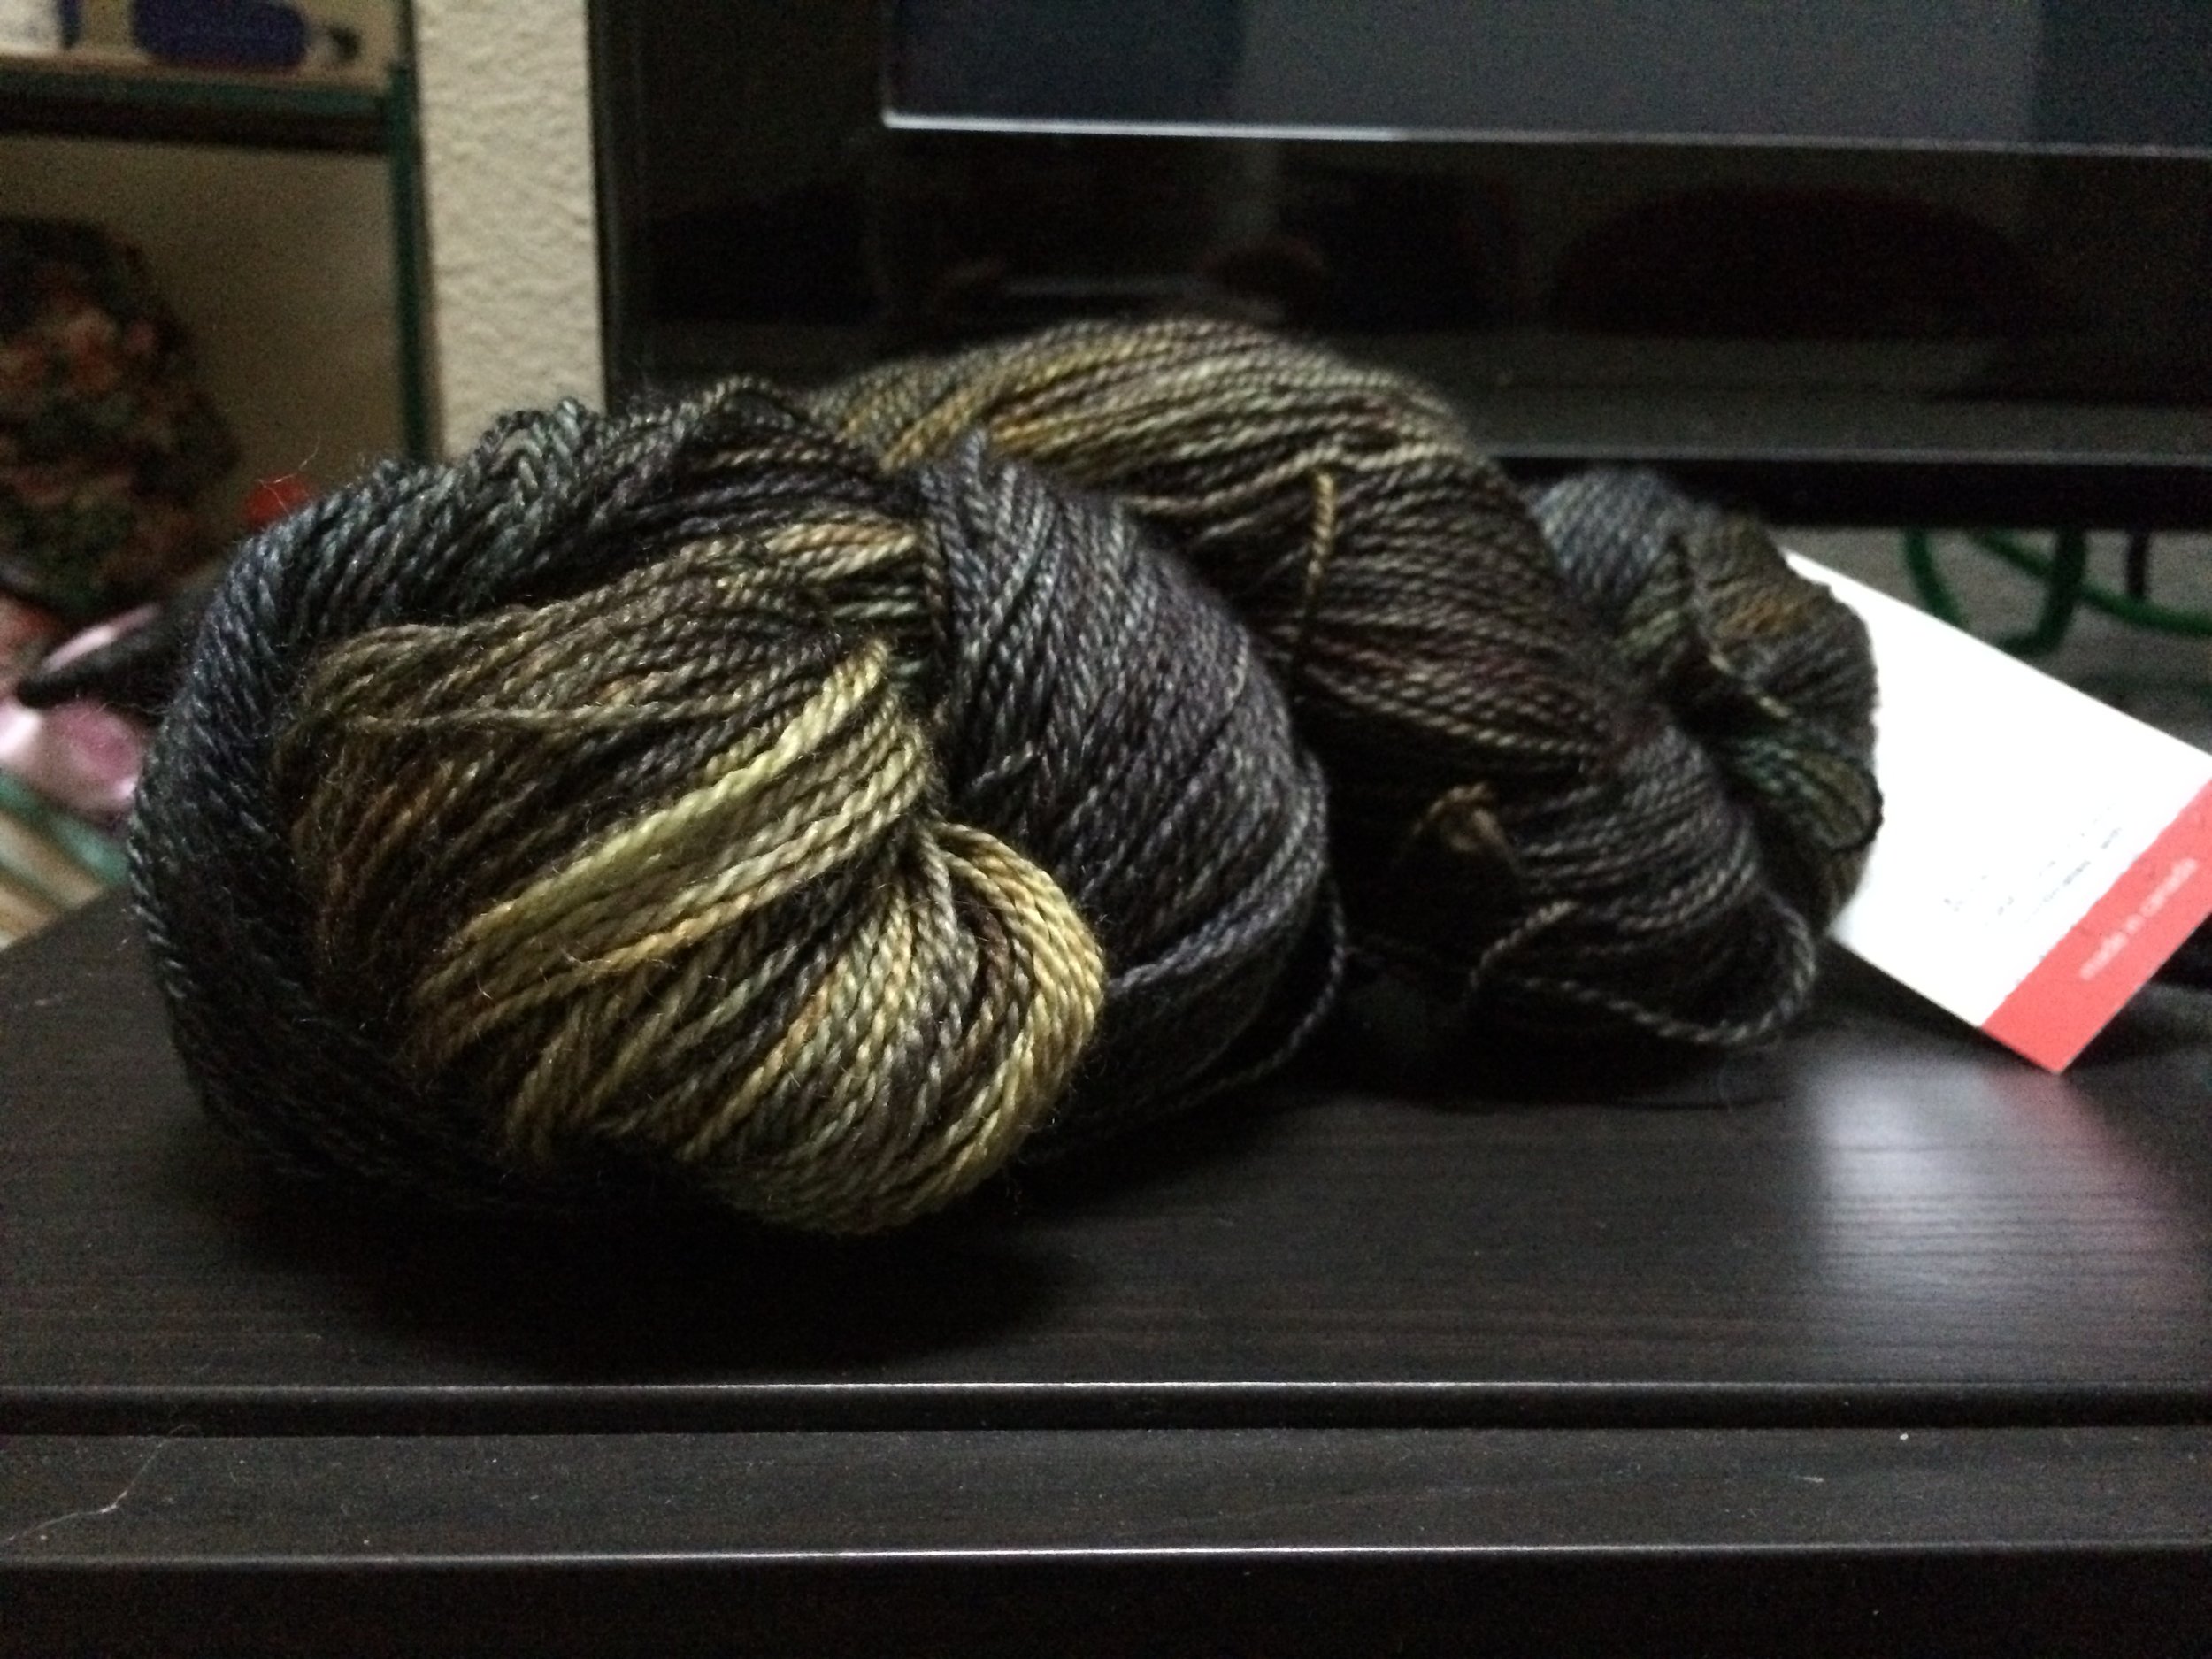
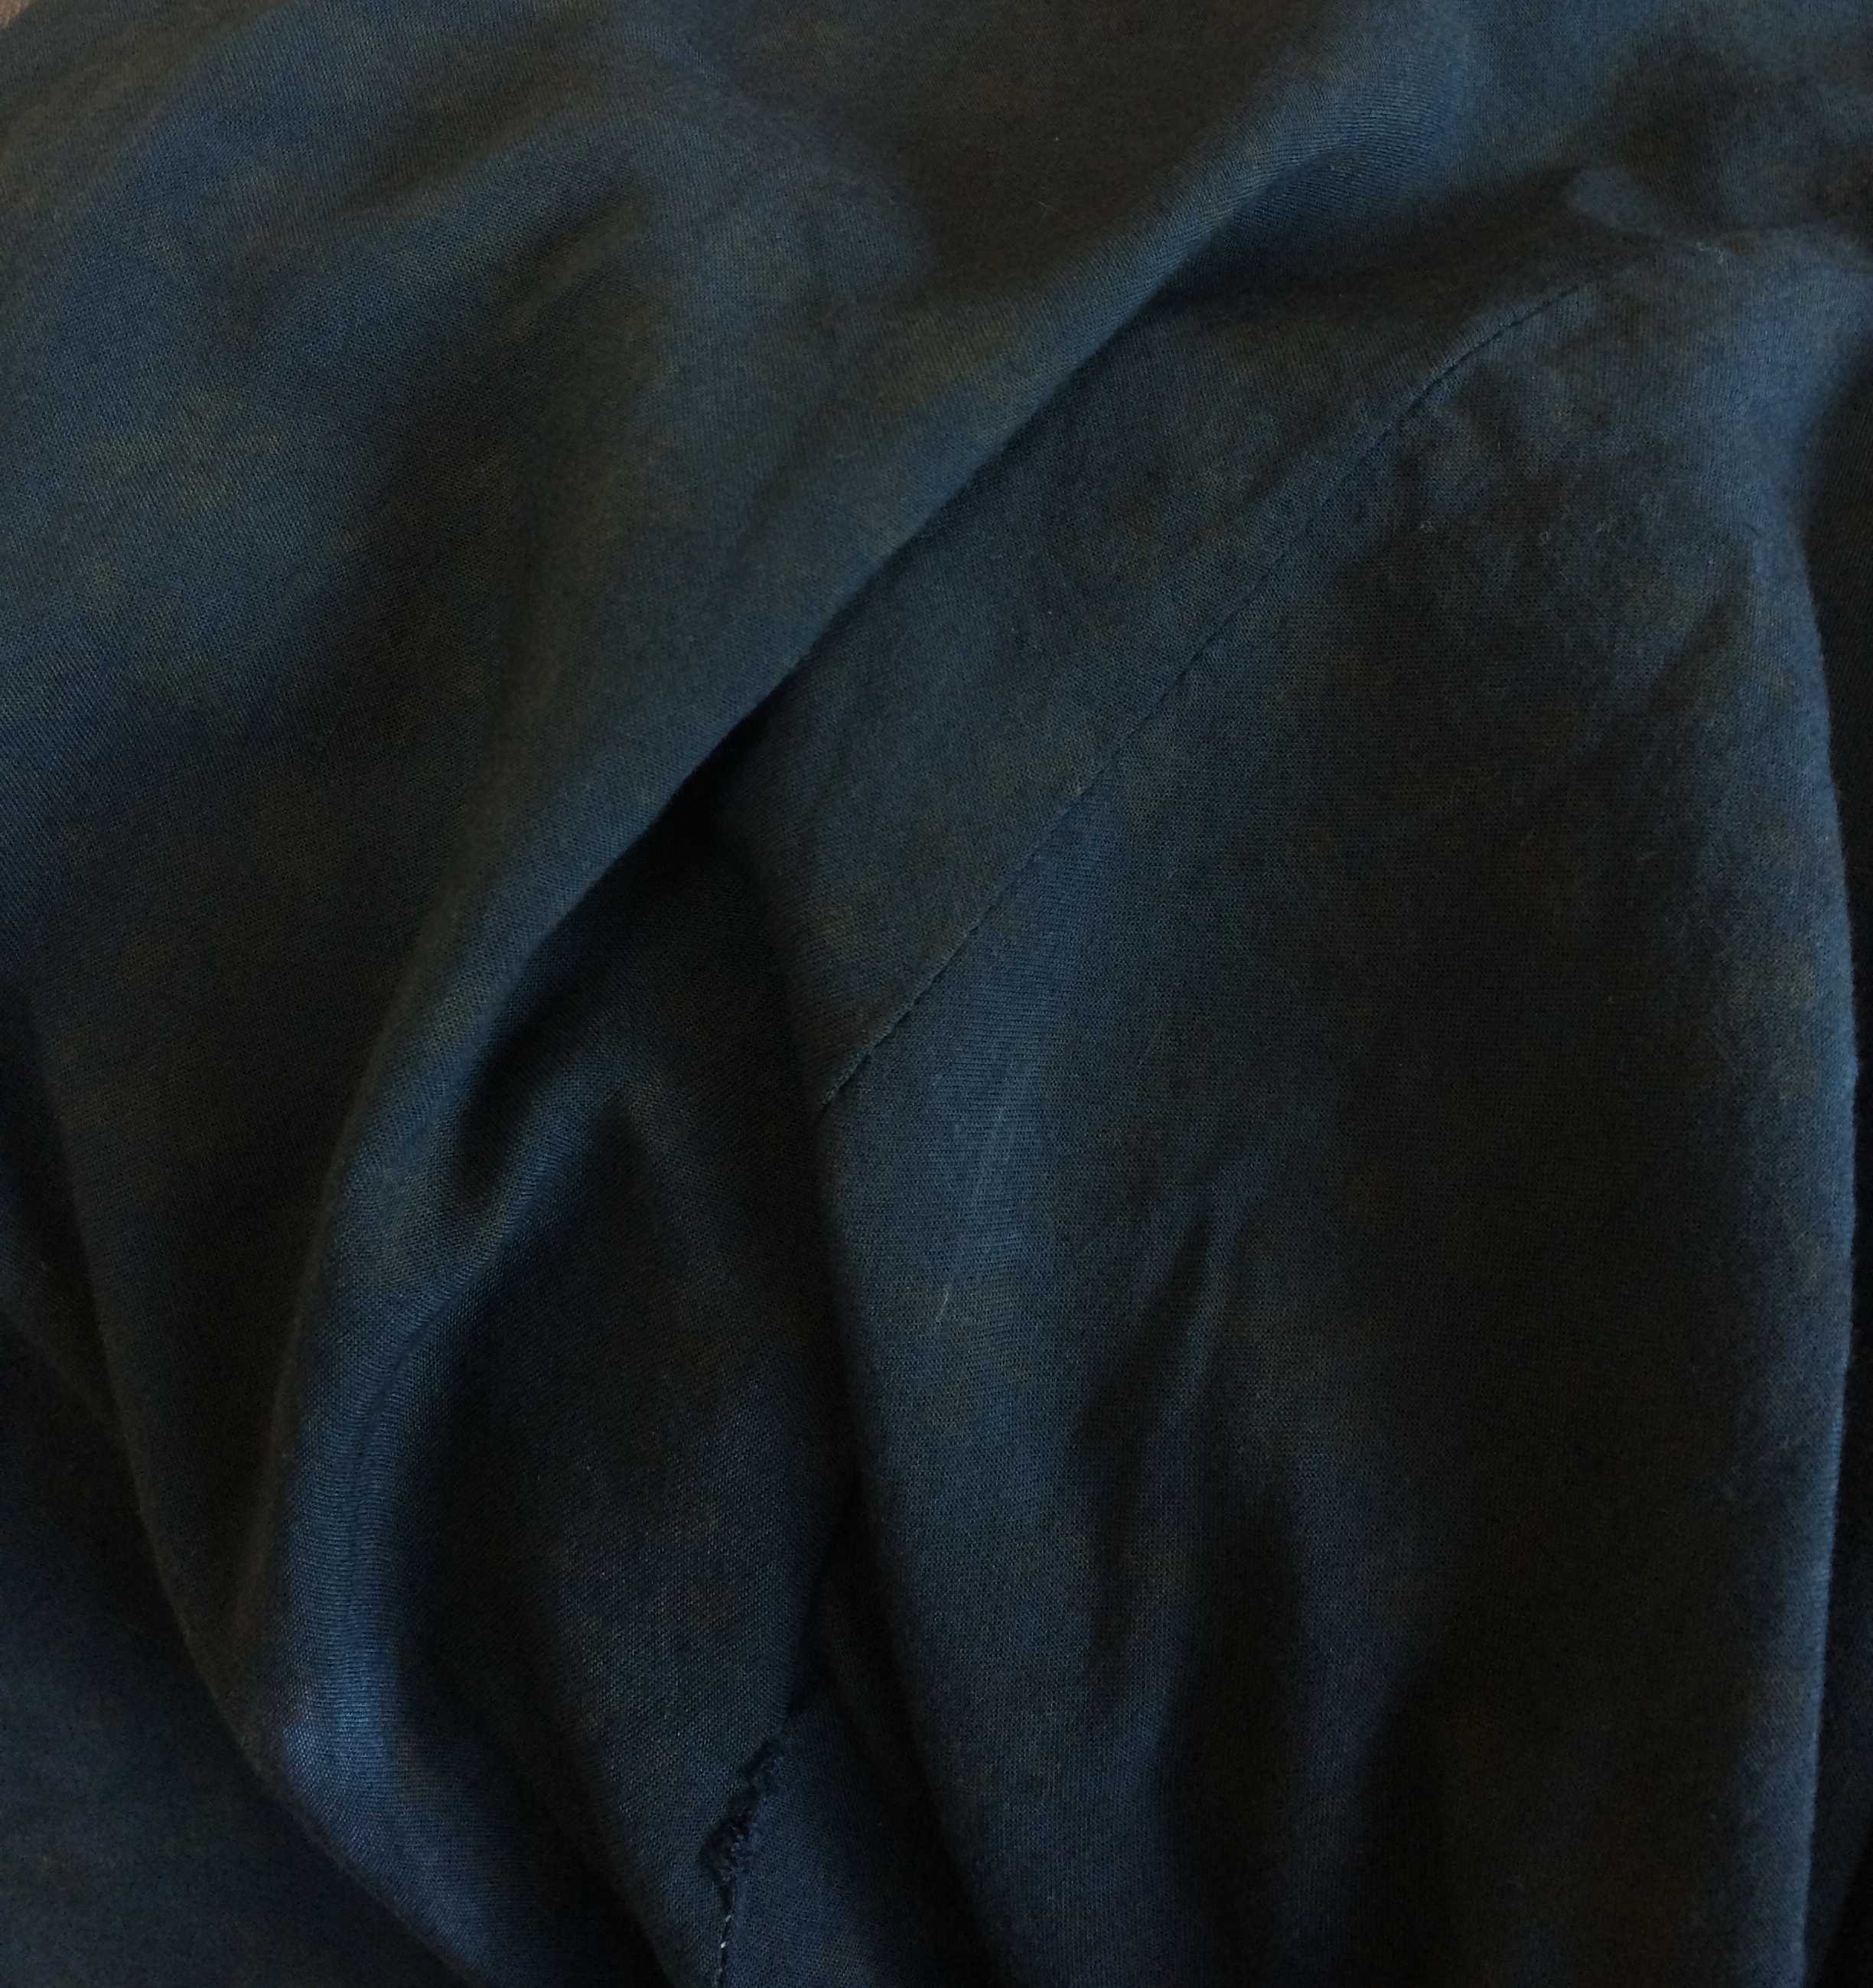
Such patience was rewarded, the colour turned out beautiful.  

This deep and admirable green is hard to photograph, but it's beyond charming and I did try to do my best to capture its brilliance.

IMG_8711.JPG

Lesson learned, use the right dye for the thing I'm dyeing!  

Stay sweet, stay crafty, and stay tuned!

Twisted Stitch

A little while back I promised to show a (hopefully) clear way to do twisted stitch, and now here I am to deliver!

Twisted stitch, in my opinion, is remarkably beautiful and gives you some neat options to make interesting designs and patterns- like this one, where I made myself some sweet dragon scales.

IMG_8623.JPG

To do a stitch that slants away from your working needle (the needle you are knitting stitches onto), you pick up the stitch that's behind the one closest to the point from the back and make a stitch, not letting any stitches slip off in the process.

In the picture below, the needles are positioned like they would be right in front of me.

IMG_8633.JPG

Then pickup both stitches from the back and let the two slide off onto the second stitch you make.  If done correctly, you should have the same number of stitches as you started out with, and you should probably notice a slant on the stitches you just knit.  Unless of course you're working with lace weight yarn, for finer weights it sometimes takes a few more rows to really notice the slanting effect.

For a twisted stitch point toward the active needle (note: this is left handed knitting now, so the left needle is the active one) this is what you do:

First you're going to make a stitch by picking up two stitches as if you're going to knit them together.  

IMG_8638.JPG

Leave both stitches on your needle though, so it looks a little bit like this.

Then make a knit stitch with only the stitch closest to the point, after which you can slide the two stitches off.  Not the ones you just made, but the ones that you originally went to knit together.

There you have it!  

Note: To make the slanting lines that go across what you're working on, all you have to do is start the twisted stitch a little further/closer (depending on which direction you plan on going.  So for this little demo piece, I started with one stitch on the right side that wasn't part of the twisted stitch, then on the next row there were 2 on the right that weren't part of the pair that makes the twist, then 3, then 4- you get the picture.

IMG_8641.JPG

Hope this was helpful, and as always-

Stay sweet, stay crafty, and stay tuned.

Quite the Pair

Back in December I made some wholesome and lovely socks for all of those cold winter nights and rainy early mornings.  

When I was finished, I happened to have a couple of skeins leftover, and decided to make my partner a pair of socks as well- so he too can know the wonders of having truly warm feet.

Other than needing to make the cuff slightly bigger, the design of his socks was pretty similar to the way I made mine.  This time though I tried to make the heal flap a little extra long to ensure that they wouldn't slide off his feet, which is something I've been having troubles with for the pairs I've made for myself.

The foot was when it got interesting- my partner, unlike me, doesn't have wee elf feet.  Throughout the duration of making these socks I had to obsessively measure them to ensure that they were in fact the right size for him.

 It quickly became a valuable lesson in sticking to the measurements taken and remembering that not everyone is built the same.  As soon as my partner slid the socks on I could see that they were a fit that cinderella herself would admire.   

That being said, they still look WAY TOO  BIG to me.

IMG_8610.JPG

The only downside now is that it's getting hot out, so it will probably be a while before these lovelies see any action.

Their time will come though.

Stay sweet, stay crafty, and stay tuned.

Tara Mae
Herringbone Stitch

Last week I said I would do a bit of tutorial for herringbone stitch since it seemed disproportionately difficult to find a tutorial for a relatively simple stitch.

To start, number of stitches doesn't matter as long as you have more than 3... if you want the pattern to show up that is.  

Then for the stitch you go to knit two stitches as if you were going to knit them together.

When you pull your loop through don't let the stitches on the left needle slip off.

Instead only slide off the first stitch (the one closest to the point of the needle).

After that you do this same pattern all the way across, making sure that the stitch that gets left on the needle becomes the stitch you slide off the next time.

When you get to your last two stitches you're going to treat them the same way you've treated the rest of the row.

Knitting the last two together, and leaving the second stitch on the needle.

IMG_8596.JPG

With that single last stitch you knit as  you would normally.  

IMG_8597.JPG

That's herringbone!  Not nearly as convoluted and confusing as it can come off!  

Stay sweet, stay crafty, and stay tuned

Tara Mae
Lightening in Chicago

When on the Rose City Yarn Crawl my eyes kept lingering on this fiber, it beckoned to me gently but also with a strength I became increasingly aware of.  Finally, after seeing it in several shops, I picked it up and agreed to take it home with me.  

It was in that moment that I realised why I like it so much- it's a beautiful representation of the thunder and lightening storms I witnessed when visiting my brother in Chicago.  The sky has this powerful and looming purple and grey, then as the thunder progresses and the lightening strikes, a deep and moody orange swirls and emerges out of the darkness, taking its place among the clouds.  It is both haunting and beautiful.

It was watching these storms that made me change how I felt about orange.  I had always felt like orange was so loud and, at times, obnoxious.  It was only when I saw the subtler side of it that I realised how powerful and brooding it could be.  

IMG_8252.JPG

The only problem was, there was only one skein, but lucky for me, after a series of dead ends and false hopes, I found not only some yarn to complement the original skein, but also (much to my surprise shortly after posting my mishaps) found a perfect match.

With the perfect match, and complementary skeins next to the original skein that inspired it all, I decided to start making a shawl- so that I may always be able to be cloaked in the lightening of Chicago.  Brooding clouds and all.

IMG_8463.JPG

The two skeins that were actually close to the same still had a bit of contrast in brightness, as you might be able to see here, but I've decided to pretend that it's all intentional and an artistic way of showing the development of the storm.

IMG_8485.JPG

However the credibility of my artistic license is perceived, I found that the colours turned out splendid together, and honoured my memory of Chicago well.

Plus taking pictures with the newly finished shawl let me justify wearing my blue lipstick, which is always a charm.

For this project I used herringbone stitch, which was a mess to try and find a good tutorial for, so in the next week or so I'll be posting a tutorial of how to do this stitch!

Stay sweet, stay crafty, and stay tuned.

Busy as a Bee

Last we left off with the honeycomb quilt, I had attached all of the cut out hexagons to batting and they were awaiting me cutting them out and sewing them together in all the right places.

As you can see in the pictures above and below, for the hexagons I sewed all the sides except one and reinforced each corner with some extra stitching to make sure that they're extra sturdy for the years to come.  

The layers to "block" have two pieces of fabric (with printed sides facing inward) and the batting.  I did this so that I wouldn't have to figure out how to stuff batting into the shapes afterward and to ensure that the batting is secure. 

After all of the hexagons were sewn I trimmed the excess batting around the edges so that the outside wouldn't be too bulky or hard to maneuver when doing my hand stitching.  Mostly it was fussy work, but it gave me a good excuse to relax a little bit and do something a bit more mindless.

After that, I just flipped it right-side-out and tucked in the side I have yet to sew!  

These are all of the pieces I have so far, but more will almost certainly find their way into the stack as I wander through life and fall in love with even more fabric.

IMG_8486.JPG

However, for the time being, I'll keep building on the center and working my way out.  Stitch by stitch, near miss to bleeding finger.  I don't have all of these stitched together quite yet, but some are in their place and I'm happy to go where it takes me.

Worst case scenario, I have gotten significantly better at my hand-stitching.  

Stay sweet, stay crafty, and stay tuned.

Dragon Scales

For the holidays this past season my mother, being the woman of phenomenal taste that she is, gifted me this voluptuous yarn that flaunted bold blues and oranges, intermingled with subtle and sweet deep blues, rusted reds, brooding greys, and touched with the smallest hints of lilac.  Seeing as I try my best to not be cruel to the wonderful palettes that people invest in yarn, I decided on something that would showcase these stellar colours.

I knew when I started looking for some sort of idea that I wanted to do a crop top.  Despite having thought for many years that they made me look like I was cut off in the worst way possible, I've grown to love them and feel very comfortable in them, and if for no other purpose- it keeps me a little bit more cool when it is unearthly hot outside.

My decision was made when I found a concept for twisted stitch pattern, and by pattern I mean the look was posted on Pinterest and when I tried to click the link the website was entirely in Russian (which I do not speak) and showed nothing that even resembled the knitting pattern.  Determined to look like I could rock dragon scales though, I hopped onto youtube and through process of elimination discovered twisted stitch and figured out the rest of the pattern from there.

This is my warning if you decide to pick up twisted stitch:

Mistakes can and will ruin hours of work.  Mistakes are inevitable, and it does your soul good to fix them, but oh how it will hurt.  I would get focused on a conversation, lost in thought, or be knitting during an especially engaging part of lecture and then suddenly 4 rows ago I made a catastrophic error that was plain as day.  However, I did find a nifty trick on my millionth mistake, and will make a blogpost explaining said trick within the next two weeks!

The other problem I ran into with this lovely creation was that I ran out of yarn.  I tried ordering the same thing from the creator, but being a different dye lot made an enormous difference.  It was so bad, that I ripped it all out, and found a grey that promised to make my stomach churn less.

It kept that promise splendidly, and gave me the motivation to follow through and finish this project that had taken me three months to complete.

Now I can happily wear my dragon scales, and enjoy the radiant colours they hold.  

And despite what I thought, the grey actually ended up being even more neutral and fitting than I thought.

I look forward to explaining my fewer-swears-fix for my twisted stitch pattern in the next two weeks or so, and until then-

Stay sweet, stay crafty, and stay tuned.

Tara Mae
Humble Beeginings

There's something extraordinary about starting a project that could almost certainly take me the rest of my life.  The idea that the work I put into one single project could be something I work on as I grow old, learn about the world and myself, and become a more skilled crafter.  A project that will follow me to each step of my life- every new home and each adventure.

Oh wait... Did I say extraordinary?  I think I meant to say insane.  I always get those two mixed up.

IMG_8404.JPG

I have been collecting fabrics that I thought were pretty since I was little, and even more so when I became a quilter.  I started setting some of the odd-ball ones that didn't fit anywhere off to the side for safe keeping, thinking that I would eventually figure out one grand project to put them all together in.

That's when I discovered, with my deep-seated adoration of hexagons and honeycombs, that there is (of course) a honeycomb template for sewing.

IMG_8405.JPG

Once i started I couldn't stop.  I kept finding all of these beautiful fabrics that I had stashed away for this very project, and the start pile for the honeycomb quilt grew rapidly as I rummaged through my crates of fabric.

IMG_8414.JPG

I did a tiny bit of fussy-cutting for some fabrics that called for it, but mostly just tried to get as many pieces out of each strip of fabric that I could.

After cutting out all of the hexagons I wanted out of the fabric I have, I set to work matching them up with my scraps of cotton batting.

I have never been okay with throwing away the excess batting from a quilt, and it once again has paid off to keep it around!

IMG_8424.JPG

I am also going to use this as the start of one of my series projects, where I will often just write about where I'm at with this fabulous beauty.  I'm doing this for two main reasons:

1.  I'm taking 21 credits to graduate this spring with a BA in Anthropology, and will need to be spending a lot of time on my academics, so I thought it would be best for continuation of my blog if I did a couple of slow burn projects that I could update you on without having to sacrifice my grades or time with one of the best parts of my life, this blog and my crafting.

2.  I have so many bee puns.  I need to put them somewhere, and therefore I'm inflicting them upon you.  I'm not going to pretend I'm sorry for it either.

I look forward to sharing more of this quilt with you!  

As always- stay sweet, stay crafty, and stay tuned.

Tara Mae
Various Shades of Purple

A good while back I was exposed to the magic wonders of blending with a drum carder.  

It was enchanting and easy fun that made my spinner's heart dance with joy as I put all that I knew about paint blending into fiber form.

At the peak of my adventures with a borrowed drum carder, I decided to take some fun purple fiber I had, and add a heap of white to one batch; reds, blues, and deep purples to another; and the middle one I added a little bit of everything to.  At the end, I ran each luscious creation through the drum carder again, and added handfuls upon handfuls of sparkling fibers to give it the added magic it deserved.

Then, being aware of my novice spinning skills, I stowed these various shades of purple away and promised them that I would pick them back up when I could do them justice.

Then within the last couple of months, that time came.

I paired these lovely darlings with a purple-toned grey fiber that my mum had spun up, and decided to make a hood out of it.  

IMG_8357.JPG

Why do I make so many hoods?

  • My mum made me one when I was small, and I didn't fully realise just how spectacularly warm and cozy they are until I was out on a farm teaching children about soil in the pouring rain and wind.
  • They don't fall off.  I'm constantly running around and trying to get things done, and fussing with a hat that keeps slipping off my head like an uncomfortable octopus is just a hassle.  
  • They're fun and cheerful to wear.  I have rarely ever been able to maintain a foul mood if I'm wearing one, because they make me feel like a wonder-creature exploring the world.
  • Most hats make my head too-round looking, hoods give me some shapes and angles so it doesn't appear that I have an impossibly spherical dome sitting on top of my ears.
IMG_8355.JPG

This hood is a little different though, as I decided to not make a scarf attachment to hold it on.  Instead, with the grey fiber I knitted in the round and when I got to my fairisle diamonds and such, I started knitting back and forth.

IMG_8363.JPG

This made it so that the opening for my face would also double to be a sort of cowl, holding my hood on, and keeping my neck warm even if I didn't want the hood up.

Hope you are staying warm and cheerful this spring!

Stay sweet, stay crafty, and stay tuned.

Tara Mae
Dusty Rose Alpaca

Not so long ago I found out that hibiscus petals make for a beautiful dusty rose colour, and because it's such a hard colour to find I decided to take the liberty of getting a bunch of alpaca yarn, and dyeing it such a splendid colour to make something magical.

This fiber is 45% Alpaca, 25% Merino Wool, and 30% silk.  

And yes, it is positively luscious.

Since I've already worked with this dye, and have been doing a good bit of natural dyeing in general, I thought for this blogpost I would talk about how the different fiber made for a very different experience than the 100% wool I've been using before.

So here's how it varied

  • To start, the alpaca blend absorbed the colour far more quickly than the wool.  With the wool I was letting it sit on heat for about 5 hours and then let it cool with the water over night to get the dusty rose colour, the alpaca blend soaked up this colour within 3 hours of being on heat.
  • The smell of this dyeing process was far less pervasive than the times I dyed wool.  Its smell was fairly mild throughout the process whereas the wool left my entire home smelling.... questionable.
  • The colour turn out was also far more bright with the alpaca blend.  Comparing the two side by side (alpaca blend to wool) made me realise that the wool created a bit of a browning effect, whereas the alpaca blend didn't have any muddying undertones.
  • Lastly, the alpaca wasn't as surprising when I gave it a rinse.  The wool bled out a lot, making it so that I lost a lot of the beautiful colour, where the alpaca blend didn't fade much at all after the post-dyeing rinse.

I will say that the alpaca did get slightly lighter after drying for a bit (as would be expected), but still was fairly consistent in how I thought the colour would turn out.

Now I have six skeins of beautiful dusty rose alpaca blend yarn that I'm positively dyeing to knit into something fun and springy!

Stay sweet, stay crafty, and stay tuned.

Tara Maenatural dyeing
Cinderella Skein

There is a warning passed down from crafter to crafter about yarn:

Always buy more than you think you will need.

Because if you err on the side of caution, you tend to be alright, but if you convince yourself that you can "make it work" you will be just short enough that you can’t make it work, but just close enough that you didn’t see it it coming until it was too late, and then you go through the heart-wrenching discovery that dye lots are VERY different and availability is as moody as the winter ocean.

Can you see where I'm going with this?

IMG_8246.JPG

This lovely yarn was something I came across during the yarn crawl, and much to my lament it was the last one of its kind at the shop.  

At first I tried to convince myself that I wouldn't need another skein (which is why I bought it) but as I drew up patterns and fantasized what it would be, I came to the conclusion that I would need more.  

My first mistake: I ordered a skein online that was supposed to be the exact same colour as my lonely little ball.  As you can see from the yarn on the left, I was woefully misled.  

I began to recount every store my yarn crawl companion and I visited, desperately trying to remember if any stores also sold this line of yarn.

I backtracked feverishly, and attempted to find a match.

It was in Starlight Knitting Society, of course, that I found something that spoke a little too fondly to my solitary skein.  It was a goldenrod yellow that, while not capturing the colours I treasure so dearly in the first skein, complemented them and made the orangey undertones pop in a way I hadn't seen fully before.  The goldenrod fiber was purchased -- for science.

Next I found that Knitting Bee did carry the same line of yarn as my lonesome fiber, but simply didn't have the exact colour.  Yet a sweet and strong purple called out to my forsaken skein, and made a connection with the moody and mysterious purples lurking within.

This too was purchased (for science).

I settled all of these strange darlings together and looked at them with an intensity that I can only manifest for my crafting, and realised that these sweet lovelies were all meant to be together.

Even though I thought I wanted a certain thing for my lone skein, I realised that (like with much of life) my idea of perfection was getting in the way of something potentially greater.  Obviously time will tell if this is wonderful or monstrous, but in the off chance you ever come across a sad and lonely skein that must be made into something beautiful, know that there is hope.


IMG_8242.JPG

And so they will happily ever after together, just as soon as I make them into a shawl.  So, as always,

Stay sweet, stay crafty, and stay tuned.

Tara Mae
Rose City Yarn Crawl 2017

Sometimes strange and beautiful things can exist right beside you without you ever noticing.  They live and play just as you do, while you are none-the-wiser to their existence.  Then one wondrous day they are made known to you, by either a more observant friend,  a social media page, or just by pure chance.

That being said, how did I not know about the Rose City Yarn Crawl till just now?

In case you're not from the region, the Rose City Yarn Crawl is a collection of shops that participate in something that is like a bar crawl, but instead of getting boozy, you get cozy.  

In addition to getting the yarn equivalent of tipsy, you also collect stamps at each participating shop on your "passport" in hopes of winning one of the many prizes.

This year 13 shops around the Greater Portland area were participating in this magical event, and a good friend of mine suggested that we tackle it together.  

Our first night we took on three shops in as many hours, and I was extremely well-behaved in that I only bought one thing -- this beautiful skein from Black Sheep.

The second day we had a far busier schedule.  My dear companion skillfully crafted a map for our adventure, and this day required us to visit 7 shops spread out through Greater Portland.  

Cloaked in my angora cowl and hand-knitted socks, we ventured out.

Caught up in all of the wonder and fun, I was a little less well-behaved and it all started with this ragamuffin of a skein that LITERALLY had my name on it (and it was alpaca).

If that's not a sign, I don't know what is.

As you can see, the first skein created a pattern for the rest of the day's colour palette.  I also had to get a bag from Starlight Knitting Society, because with a name like that I can't help but be madly in love with whatever they do.

Believe it or not, we got through all seven shops with time to spare, and ended up having a nice little lunch so we could relish the day's delights and strategize for the next day and its three remaining shops.

One of the best parts was that all day the angora cowl attracted eyes everywhere we went.  I happily let people pet the cuddly wonder.

Sunday came, the last three shops went quicker than we would have thought, and before we knew it we were handing in the completed passports.  

Neither my dear friend nor I won any of the prizes, even though there were over 80 and we totally deserved them ;)

The picture below is all I got at the crawl, and I'm excited to show you what it becomes as soon as I figure it out myself.

Ultimately we got the best thing out of the crawl --  A fun weekend with kindred spirits and new treasures, with memories that are worth cherishing for the rest of our lives.  I met people I may have not normally met, was reminded that young crafters do have a welcome place in the crafting community (as well as so many other people of all ages, genders, walks of life, and interests).  I was able to chat with fun and innovative people that will inspire me to create more in the months to come, and at the end of the day I can't wait for next year.

Stay sweet, stay crafty, and stay tuned.

Hibisc(yes)

I decided to try some more natural dyeing, and this time be a little smarter and put all of the leaves/flowers in an unbleached cheese-cloth pouch so I didn't have to fuss with getting them out of the fiber.

This time around, as you may have been able to tell from my cringe-worthy pun title, I decided to use hibiscus petals.

For this blogpost I'm simply going to talk about the pros and cons of natural dyes that I've found so far.  

Pros:

It has given me a bit of a new perspective on the multitude of uses everyday plants possess.  The more I researched which plants did what, the more I was surprised by what plants had to offer.  Bay leaves, for example, supposedly turn fiber yellow, and I would have never known that unless someone was dyeing to tell me that fact, or I started learning natural dyes myself.

  • Even though I trust a lot of non-natural dyes everyday, there's something that feels a little extra safe and clean about natural dyes.  
  • If I get splash up when I'm messing with the water and putting the fiber in, the dye is for sure washing out.  I could take my dear sweet time to put it in the wash, and would still have nothing to worry about.
  • The colours turn out subtle and pretty.
  • (If you're into this) there's something very enriching about realising how much work our ancestors put into dyeing their garments.  Think of the time, resources, and labour it took to make their clothing different colours, and investing what could be eaten (sometimes) into something that was mostly impractical.  That's a lot of dedication to make something nice for day to day life.

Cons:

  • Bold colours tend not to happen.
  • It takes a long time.
  • As nice as the natural dye agent might smell, adding wool fiber to that can often make it smell a little gross.  The people I live with are patient, but I've noted I should space out how often I do these dye pots just so I don't make other people's lives difficult and smelly.

Main takeaway:

Natural dyes can be remarkably fun, but going into the process you have to accept that the colour is probably never going to be what the water around it looks like.  It's a fun process, and if you like more mellow colours it's your dream boat, but if you're going for bold, you might want to go elsewhere.

For me, this outcome was really exciting and I have full intentions of using it in future projects, so you will absolutely be seeing this colour again in the future.

It's the perfect dusty rose colour that I can rarely ever find clothing in, and I think I would be a fool not to make myself something in this colour.

I hope this might help in future natural dyeing experiments, and as always- 

Stay sweet, stay crafty, and stay tuned.

Love Burns Brightest

One of the many new things that I've decided to try recently is pyrography.  

IMG_8075.JPG

I got a simple (and surprisingly inexpensive) set on Amazon, and shortly thereafter went to try it out.

The first thing I noticed is that the fun swirly and sweep lines I wanted to do were not something that I could do right at the start.  In order to get the tip of the tool to move smoothly enough to do designs, I had to turn the heat up to the max setting, and that made it so I had to move far more quickly than I really wanted to do with something that was so spectacularly hot.  

Along with my beginner mistakes, I made this incredibly demented star that serves as a nice reminder of how much progress I may have in-store for me as I keep practicing and doing my best to not burn myself or my house down.  

Another good thing to note about pyrography is that the smoke can be pretty serious!  I can't recommend highly enough that you wear some goggles if you have them, and to make sure that your face is tilted away from your project.  Even if you're wearing goggles, good practice would be to keep your face away from something so hot it scorches wood in a second's breath.  I fortunately didn't have any accidents on this first round, but I did lift a little too quickly at one point and saw a chunk of my face being smoldered away before narrowly avoiding myself.  So word to the wise, goggles and face tilted away.

Eventually the sweeping motions I wanted to try got a tiny bit easier, and finding the balance between being firm and yet fluid started to make sense to my hand as I worked to understand this interesting new art form.  Plus whenever I was feeling like I didn't know what to do, dots were fun and easy to make, so if all else fails I can just get really good at pointillism.

Also, of course, I had to try to do some writing and see what that was about, and decided to go for one of the great loves of my life.

I hope you enjoyed the little change of pace, and I hope to be sharing more pyrography with you all soon.

Stay sweet, stay crafty, and stay tuned.

Tara Maepyrography
Hidden Treasures

Many years ago on a lucky day in the middle of a meadow, I was gifted alpaca roving yarn.

This was before roving yarn had hit its big craze, so I had never seen anything like it.  

Luckily for older me, younger me had no idea what to do with it, so I safely tucked it away and waited for the day it would speak to me.  That day came.

I've made a hooded scarf a time before, and have one that my mother was kind enough to make for me when I was but a wee bit of a thing.  Two is certainly not enough when you meet the majesty that they entail. 

After finishing up a big ol' rectangle, and stitching it up the back (because yes the hood part is just that easy), I set out to turn some handspun alpaca yarn into the scarf.  

This alpaca for the scarf, by the way, was so soft that I would knit on this scarf just to relieve stress; it's so magical that it only makes sense that it would be part of a glorious hood to join me on many adventures.

My only qualm was that when I finished it, it was a tad short and it didn't look quite right for what I wanted.  

Fringe was the answer.  

With everything knitted and ready, I stitched the two magical beings together to form one wondrous creation.

Because of how bulky the roving yarn is, it naturally rolled a bit, and I decided to roll with it.  I left the edges unattached to the scarf, and proceeded to proudly start wearing it.

And just so you know- I've been collecting a myriad of fun and interesting new things to share with you, and have been getting quite distracted.  Meaning there are more fun and different things coming soon, and in the meantime-

Stay sweet, stay crafty, and stay tuned.

Tara Maeroving yarn, hooded scarf
Colours to Dye For!

At the beginning of this year I decided I would try my hand at dyeing, especially natural dyeing, as I've always been interested in it and wanted to give it a go.  So this week I got a good sized pot, a couple of skeins of white wool that I had spun up several months ago, did some research, and tested my luck.

For the first batch I decided to try out stinging nettle.  I did not measure how much because for this first round I just wanted to have some fun and see if it would actually work.  

The only regret I have is that I didn't use cheese cloth to keep the leaves in a confined place.  I thought by making it so that the leaves were free floating around that it would be easier to get the colours to work their magic, and while that may have helped, it was almost certainly not worth the hassle of all of the little itty bitty leaf chunks that appear to be forever entangled in this yarn.

That being said, it definitely made for some beautiful pictures and it was fun to look like I was making some of witchy and nefarious concoction on my stove top.  Life just gets so busy and stressful, it's sometimes the simple pleasures, like saying "boil, boil, toil and trouble" over a cauldron of fiber, that makes all of the weight of the day ease off.  

Another thing I learned during this process is that no matter how well the colour looks like it's taking in the pot, it's always good to hold it up and let the water drain out of a section to see what it really looks like.  There were several times where I thought it was the colour I wanted, only to find out there was barely any colour there at all.

Next pot, same mistake of not using cheesecloth, but useful for pretty pictures.

These are elderberries!  

The darkness that the elderberries gave to the water were especially deceptive in making my think that colours were taking more quickly than they were.  However, it did provide a nice reprieve as the stinging nettle ended up making my home smell like a hamster cage, and the elderberries had a lovely floral scent to them that did its best to mask the hamster-ness.  

For the dyeing process itself I put the water on a medium heat for both and let them sit on heat for about 4 hours, then left both skeins in the water overnight.  

As you can see, the stinging nettle really clings onto the fibers, but I'm not particularly upset as it was my own fault and they did produce a beautiful colour.

The elderberries created this lovely dusty rose colour, and were significantly easier to shake off than the stinging nettle.

Definitely be expecting more posts like this, as I had heaps of fun and learned a lot from this first round.  I am also planning on trying some non-natural dyes in the future as well -- the natural dyes were just the most enticing to start out with.

Stay sweet, stay crafty, and stay tuned!

Being Terrible

I'm going to be seemingly in the wrong place for what I'm talking about until part of the way through- so just trust me, I'll tie it all into craftiness.  

For our anniversary, my partner got me these beautiful rollerblades.  He did so because I have always raved to him how much I've loved the brief periods in my life where I got to use rollerblades but I've never had them longterm except for when I was a kid, and as a kid I was a little afraid to use them all that much because I saw people get pretty scraped up when doing any sort of skating (board, roller, or otherwise) and thanks to some pretty nifty instincts my brain told me that self preservation was better than cool tricks that could leave me in road-rash pulp.  

That being said, the last year I've been thinking about how happy I would feel while rollerblading when I managed to get my hands on a pair, and started thinking it's time to get back on the blades.  

IMG_7906.JPG

Which leads me to confronting something that I think many people have a hard time with.  Being utterly and unmistakably terrible at something.  Not just a little terrible, but laughably bad at something when you are working out the newness.  Because being a beginner tends to mean that it's not going to be pretty for the first little while.  Being a beginner means feeling foolish sometimes and working hard only to get slightly better results as time goes on.  

It's tough, but it's usually worth it, right?  Because why else would a person repeatedly make mistakes, subject themselves to bouts of frustration, or put themselves through the trouble at all.

Why else would I risk some nice and solid pieces of my person?  It's because I think rollerblading is fun, and even if I feel clumsy and foolish practicing now, one day I won't be awful at it. 

Hopefully.... 

IMG_7907.JPG

That's where this ties into crafting.  

Beginner projects tend to look like, well, beginner projects.  Working that hard for something, going through all those little fussy steps to figure out how it works, only to have something hideous and/or mediocre for the outcome feels defeating at times.  Because who wants to spend all the time and frustration, only to find it didn't turn out very well?  

The answer is I do, and you might be better off if you do too.  

IMG_7911.JPG

Being terrible is fantastic, because you suddenly have endless room for progress, and all you have to do is put in the effort.  Every moment you spend swearing at the (insert your favourite salty swear here) thing, you become better at that thing and better at life.  Life is about being REALLY awful at things until you're good.  

Look at infants, when they start walking they look like the most intoxicated, disjointed, and clumsy creatures that the world has seen, but soon enough they figure it out and turn into beings that don't even think about how to walk.  

When I first tried to hula hoop with my feet, I ended up slinging that hoop back at my face so fast and hard that I split my lip clean open, and it took WEEKS to heal, not to mention I had countless near misses where I nearly destroyed various items that had the misfortune of being in the same room as me.  Now I can hula hoop with my feet, while reading a book or typing up one of these blogs without even thinking about it.  

Yes, it's aggravating, and no I don't expect anyone to deeply enjoy working hard to not have things work out, but it takes time.

IMG_7912.JPG

Often in these blog posts, especially in my first couple of months, I tried to avoid admitting when I messed up, because I was embarrassed.  Subconsciously I felt like if I didn't do it right and beautifully the first time, I would be somehow lesser because of it.  I would feel like I was less deserving of having a crafting blog and less suitable to be doing any of this in the first place.  I was wrong in my opinion, and now challenge myself to tell you all about some of my mistakes, especially if I feel like it can be beneficial.  That being said, I still get frustrated when I'm not as good at this as I think I should be.

When that happens, I do one of three things.

1:  I talk to my family, friends, or partner- they're all used to projects making me into a deranged lunatic and have gotten good at talking me down from going wild with some scissors and/or a rotary blade.   

2: I go onto the Facebook group page of the crafters I grew up around, and read about their woes and triumphs over projects, because they are inspiring enough individuals to post both, to be comforted by their fellow crafters and also to remind the rest of us that even some of the most extraordinary crafters make mistakes.

3:  I watch something funny, because if I'm having a hard time laughing at myself for getting so worked up, laughing at something else can be a good starting point.  It puts a little more good in my world (and mood) and helps me remind myself that I can't take myself so seriously.

IMG_7782.JPG

I knew I was becoming a great crafter when I wasn't ripping out my projects because they were "wrong" but because I told myself I could do better the next time, and I believed it.


Stay sweet, stay crafty, and stay tuned.

Tara Maebeginners
Sweet Sweet Bunny Snuggles

A couple months ago I spun up some angora fiber and, because it was a test of patience in itself, I decided to set the beautiful fruit of my labor to the side until I could cool down and figure out what it was truly meant to be.

The more I played with it, the more I realised that it's one of the softest things I've ever felt, and it should definitely be something that I can easily snuggle into, and won't get ruined.  

With that decided, the lovely fluffy yarn told me that it wanted to be a cowl that would be close around my neck, and would be done and undone with some nice dark wood buttons.  

My decision was a wise one too.  Every person I showed this to had the instinctual reaction to rub it on their face (don't worry, all family and close friends).  The pattern I did for this is:

Row 1 (Right Side):  Purl, Knit, Knit, Purl

Row 2 (Less-right side):  Knit, Purl, Purl, Knit

Row 3 (RS): Purl all the way across.

The photos I've taken are mostly of the wrong side because I ended up liking the look of the pattern on the back side rather than the front.

To demonstrate the buttonholes I thought I would use yarn that wasn't so fluffy so that you can actually see what's going on.  I considered just sticking with the angora fiber for the example, but thought better of it because just about everything looked exactly the same as it had before until it was completely finished.  

So all I did for the buttonholes was cast off stitches in the middle of the row which for my project I did a smaller hole to match the buttons, but a large one here to make it more visible.  

On the way back towards the stitches I casted off, I knit up all the way to the last stitch on the left side.  At that point I went to start another stitch as if I was going to work my way back on the side I just knitted across (meaning the stitches you see to the right are completely left alone).  Instead of working my way back I took the loop that would be the new stitch on my right needle, and twisted it around and back onto the left needle.

To simplify, the old stitch that normally slides off of your needle when doing a stitch remains on the needle it started, and you twist the new stitch onto the needle with the old one.  

Doing this casts on in a clean, tight way in the middle of your row.  

Only do as many stitches as you cast off, because it will absolutely look too small when you're finished casting on, but by the next row you have the perfect amount.  

Note:  I knit left handed and right handed while doing this so I'm always facing the correct or "right" side, and never flip to the wrong side.  If you do not knit this way, flipping your project around to best suit your own style will be fine so long as with the side you're facing you use knit stitches to cast on, that way it will all look pretty much the same.  

Here it is, all finished and ready for me to snuggle into as if I'm an owl, and it is my delightful plumage.  

Stay sweet, stay snuggly, and stay tuned.

Dreaming of Stripes and Cold Weather

I'm going to jump right in.

First off, this green and brown fiber started out being something that I planned to spin up and let hide in the bottom of a tote of crafty business since something about this mint chocolate chip ice cream concoction was hideous to me.  This picture even makes it look like it's a little nicer than it was, but oh how it made me cringe.  

It had spent YEARS in my fiber collection, gathering dust and loneliness because I couldn't stomach the thought of spending time and effort on spinning it up, even if that meant it would become a lesser grossness.  

Why did I make this part of what I packed all the way up to Oregon with me?  I think some strange part of my brain that I have yet to understand knew that there was something greater lurking beneath the surface of this thing.  

The part of my brain that thought it was worth bringing home was right.  It turned into one of the most beautiful greens I've ever seen in my life, and I proceeded to dash a bit of pepper on my words as I ate them, promptly followed up with a slice of bittersweet humble pie for dessert.

This next fiber, however, had my heart from the beginning.  It's my favourite colour of grey and the caliber of softness made it so that it was all that I could do to keep myself from curling up and sleeping on it (not that it's actually big enough for that, but I can dream).

The fact that this one spun up beautifully didn't surprise me in the slightest.  

That's when my brain started scheming.  This all started out as me spinning up various bundles of fiber that had been sitting and gathering dust, but when I laid the finished skeins next to some other white yarn I had made, I realised they were destined to become one glorious scarf, where they could live happily together.

So I greedily took some of the fiber I had initially been planning on dyeing, spun it up, and stacked it with the other two so they could become well acquainted while I decided what to do with them.

I decided on a nice and simple seed stitch.  I had never done seed stitch before, oddly enough, and thought this would be an excellent time to start.  The hand-spun yarn became quite bubbly looking with the pattern, and still managed to feel soft and cozy.  

This was one of many travel projects I had while visiting my family for the holidays.  

It grew longer and longer as I chipped away at it while watching movies, waiting in line while running errands, and whenever I got a spare second, like I do.

At this point though, I had used up the last of my white yarn for the stripes, and was hopelessly stranded without those poor little balls of yarn that lay in wait at home.  I had no way to continue without the white so I folded up all the progress I had made, stuck it in the bottom of my backpack, and promised this poor project that one day it would be reunited with the other balls of yarn and I would finish what I started.

Lucky for us (mostly me), I eventually made it all the way back home, and finished what I started.  The scarf measures a perfect 100 inches (or 8 ft and 4 inches), which is exactly right for being able to wrap the scarf around twice while still having enough length to let it drape down.  

All of the white stripes decided to hide in this next picture, but I wanted to show off the scarf in a place where it was well loved and appreciated, as I just so happened to finish it right in time for a bit of snow to grace the land around me.  

Photo credit to my talented partner.

Photo credit to my talented partner.

Stay sweet, stay crafty, and stay tuned.

Hats Off To My Partner

I am lucky enough to be with someone who is endlessly supportive of the odd and lovely life I love to live (excuse the alliteration, I get excited).  He is kind enough to spend hours upon hours of his personal time editing my blog posts to make sure that I sound coherent, he listens as I ramble to no end about all of the things I want to create and all of the alpacas I want to snuggle, and he's part of what makes my crafterlife so sweet, so obviously he's going to have a plethora of knitted and quilted things that serve as my wee crafty heart’s expression of love and appreciation;

This one happens to be a hat.

IMG_7714.JPG

He picked out his own yarn, and I snagged the dark grey from my stash because I went through all of the careful deliberation of making a pattern only to realise I would need 4 different colours as opposed to 3.  Lucky for me, the grey was a welcomed addition.  

When first attempting the fairisle for this hat, I tried the method of having separate bundles of the colour I was working with in the back so that each section would have its own ball.  I was hoping that by doing this that I would prevent any undesired bunching or tightness from running the secondary colour (blue) behind the primary (purple).  I found that I had a hard time not relaxing my hands enough on my fingerless gloves, and wanted to steer clear of that same mistake.

That being said, after getting most of the way through the trees with the separate balls method, the work actually became more messy and ended up with disastrously bad tension so the secondary stitches would either be completely invisible or loose and sloppy looking.  To solve this I ripped it all back and ran the blue behind each purple stitch like I did with my hooded scarf. 

IMG_7716.JPG

It was exactly what I needed to do.  The pattern stayed crisp this way, and running the secondary colour behind each stitch kept it from getting too tight and losing the flexibility it had.  

Running two colours behind the primary colour was a little more challenging but still worked out, and ultimately kept the pattern bright and clear as I finished up the last of the multi-strand work.  

I did however run into some speckling from where the 2 secondary colours were poking through which I fixed by taking a darning needle, and some of my leftover purple yarn, and looping around each speckled spot to pull it back and give the room in between the stitches a purple base.

By the time I had finished the pattern, I was worried the hat was a little too long to be practical, so I tried a couple of decreasing techniques to cast off more quickly, e.g. decrease by two stitches as six set points, decrease by many fixed points, and adding decreasing points after having already set fixed points to decrease from.  These all ended up making too drastic of a change, and made the top of the hat lumpy and sad.  After the third time ripping it back, I made peace with it being a more elongated hat, only to find out that the length made it the perfect size -- go figure.

So at last it's finished, and I've finally knitted something for my partner to help keep him warm in the chilly months we still face, and hopefully for many more years to come.

Thanks for reading.

Stay sweet, stay crafty, and stay tuned.

Tara Maefairisle, knitted hat