IMG_1612.jpg

Blog

Posts tagged knitting
Forest Grove Shawl

So often I find that the projects that end up on the needles are the ones that I feel like my heart is bursting out of my chest to have. I know at this point that if I’m anything short of this ridiculously ecstatic state, the project will almost certainly never get finished.

Lucky for me, there is an endless number of beautiful things to knit, and amazingly talented people like Mara Catherine Bryner will come out with patterns like this Forest Grove shawl so I can continue to obsess over what’s possible with two sticks and yarn.

IMG_4329.JPG

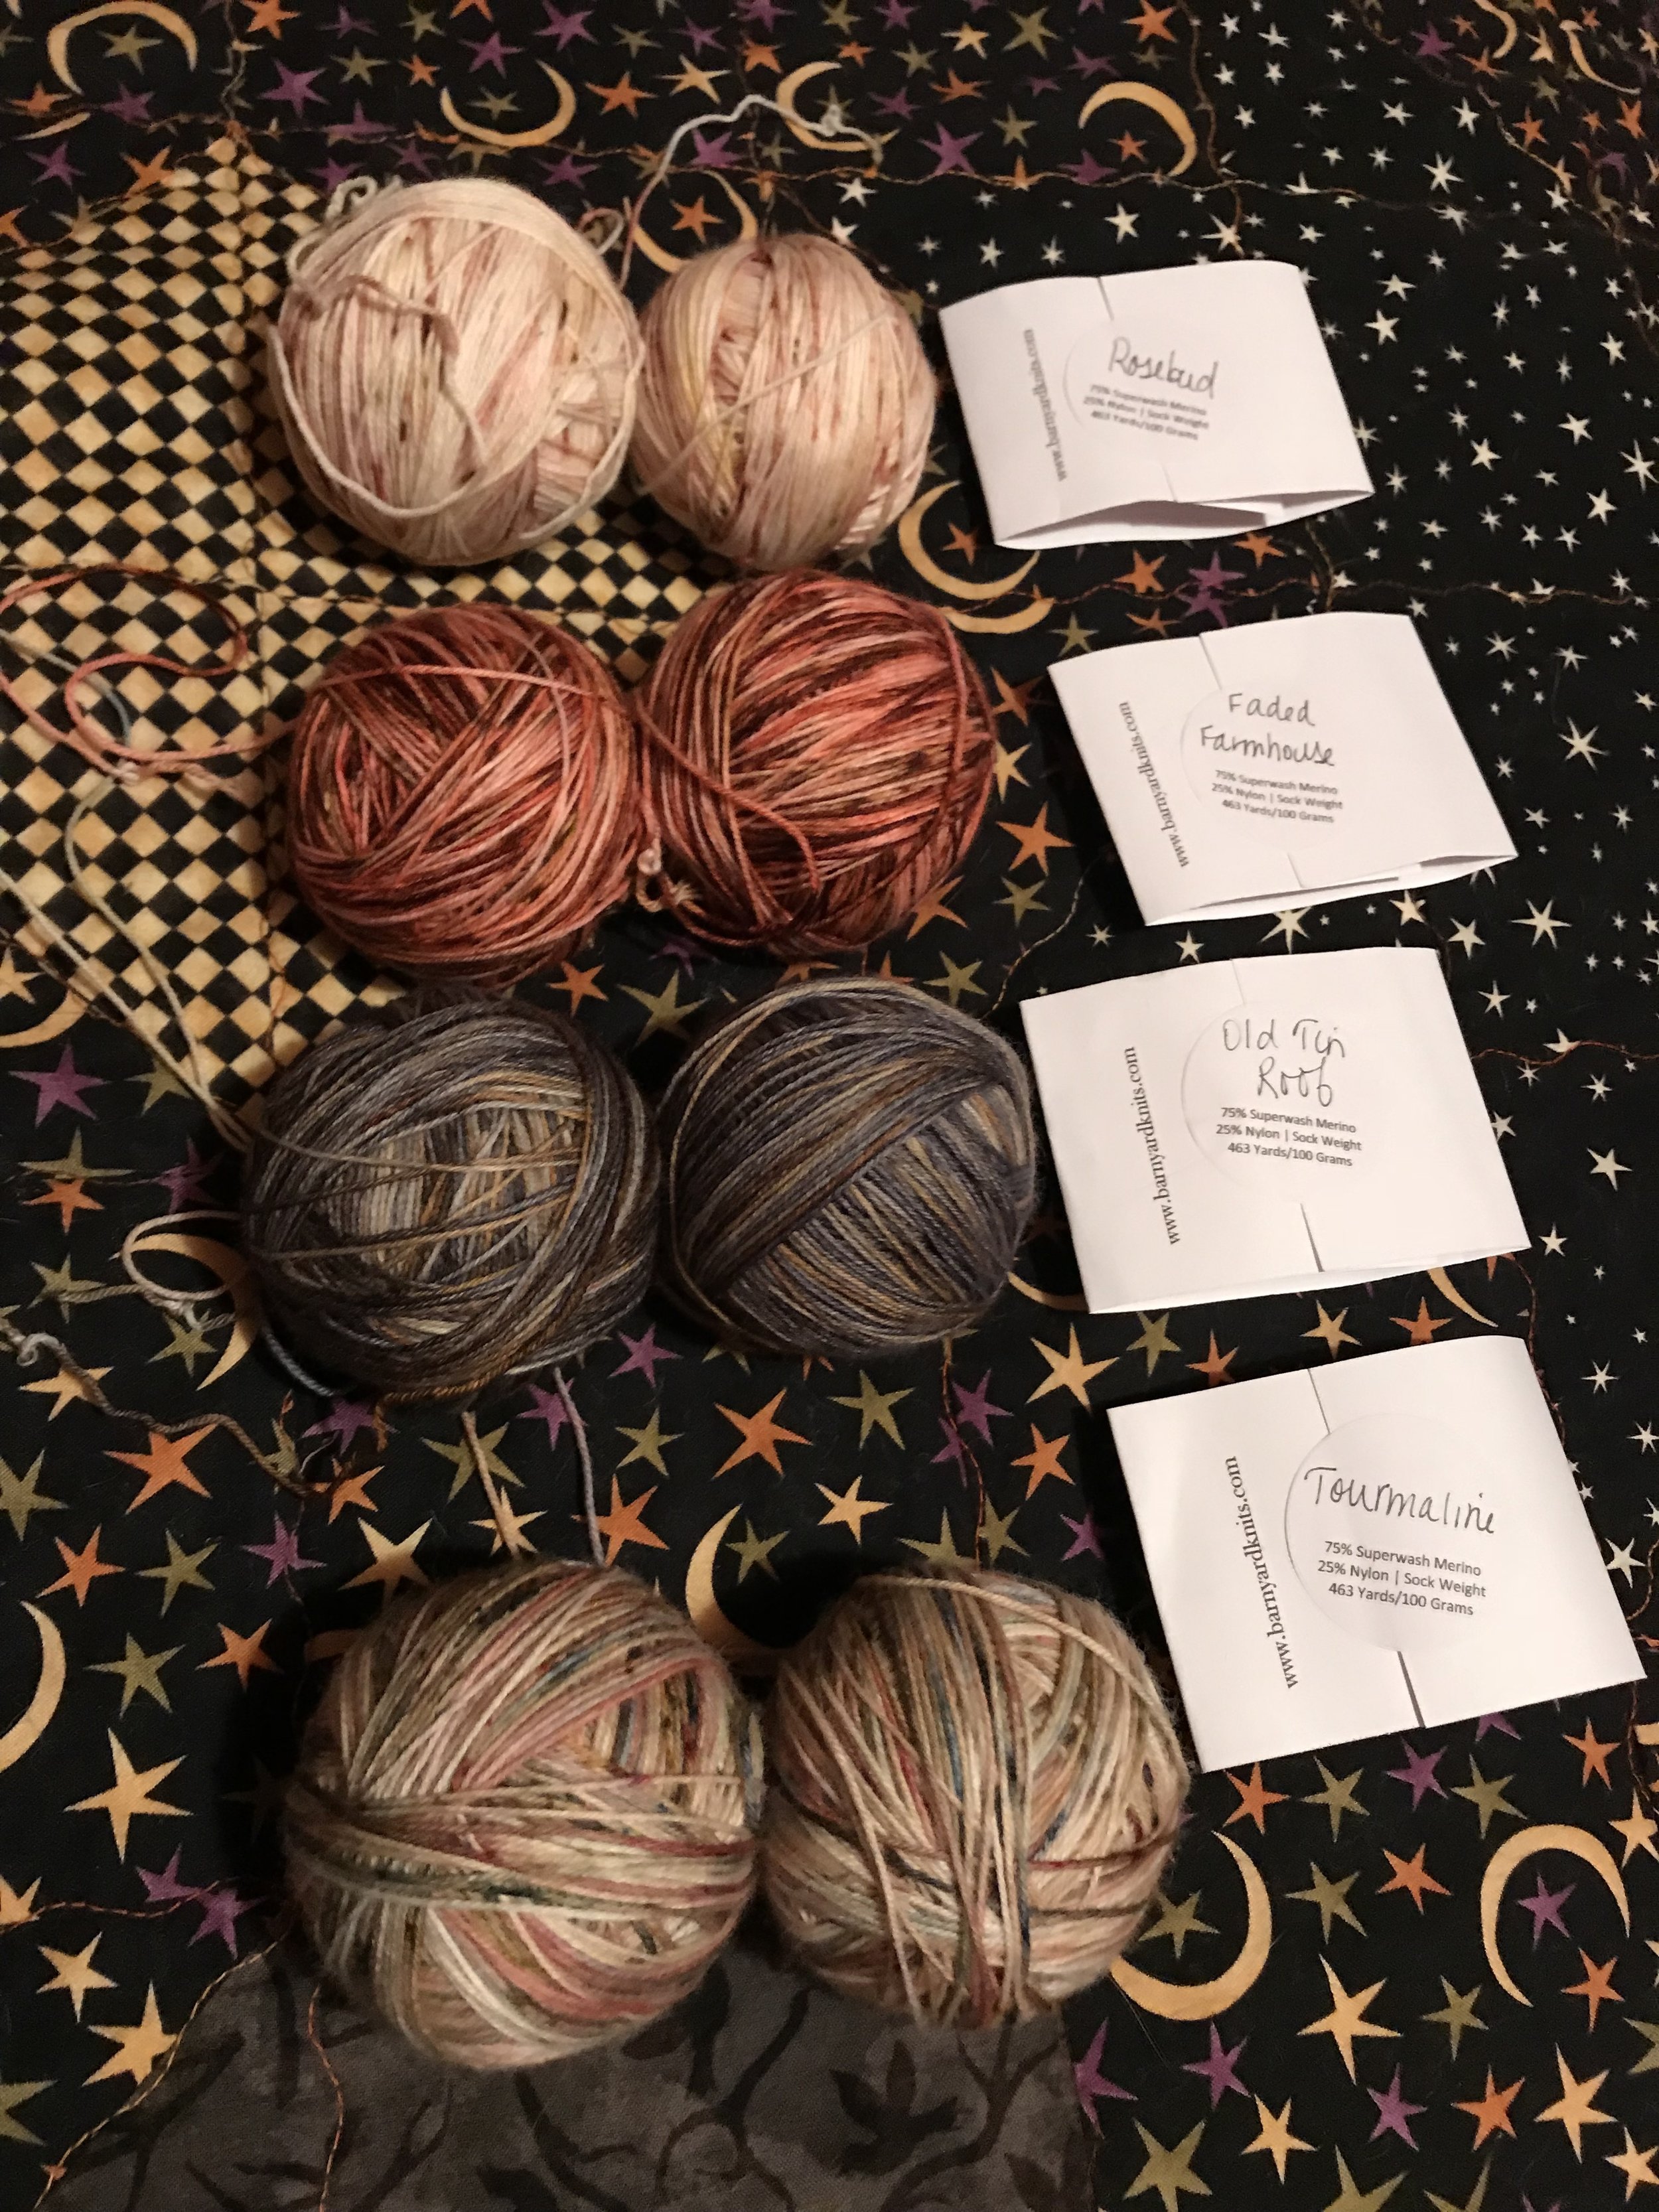
And obsess I did. Knotty Lamb (one of my favourite yarn stores) was cruel enough to post heaps of pictures for this pattern and their kits of Barnyard Knits’ yarn to make the shawl exactly like Mara Catherine Bryner’s, taunting me for weeks. I could have gotten angry at them, I could have written hate mail to Knotty Lamb, I could have used every social media platform I have a presence on to vent my malicious feelings, but instead I did one better. I ran home, bought the kit and checked the tracking number 5 times a day until it got here.

That will show them.

IMG_4368.JPG

The rule I had for myself was that I had to finish Rock Creek before I could start Forest Grove, even though by the time I had the yarn I was having dreams of the completed creation, that I would so delightedly wear.

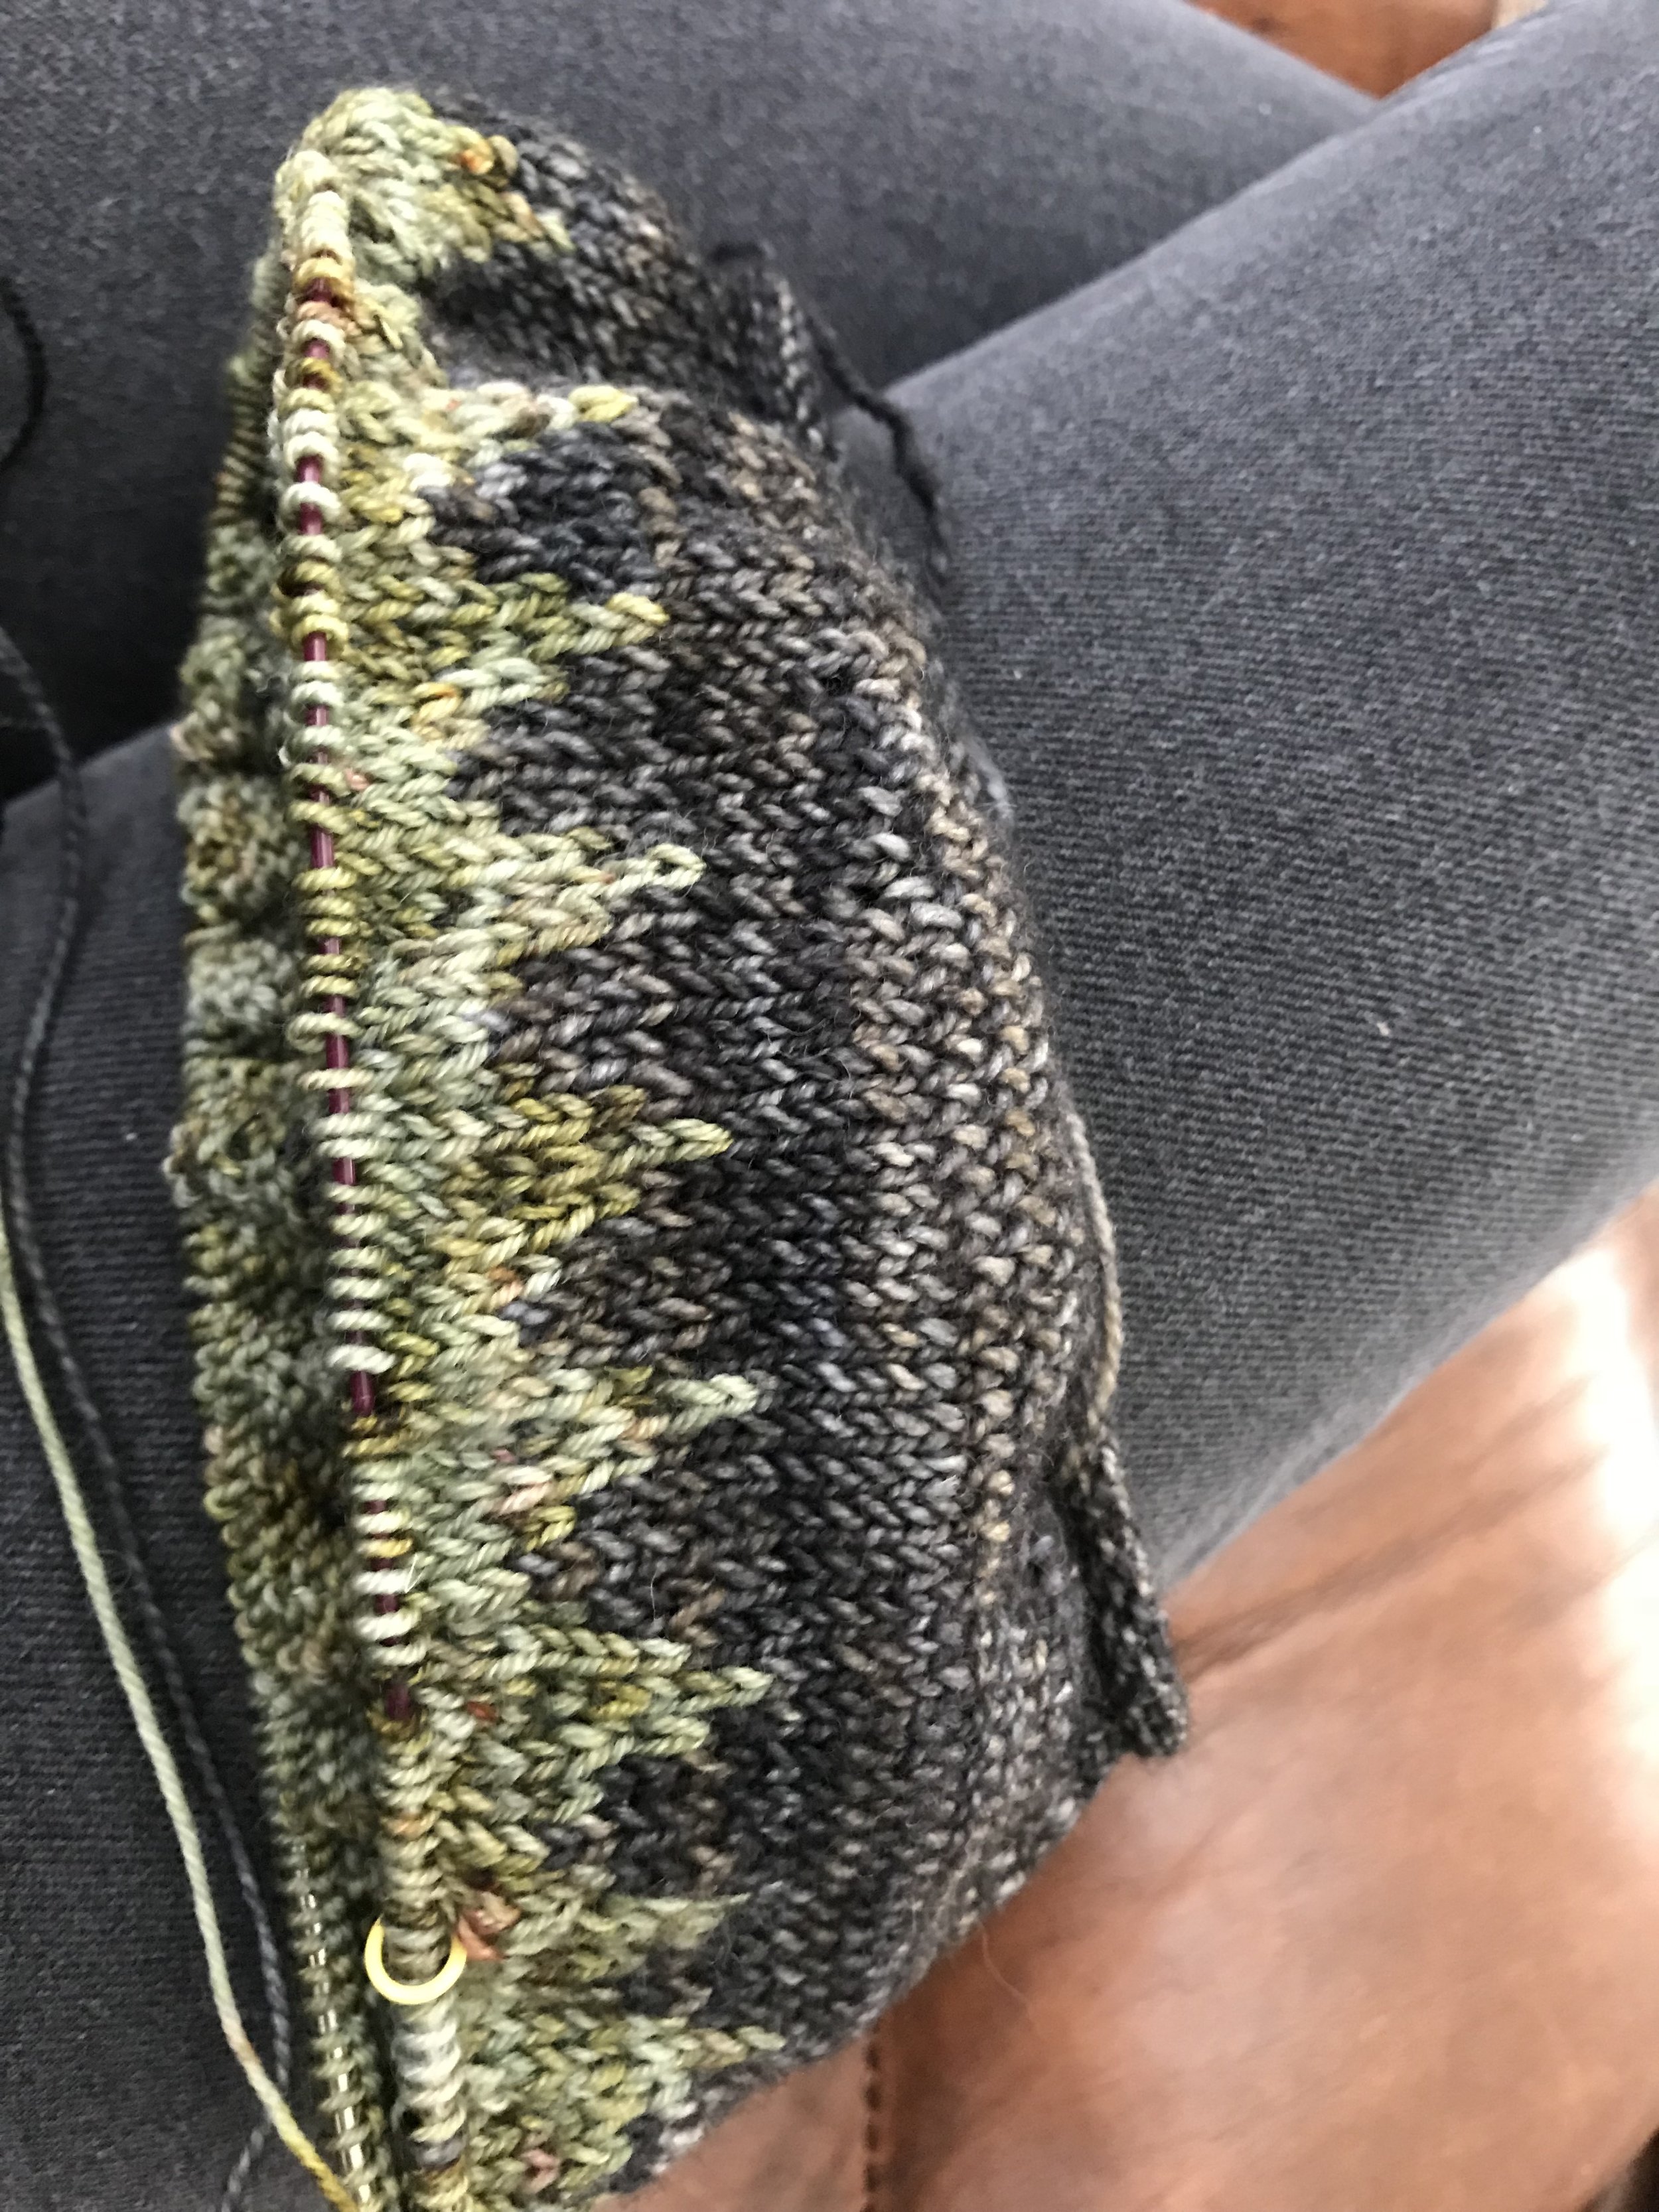
Once I started the shawl there was no stopping. Every spare second was spent working on it, and helping it grow into the lovely thing I had only seen it pictures and dreamed of.

This is also the first time I’ve ever used a kit for a pattern I was working on. Usually I’m eager to work with a colour palette that I thought up and arranged, but the original concept was so beautiful that I for once I didn’t want to deviate from it.

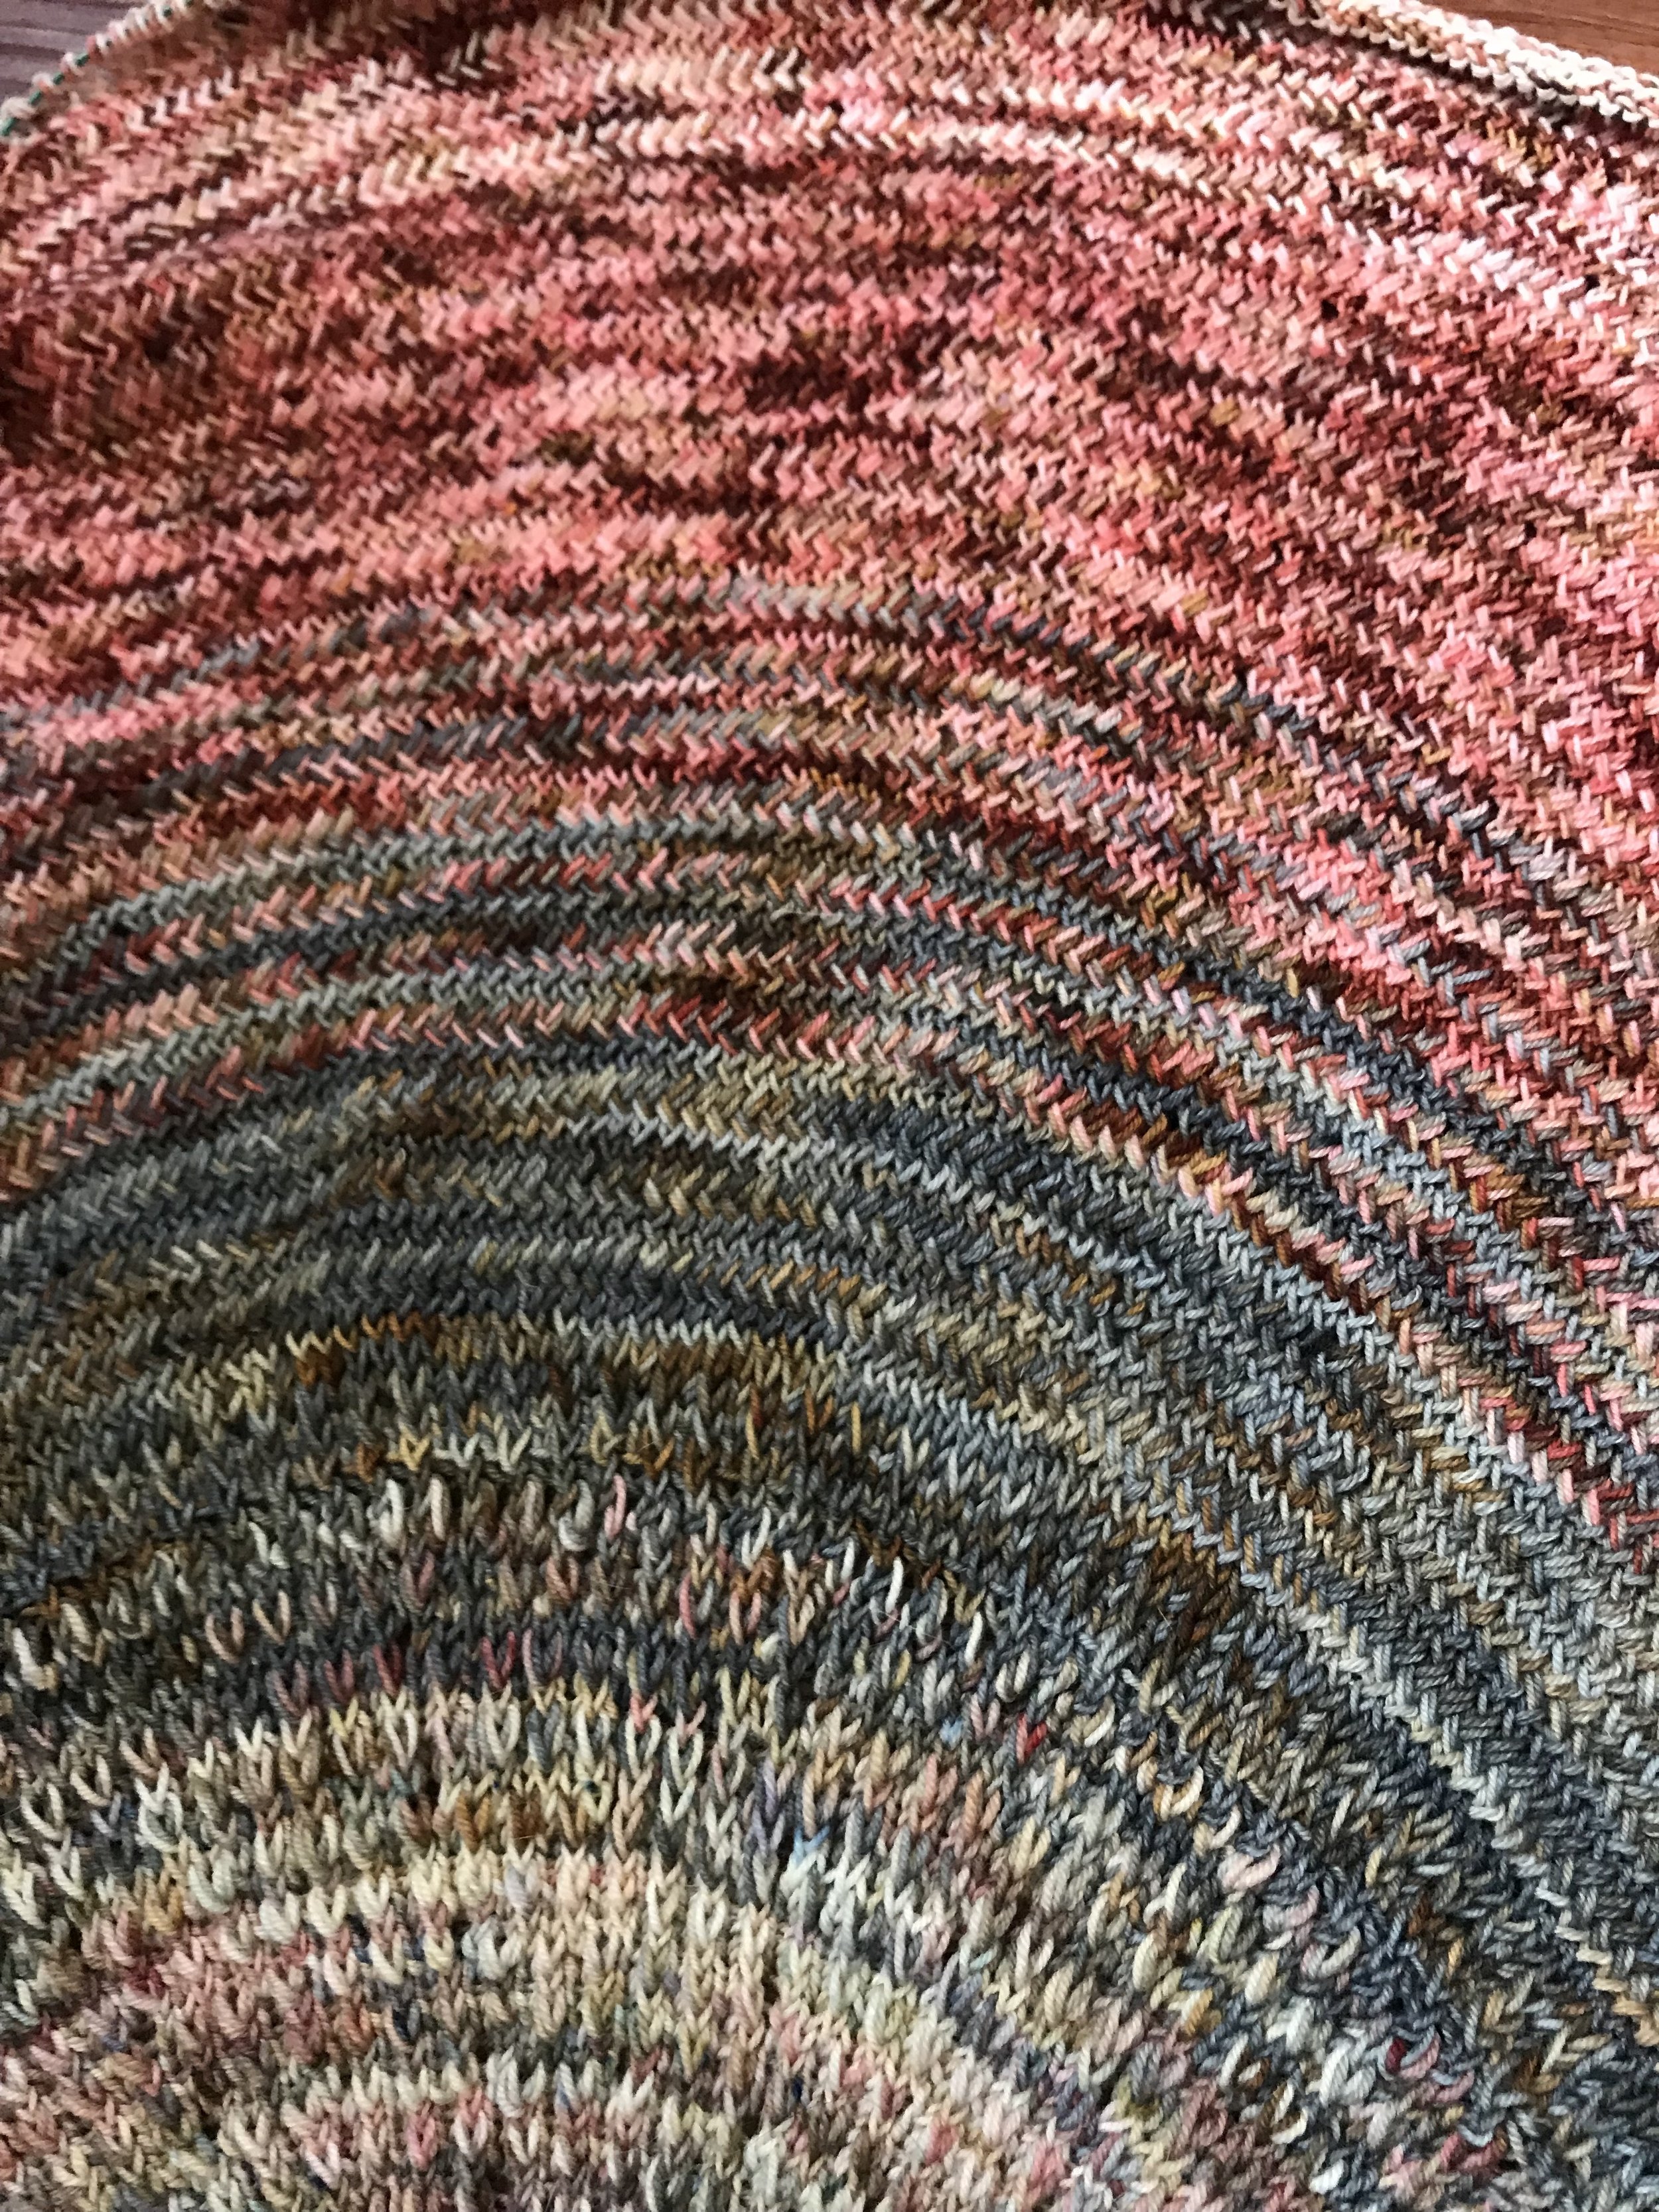
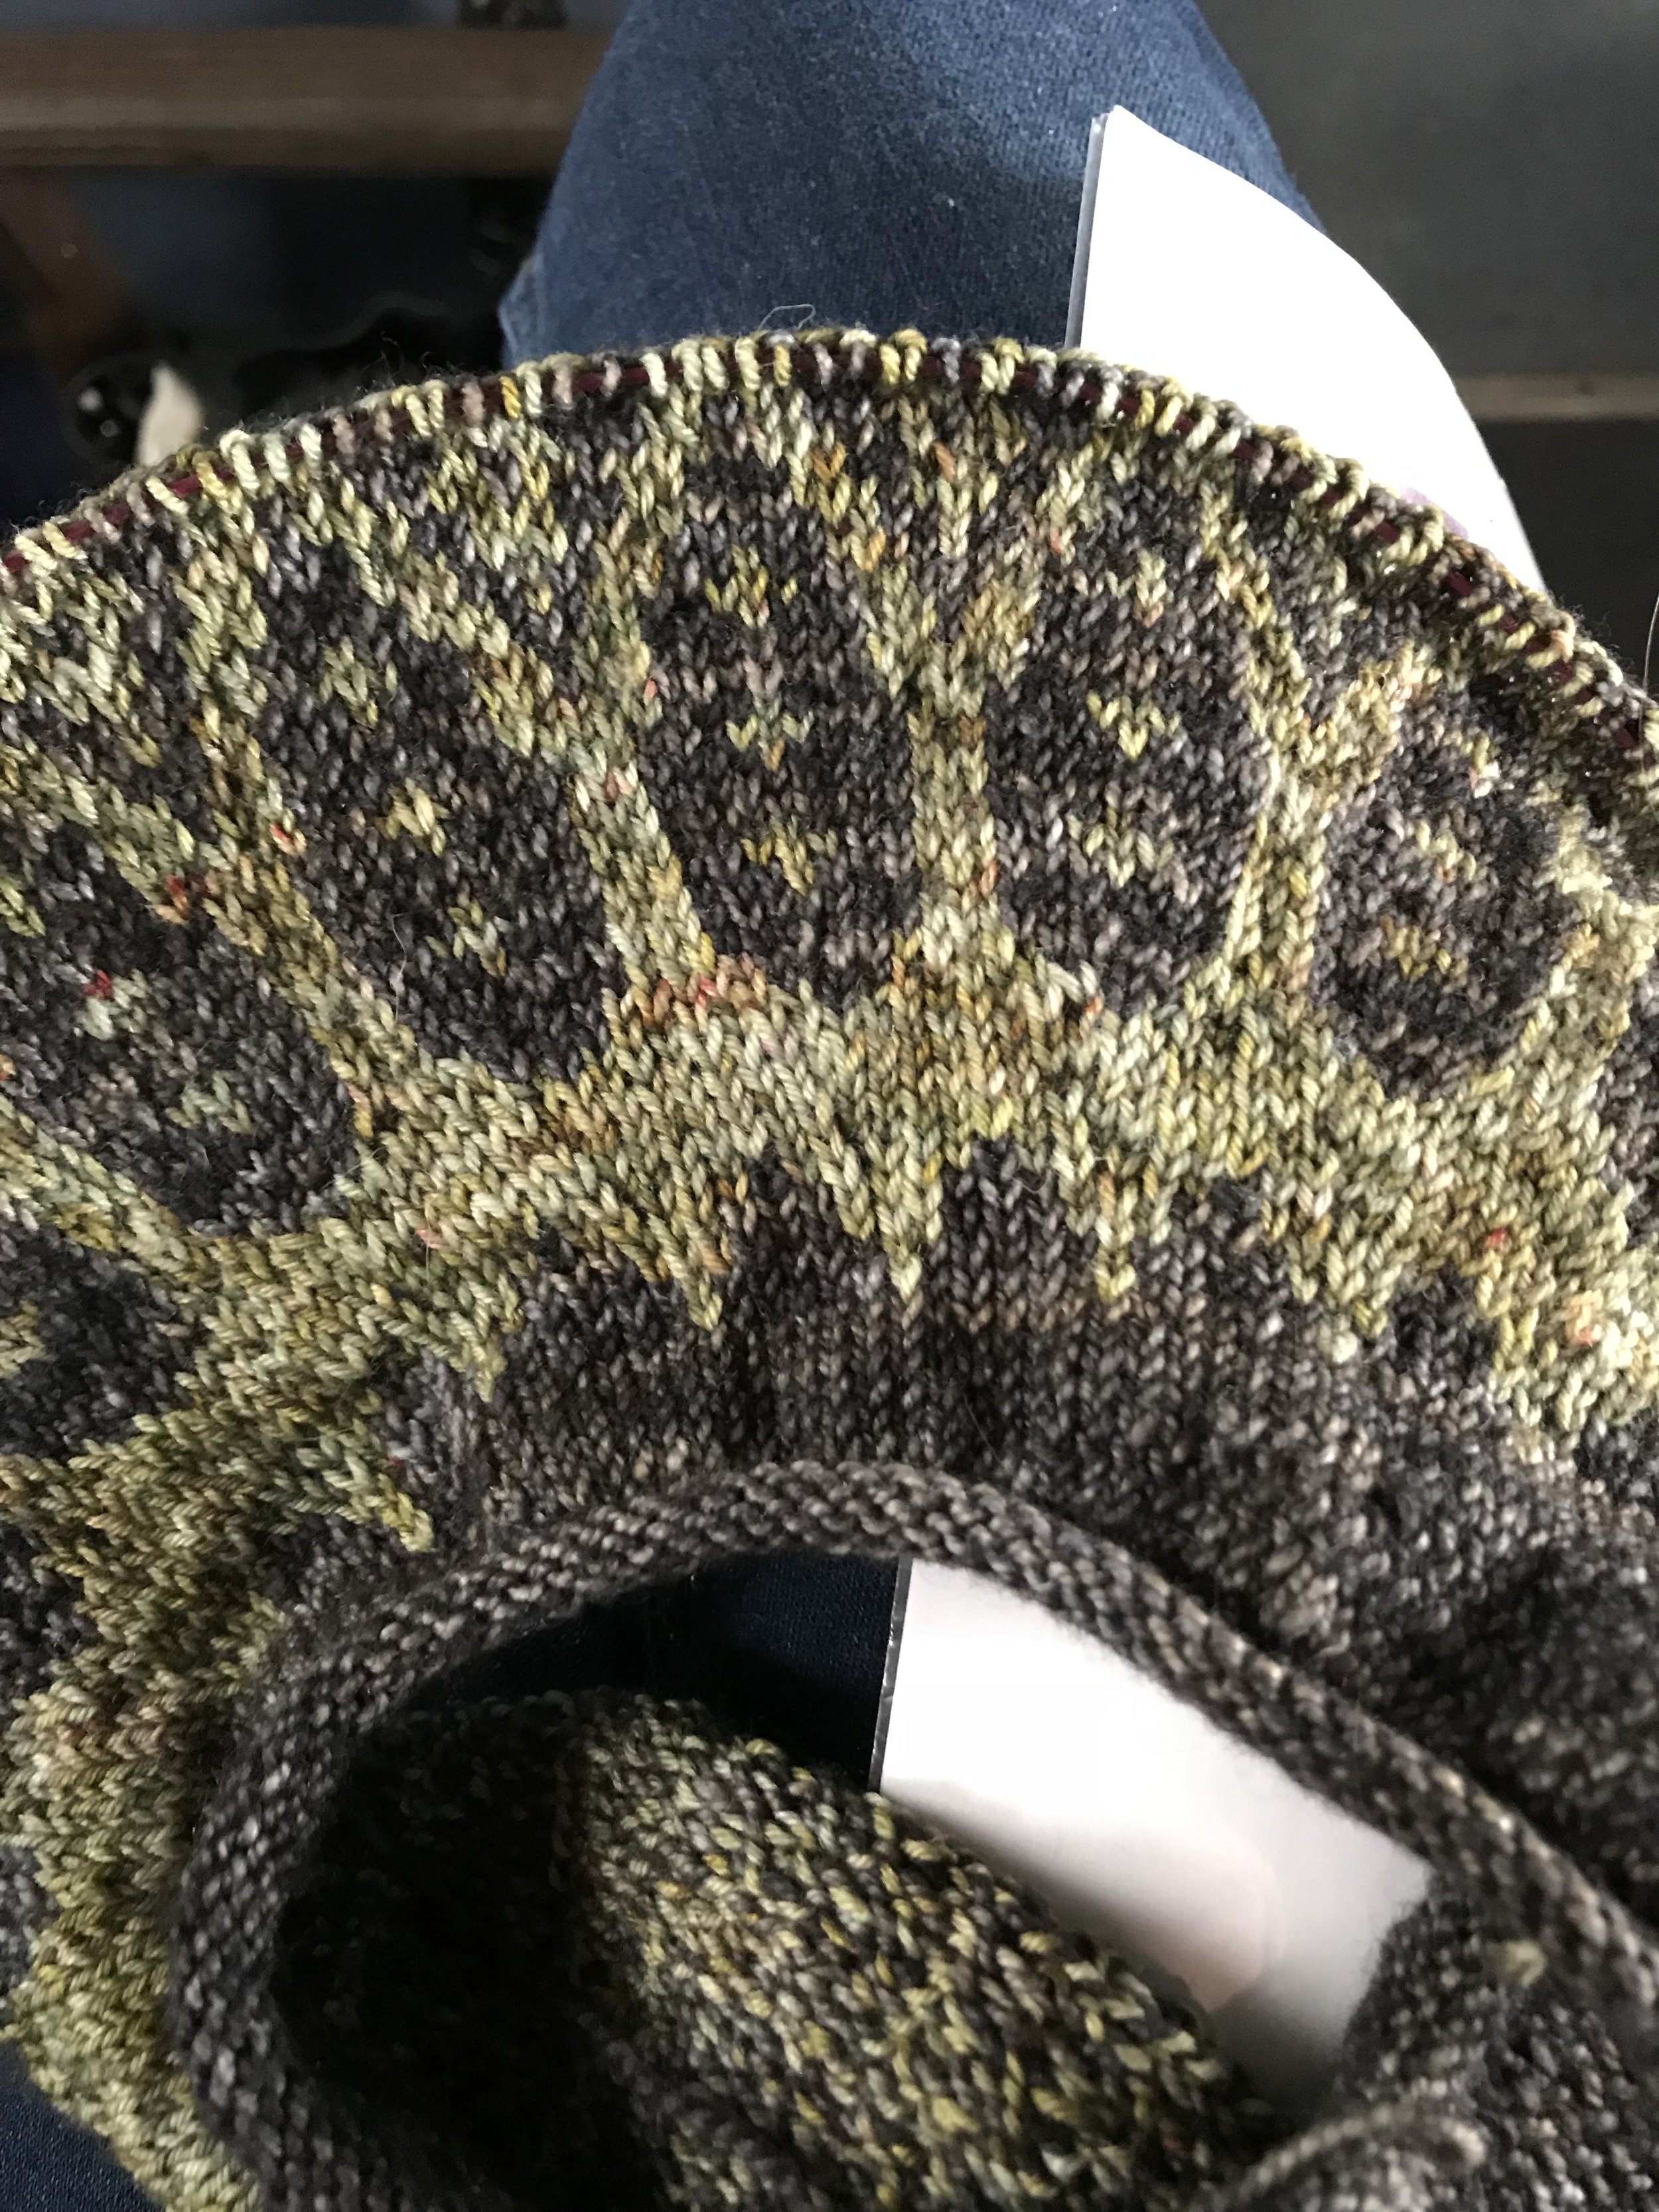
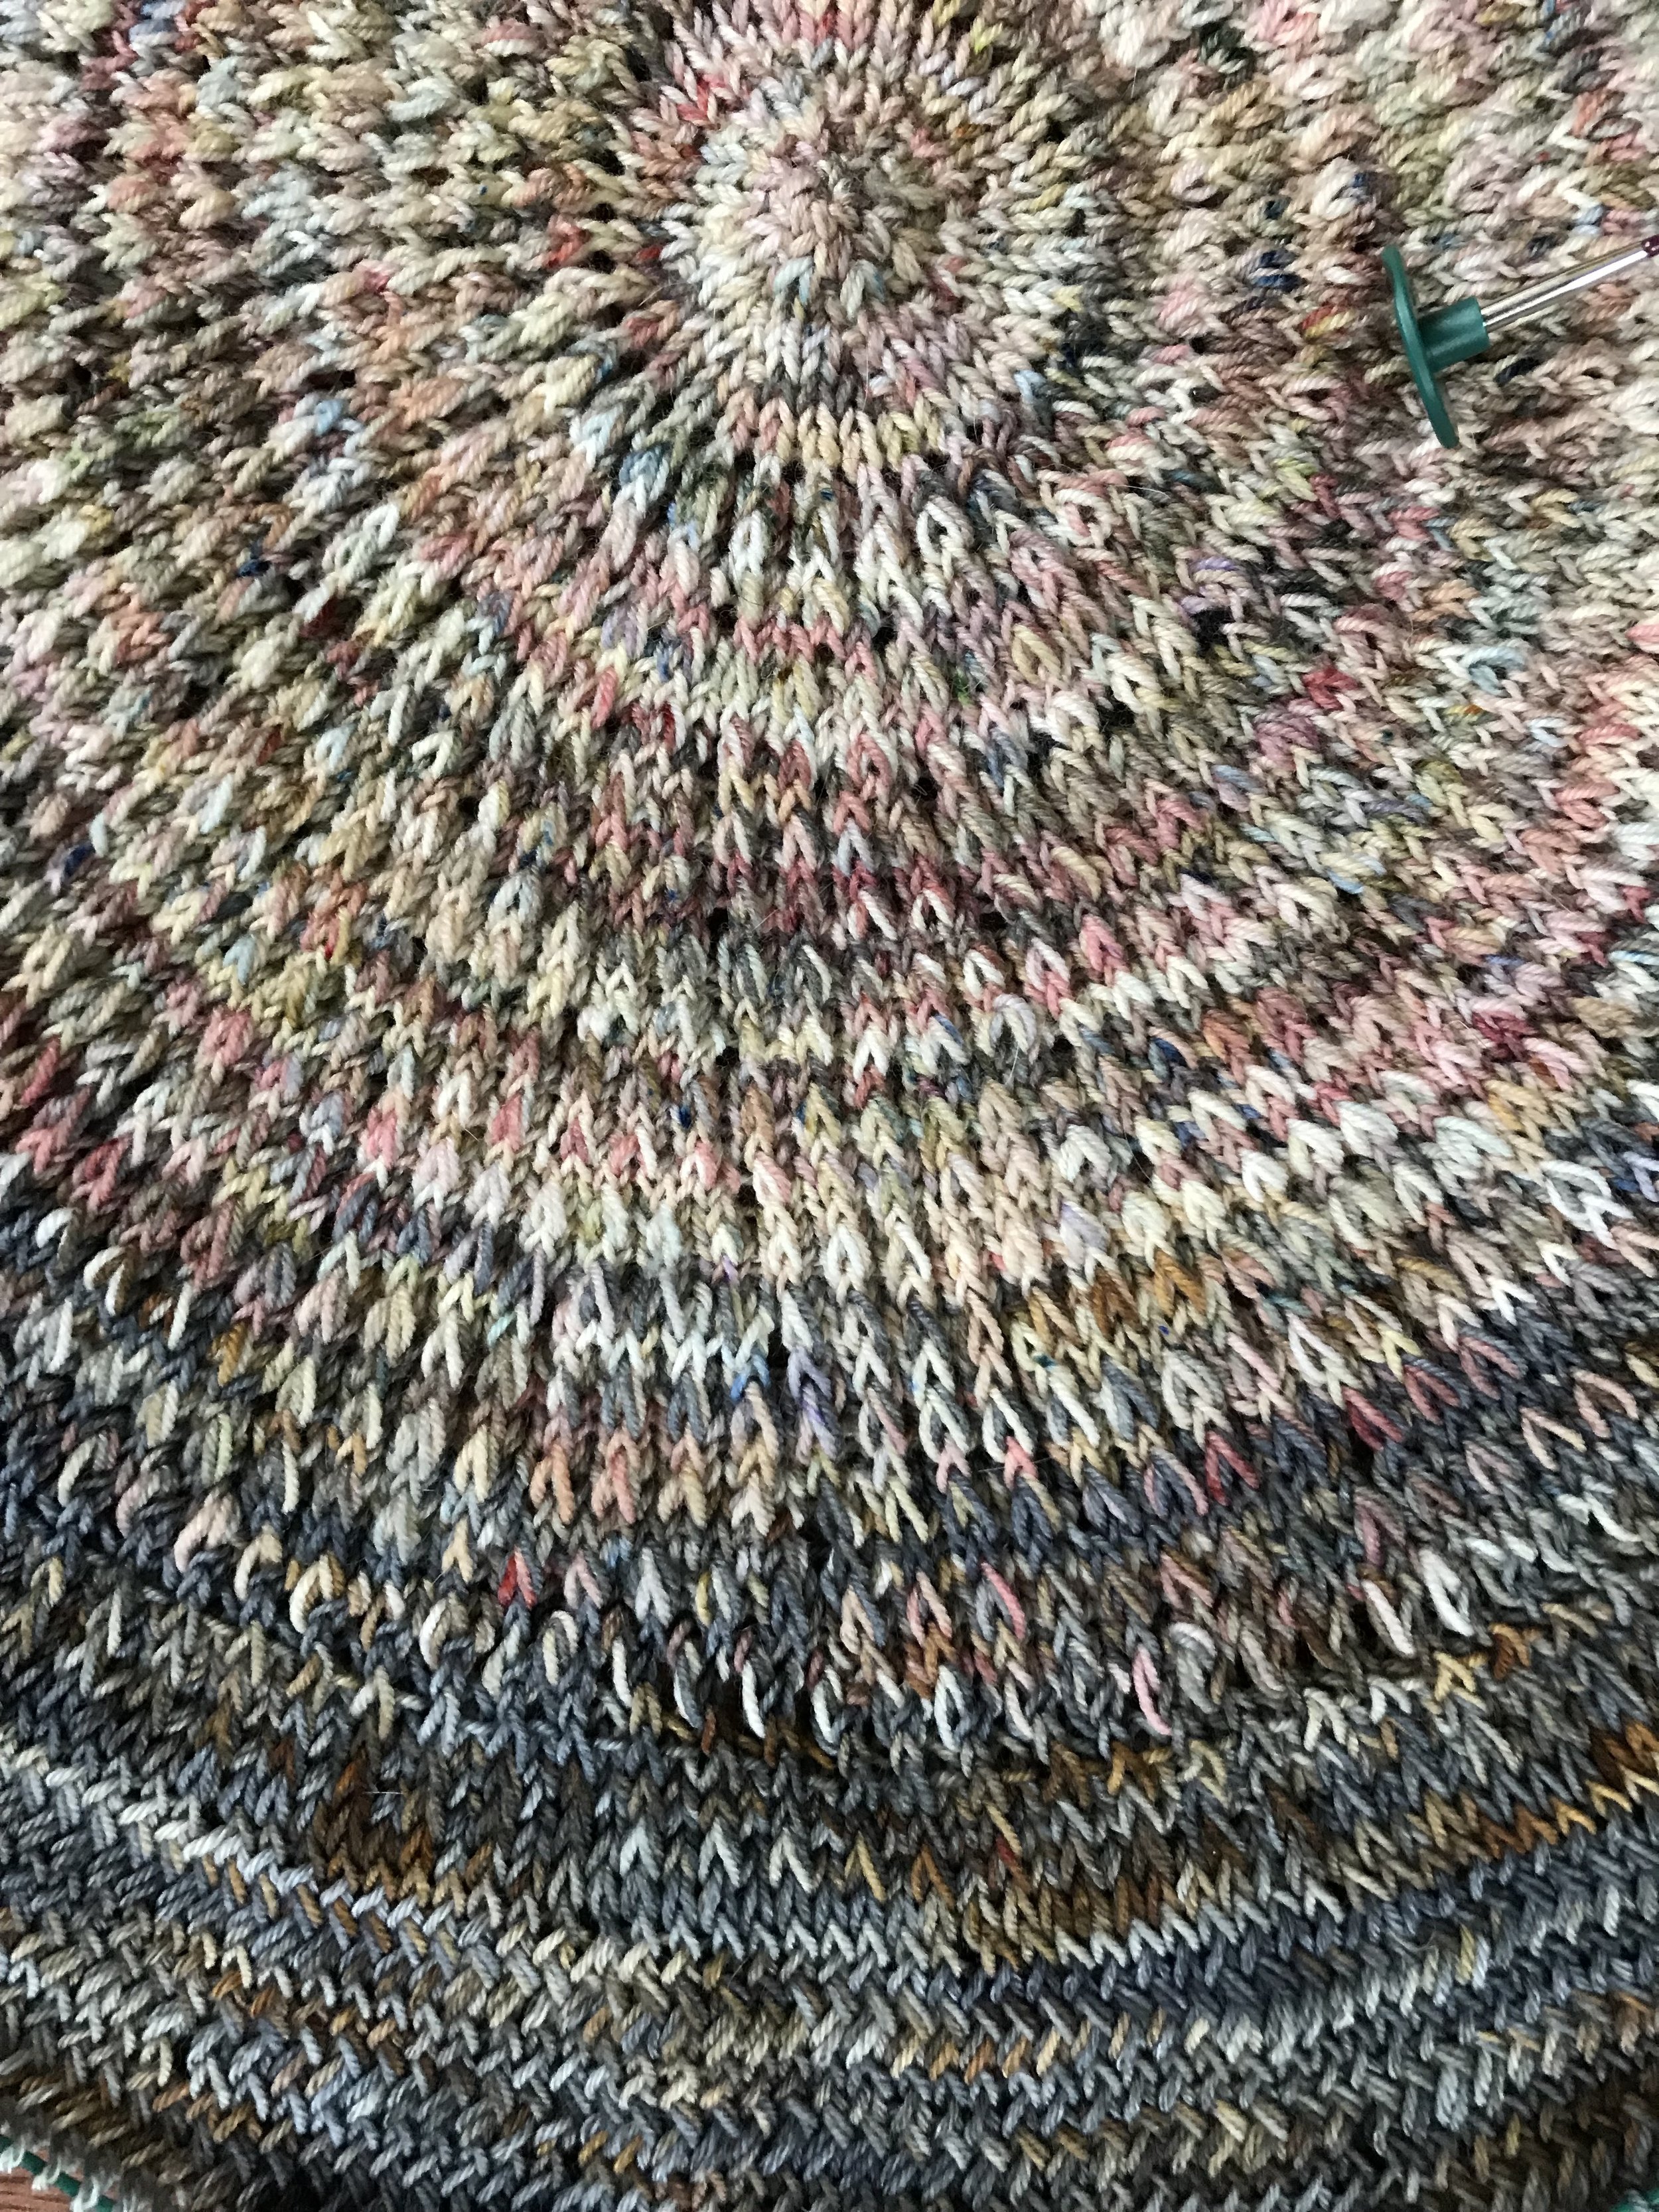
And I’m glad that I did so, these colours play so well together, and since they’re all from Barnyard Knits, they have all the right tones to meld together. I noticed in particular that the transitions between colours looked natural and smooth.

This is also obviously good planning and coordinating on Mara Catherine Bryner’s part, as each of these yarns have hints of every other yarn present so you do get this near seamless look in the pattern.

IMG_4635.JPG

As I got lost in the love of these colours, soon the shawl was completely knit up, and just about as beautiful as I hoped it would be.

IMG_4666.JPG

I think the only thing I don’t love is that I did my I-cord edging a wee bit too tightly. Which I plan to remedy in the future by allowing those side stitches to be looser, instead of pulling every stitch tight like I always do.

As for with this shawl, I plan to aggressively block it until it realizes how badly I want it to lay flat. I feel that with enough determination I will show it the error of its ways.

IMG_4732.JPG

No matter how successful the blocking is though, I still love it and find it beautiful.

IMG_4700.JPG

(And so does this lovely cat)

Until next time-

Stay sweet, stay crafty, and stay tuned.

Sipila

The second I saw Caitlin Hunter of Boyland Knitworks start posting about Sipila, I knew that I would have to make the sweater for myself.  

IMG_2703.JPG

Originally I was going to do the classic black and white that the original sweater was done in, but upon arrival at Knotty Lamb in Forest Grove, Oregon I knew that this green with dashes of pink/red was the soul mate to this project.  

IMG_2744.JPG

This sweater has been across most of the continental United States with me.  It has been with me on a train from Utah to Chicago, Illinois, then on a drive from Utah to Oregon.  It has been with me on a kayaking adventure when trekking a beautiful lake with my brothers.  

It has been with me on kayaking adventures, as my brothers and I, along with some dear other people, voyaged across a lake some lazy Sunday afternoons.  

IMG_2907.JPG

This sweater has also been what's on the needles as I make all of these huge life changes.  

This sweater, in a way, has been my active metaphor for all of the progress I've been making with changing my life.  Yet when it got to the last sleeve's cuff, I stalled for days on end.  I kept reminding myself how close I was to finishing it, and somehow managed to keep pulling away from that last inch and a half of cuff because it was yet another end.  

Much like making difficult decisions in life, even if you know it's for the best or your own happiness, ending things is a challenge.  I've only been working on this sweater for 2 months and some change, yet it feels like a part of my soul.  Giving it a conclusion made me realize how many things I am closing the chapter on as I leave Oregon.

I couldn't let that hold me back though.  

Change is daunting, but also invigorating.   Change allows for new and better things to come into your life and can be the catalyst for happiness and fulfillment.  

IMG_3412.JPG

It would be ridiculous to leave this sweater on the needles just because I was anxious about things ending.  Sipila deserves better than to be something that was never seen all the way through.  

IMG_3413.JPG

So today I powered through the uncertainty, and cast off a sweater that makes me realize how far I've come in the last 2 years as a knitter.  This sweater can now not only be a symbol of progress, but also a symbol of all the good that can come of following through things even if it's difficult.  

Stay sweet, stay crafty, and stay tuned.

More Cases and Some Teaching

Last week's blog post went over the steps of how I made the needle case for my single point needles.  This week I made another case for my circular needles, but I thought it would be boring if I talked about the same thing back to back for my posts, so instead I'm going to show pictures and talk about teaching.  Because as crafters, we often come across the woes and joys of teaching other people new things.  

For the last few weeks I've been teaching Kindergarten-5th grade kids about life on a farm on an actual farm.  The program I'm a part of teaches kids, including kids who are food-insecure, where vegetables and fruit come from.  I teach the soil module, and it's all sorts of lovely now that I actually know how to teach children and have come to terms with the fact that kids will simply enjoy playing in dirt.

Knitting everywhere I go lands me with a lot of questions and interest.  From strangers to friends, people constantly ask me what I’m doing and what I’m making.  Most recently my knitting caught the eye of one classmates.  He had asked me several times throughout the term if I would be willing to teach him, and each time I told him I gladly would.  It made me happy that I live somewhere where men feel welcomed to crafting, even though culturally it has been so female-dominated.

So I'm here to tell you about what I learned, not from crafting, but from teaching.

When it comes to kids, it's so important to be as hands-on as possible and show no fear (they can smell it from a mile away).  

Adults on the other hand need a little more wordiness with their demonstration.  

With both, though, there are so many things to remember in what it means to share an understanding of something.  

IMG_7309.JPG

For one, people need to get their hands on what they're working with.  Don't be afraid to put a pair of knitting needles in a beginners hands and let them make mistakes, or give a kid a pinch of soil and ask them what they see.  There is endless value in letting people experience what they're trying to learn from, and words can often only go so far, and don’t just expect people to make mistakes but let people make mistakes; it's only natural and can genuinely help the learning process.  

Secondly, what you do is amazing.  When you are teaching someone just about anything new, understand that the more energy and love that you have for that subject, the more engaging it will be and the easier it will be to learn. Passion is contagious.  Anyone can drone on for what feels like eternities, but the best teachers make us feel like they're bringing us in on something special.

Lastly, remember when you're teaching that the facts of your world are not always the facts of the students’.  I learned from the kids on the farm in particular that sometimes things can seem impossibly clear and obvious, but for someone on the outside it's completely opaque.  The easiest and plainest steps are unknown to the newcomer, and that has to be appreciated.  Being gracious about the student not knowing or understanding is one of the best ways to make them feel safe learning from you.  

Now to explain this project.  I wanted a circular needle holder specifically for a long time.  Circular needles in particular just get so unwieldy and messy when they don't have a proper place to be, and circular needles happen to be my favourite things to knit on -- probably because they are what I learned how to knit on.  

This case has all the slots I wanted along with a tie in the middle to secure any of my cords for my interchangeable needles, because when I make something, I don’t start until I have about 80 notes on how it would be perfect for what I want.

Both with teaching and new projects, I find it's always wonderful to enjoy the growth that they bring.  There were so many things that were made much simpler in this case by having done the last one, and every day it gets easier to teach people.  

It's all about practice, positivity, and pressing on -- even if it's daunting or difficult.

Stay sweet, stay crafty, and stay tuned my dear ones.

There's Something Crafty Afoot...

Socks are this strange beast that seem to rarely have good instructions.  I wasn't too terribly concerned about any particular part except for the heel.  I've never made socks before, and thought that maybe reading a blog or two, or watching some youtube tutorials would be my solution in figuring out what exactly I needed to do.  

14 blogs and about 8 videos later, I found that for whatever reason every single one of them skipped the part that shows or explains the actual turning of the heel.  I went to the knitting for idiots websites and still wound up with nothing.  Yet, upon visiting my parents this summer and griping about the nature of the mysterious heels to my mother, she sat me down and explained the simplicity of it all in a few short sentences.  

If you or someone you love has been a victim of void or confusing sock patterns, for the most basic of explanation, then you've come to the right place- I'm going to talk it through.

It's finally getting to the seasons I usually dress for- Autumn and Winter, so I decided to make some fun fall socks out of this glorious orange and brown yarn, along with the leftover grey and white from my stag fingerless gloves.  


I worked on both of the cuffs at the same time so that I would have an even distribution of the orange yarn to be sure that each cuff could be as long as possible.

I did a classic knit 2 purl 2 for the cuff to make sure that it would have a bit of grab, because few things infuriate me like having my socks constantly slipping, and this way it will also look nice if I fold them over and have them poke out of the tops of my boots.  This yarn is a little too beautiful not to share just a smidge. 

After several days of working on these lovely cuffs, I came face to face with the beast.  The heel.

To make the heel flap, I took half of my stitches and knitted a rectangle that would fit my heel.  It ended up being quite small as I have wee elf feet.  

Sadly though, my first attempt at turning the heel was heinous.  As you may be able to see, I have some weird gaping going on, and felt like I couldn't decrease stitches fast enough in order for the sock to actually fit my foot.  Frustrated, and slightly defeated, I called upon my partner for words of encouragement, and proceeded to rip it back to my heel flap to try again from there.  

This wasn't a time to quit.  People need good socks and they need the knowledge of how to make them.

IMG_6468.JPG

The second attempt was far more smooth.  Each needle had 20 stitches on it, so to shape the heel, I left 15 stitches on either side of the heel flap, and created a center needle with the remaining 10.  

IMG_6478.JPG

I knitted back and forth on the center needle, picking up the stitches from each of the sides for every row, and combining the outer-most stitch from the center needle with the stitch I just picked up from the side needle (knitting two stitches into one).  This created a seam and folded the sides in, since I was always taking the stitch that was closest to the center needle's stitches.

IMG_6482.JPG

From there, I picked up the end stitch from each row on either side of my heel flap with two new needles, and continued to knit all the way around again- decreasing stitches as needed to make it the right circumference, without decreasing so much that it would create gaping like my first attempt.

This is the part that mentally I had a hard time wrapping my head around when there were any sites that I could fine to explain it well.  Though, as soon as my mum described this, it made perfect sense- and as an anthropologist, I'm glad I can find at least one missing link in life.

IMG_6486.JPG

The rest was simple enough, as I just knitted in the round, and constantly decreased for my narrow narrow feet.

IMG_6494.JPG

Finally, I finished it off with a nice and pointy toe to suit my particularly pointed feet, and reminded myself to call my mother when she's back from vacation so I can thank her for making this so much less painful than it could have been.

IMG_6498.JPG

I'm typically always going to thank you for reading this, that's my sign off because I like to make it clear that I care about the people reading this.  I care that people take the time to read through my triumphs and failures with the crafting life, and hopefully take some sort out of amusement out of my whole circus.  I try to thank my partner often for the love and support he provides when ripping out projects breaks my heart and makes me want to put the project in the corner, but I would also like to thank you.  It's easier to get back on the horse when I feel like I can make something good of it for other people, as well as myself.  It's easy to be annoyed with myself and sometimes even just walk away, that gets a lot harder when I go back on my word with people.  So thank you for your time, you patience, and all of that morale support that gets me through the sad little moments that I have to pull it back or break out the seam ripper.  All of you help to make it worth it to start again and see it through. 

Take care.

Staggering Results!

Oh deer...

I have finally come to Fair Isle knitting.  I've always been enchanted by it, and here I am now- working on the bust of a stag and trees in fingerless glove format.

The design I've used is based on one that I found on  braceletbook.com.  I took the pattern and altered it a bit to fit more of what I was looking for, and then designed a very basic tree shape.

I transferred and designed the tree for my patterns on stitchfiddle.com, which ended up being endlessly useful, as it has a function that allowed me to select which row I was focusing on and highlighted it while dimming everything else but still leaving it visible.  This is probably old hat to most everyone else, but I was plum thrilled to not have to keep making various marks to know where I was at.


Curled under my Halloween quilt, I chipped away at the first fingerless glove. Despite a couple of hang ups in figuring out my own rhythm with multiple strands, it started to come along quite nicely.  

I did quickly realise as I was knitting along, however, that knitting as tightly as I normally like to was both my greatest ally and greatest foe.  Keeping the stitches tight made sure nothing was disproportionate to the rest, yet pulling either of the strands too tight would make it so that I would end up with unfortunate puckering and a lack of stretch around.  I found though that carrying the non-active strand consistently behind the active strand helped keep me from feeling like the non-active was too loose.  I did this by twisting the two strands so that the non-active would be caught with the active, but as I created the stitch, only the active would show.  


The dark grey is the active strand while the white is the non-active.

Pulling Only the active strand through.


Only the dark shows.


Yet the white is close and makes it so that I don't shred these within a couple of months because I keep getting my fingers stuck in big loops.  

The end result of this strange adventure of Fair Isle was elating - it was remarkably satisfying to be able to turn the blocked-out pattern that I had adjusted to fit my wishes into this beautiful, and incredibly soft, creation.


I've found that what I love most about quilting, knitting, spinning, et cetera is that I can create all of the beautiful things I think of.  It's an expression of the soul and grants me the ability to give myself something I want.  I can take something I think is beautiful, and make it into something unique that holds that same beauty while being something that’s entirely my own.

Thank you for reading, and stay tuned for more projects!