IMG_1612.jpg

Blog

Sea Queen

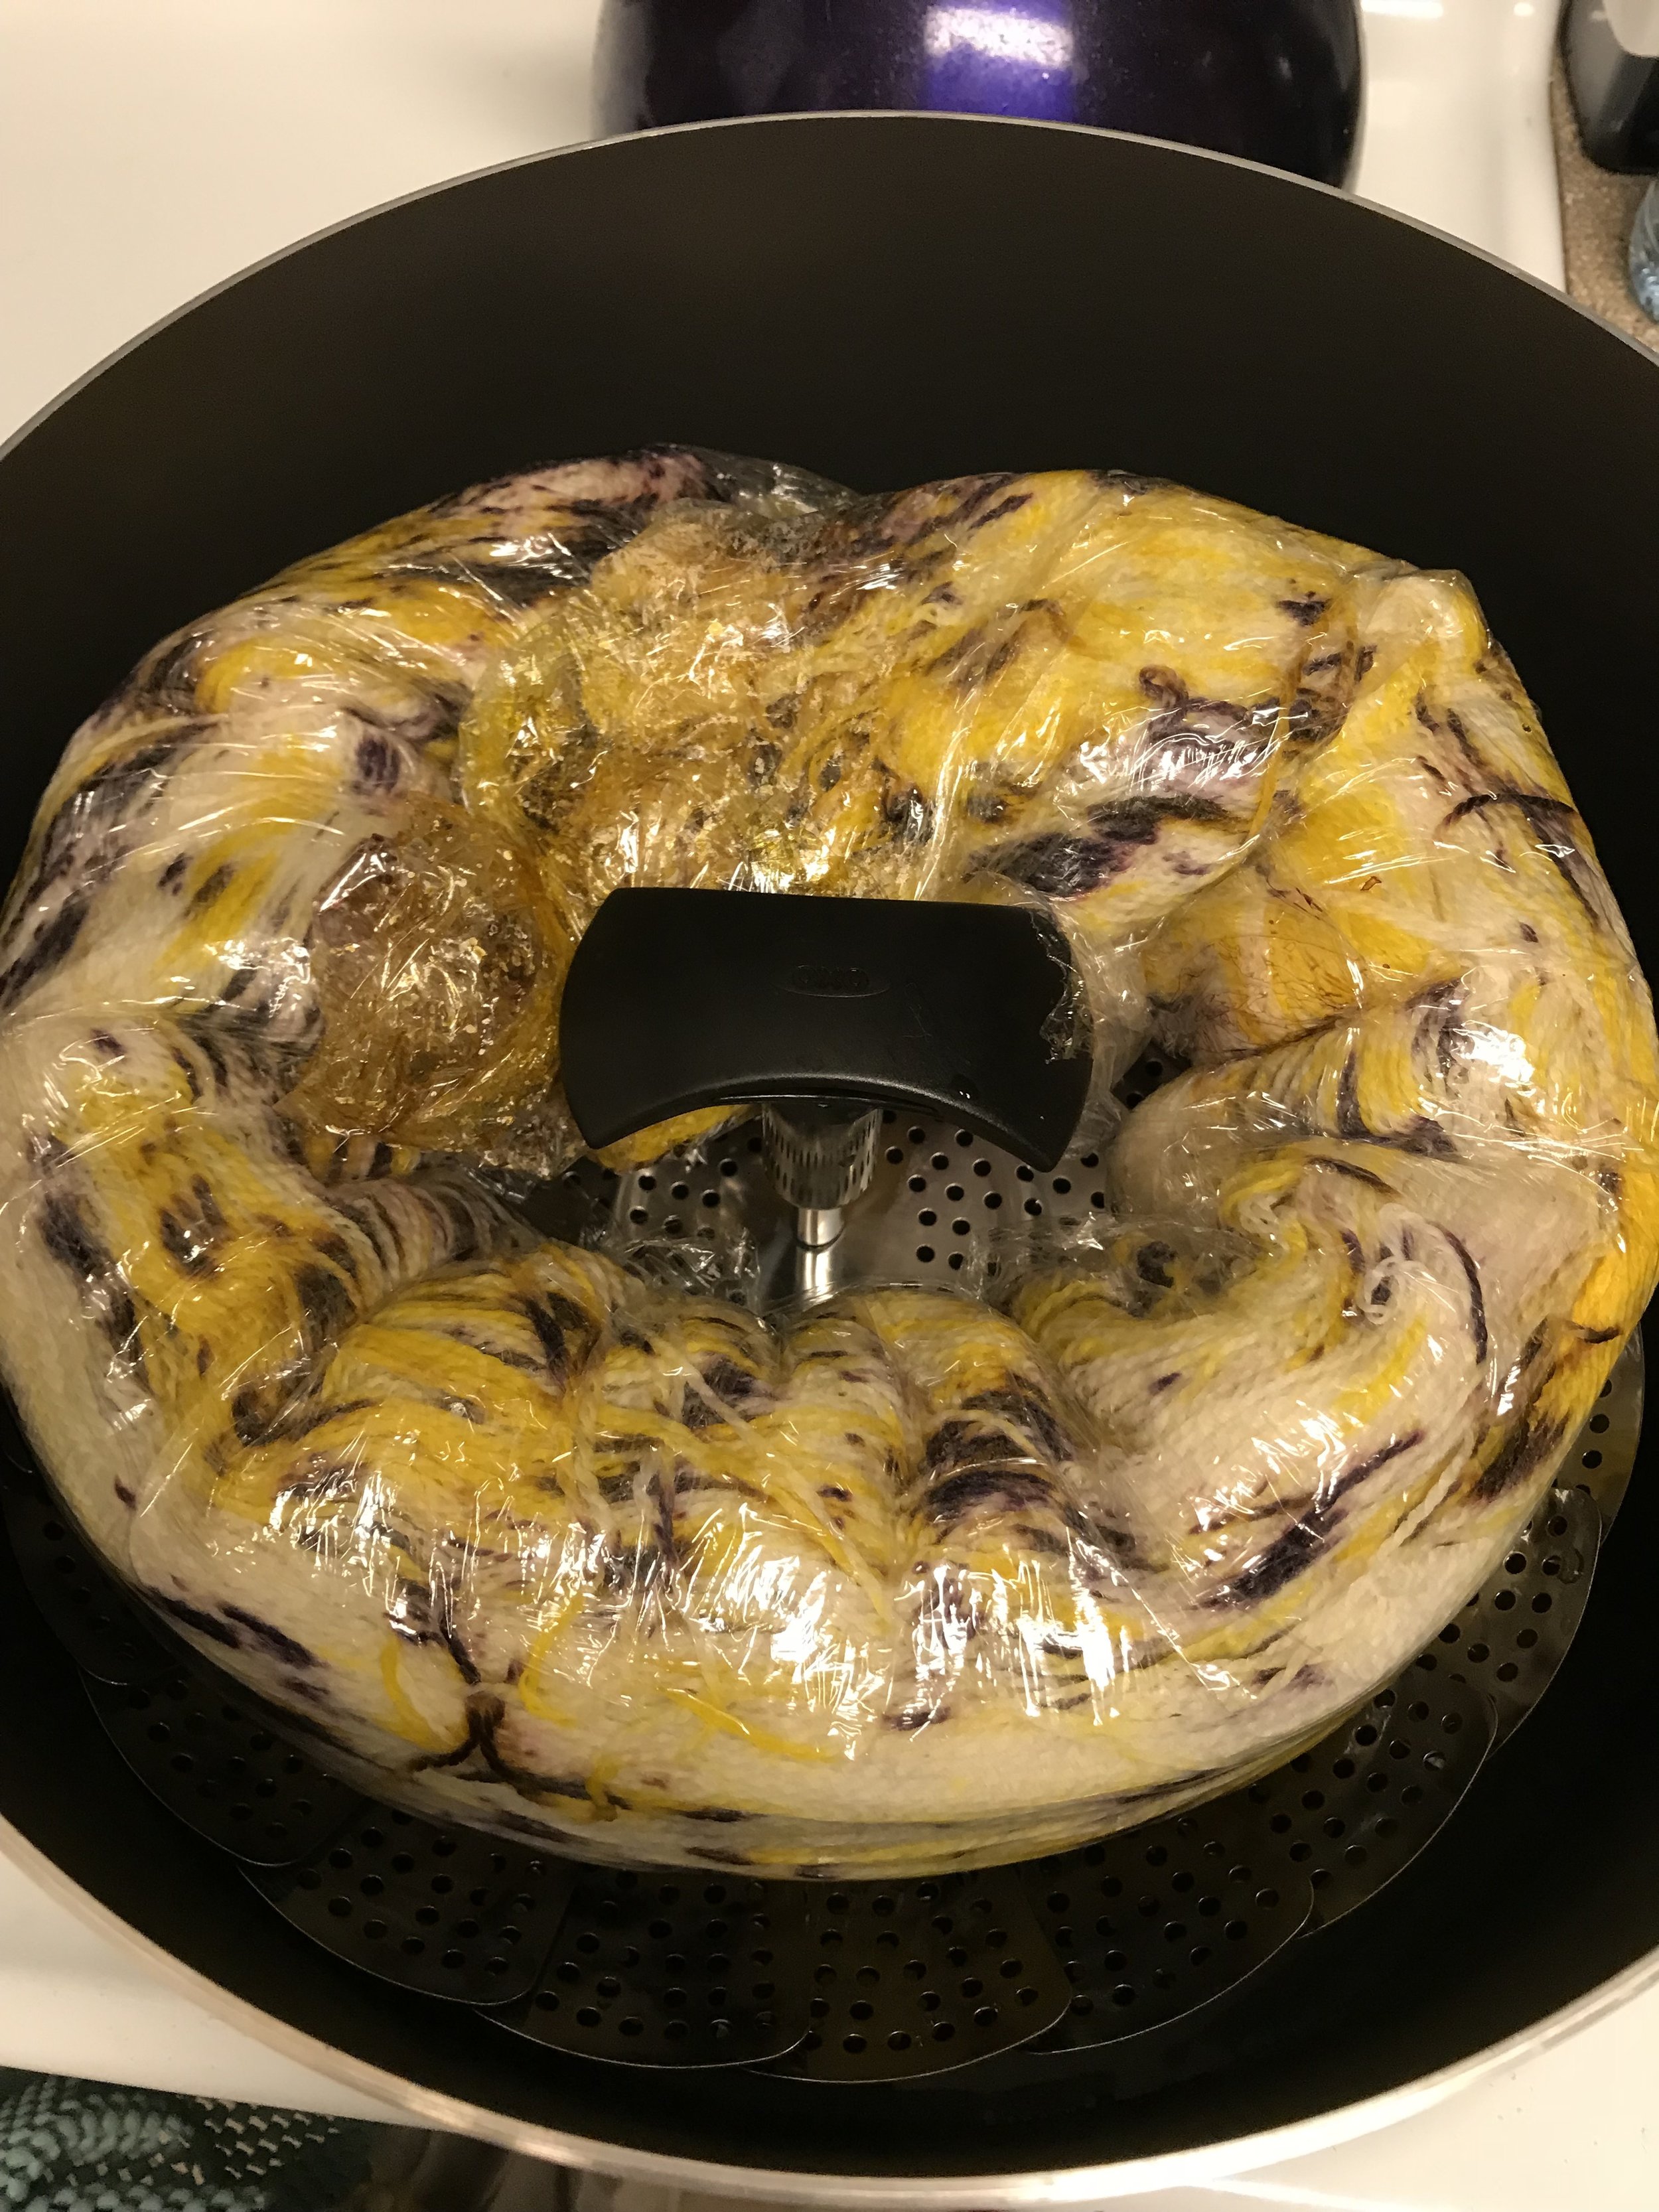
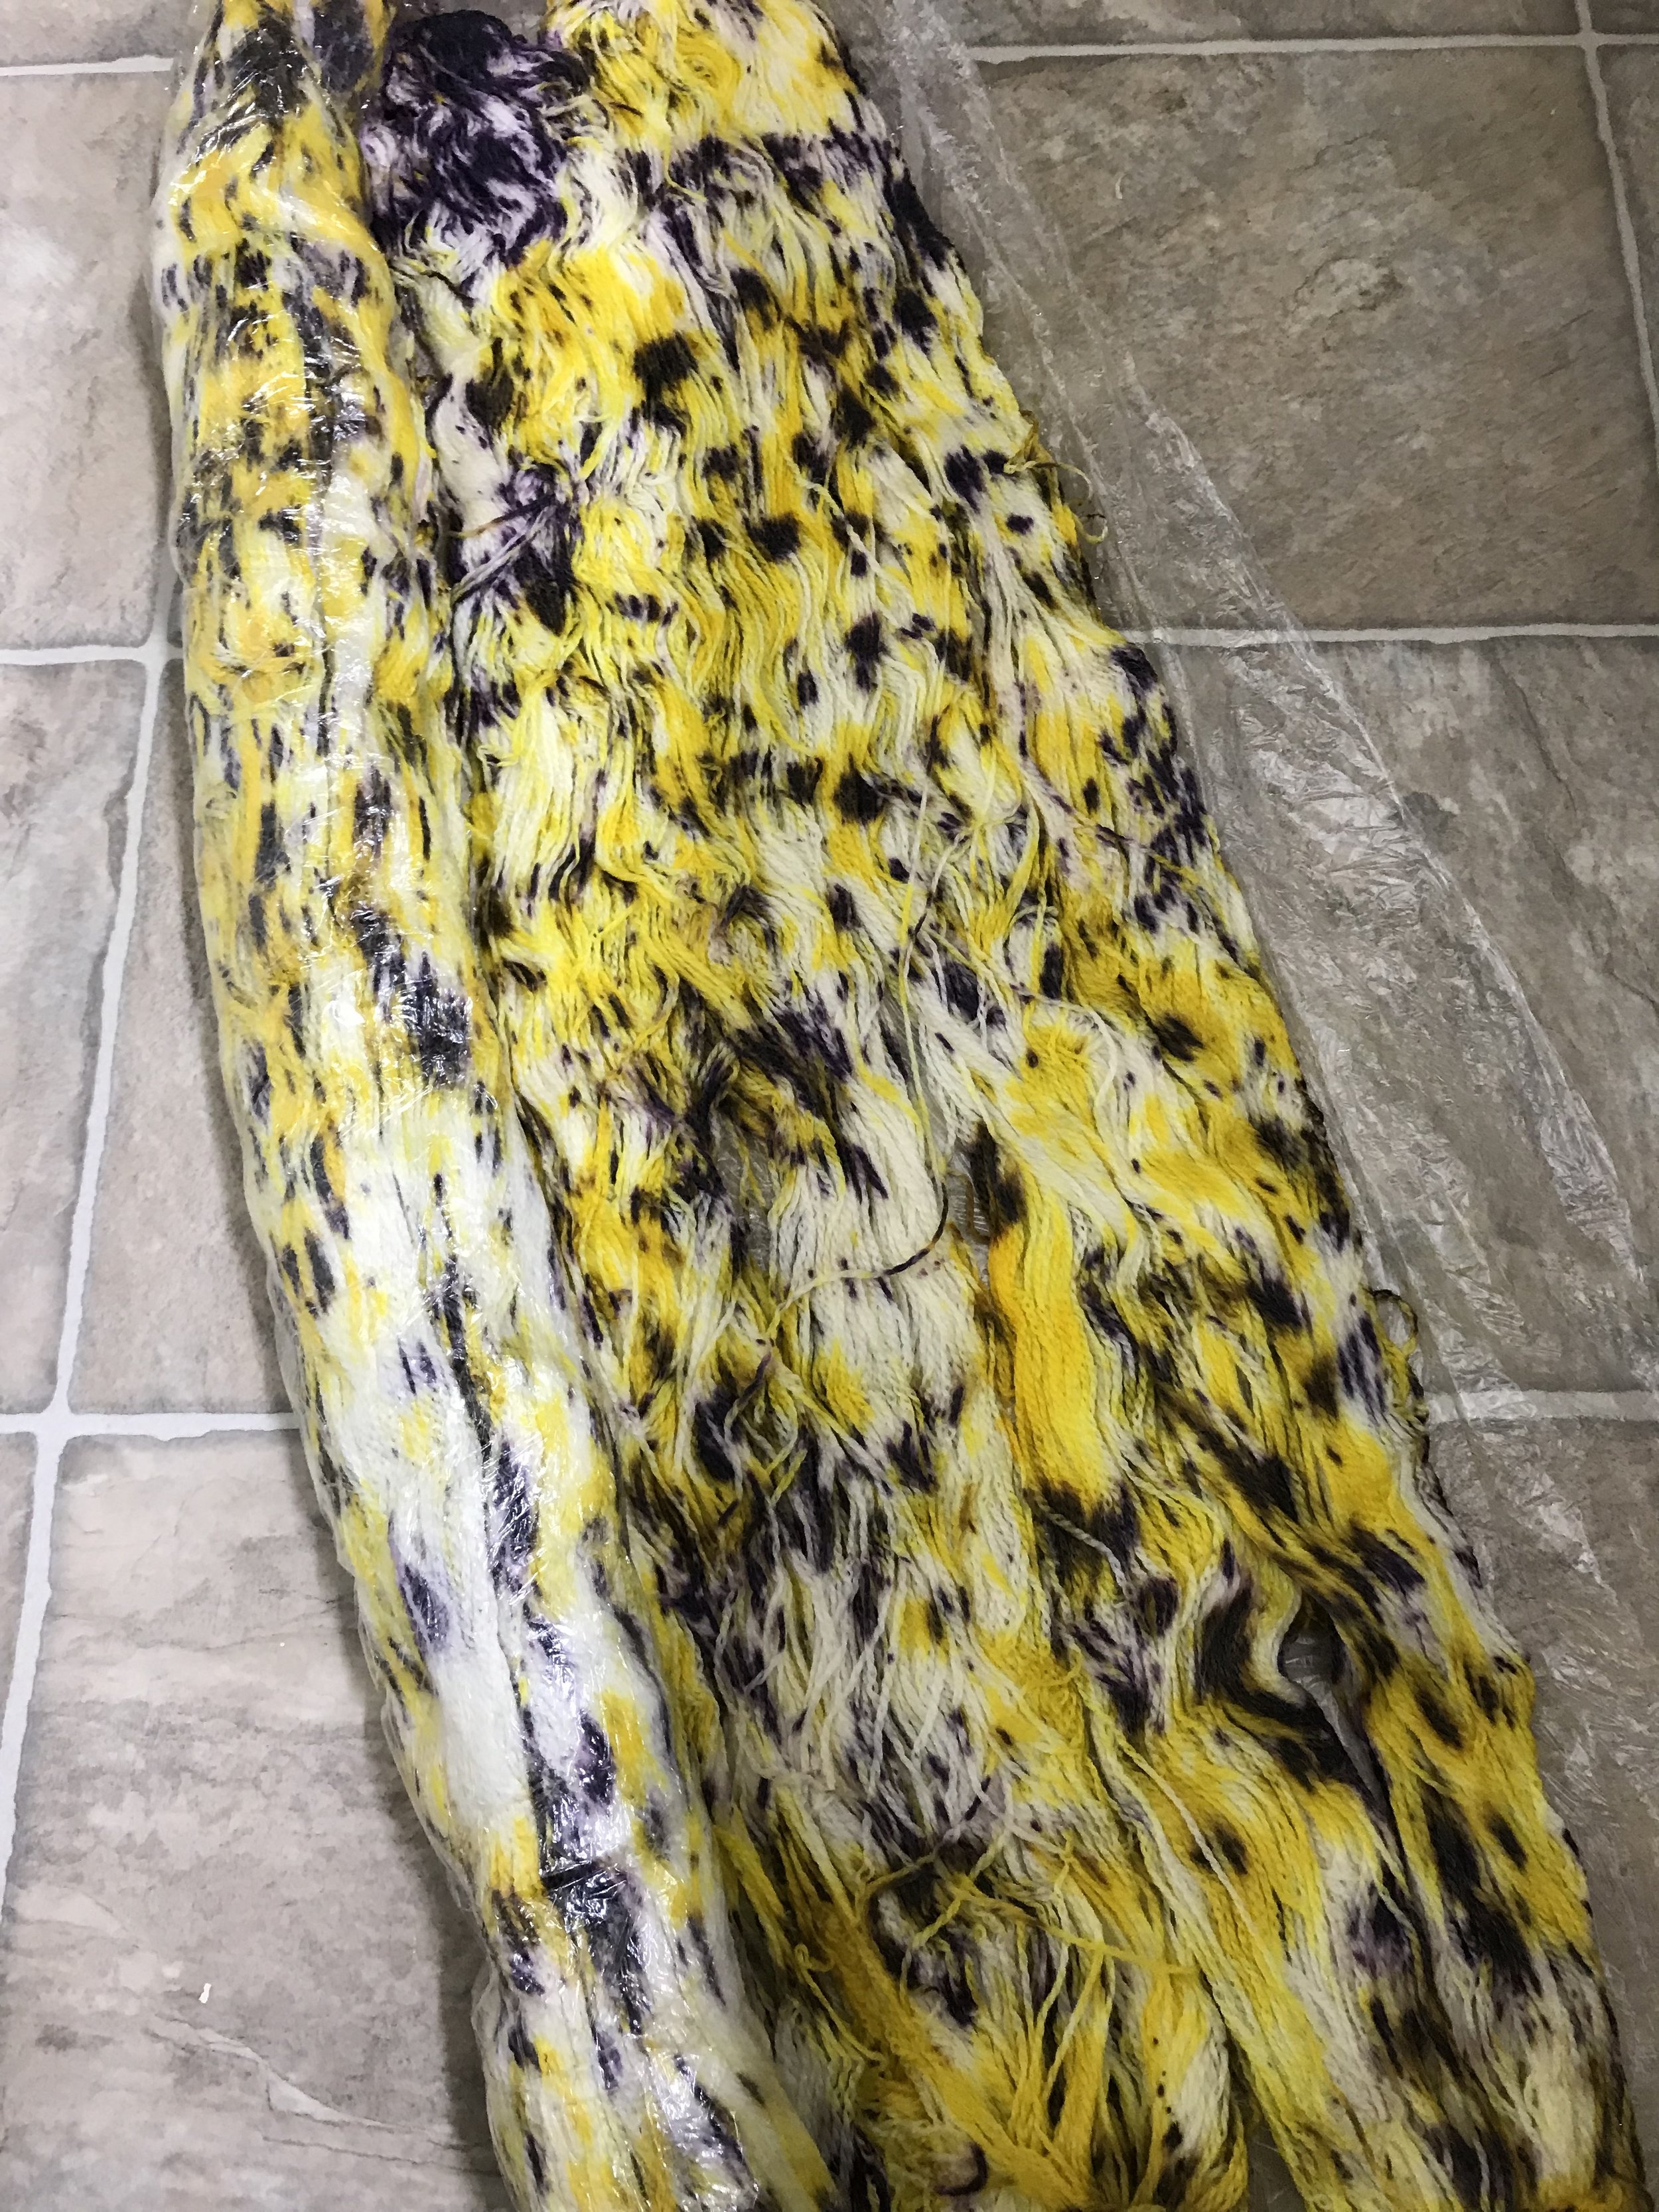
I of course will always come back to dyeing yarn and showing all of you the pretty colours.  
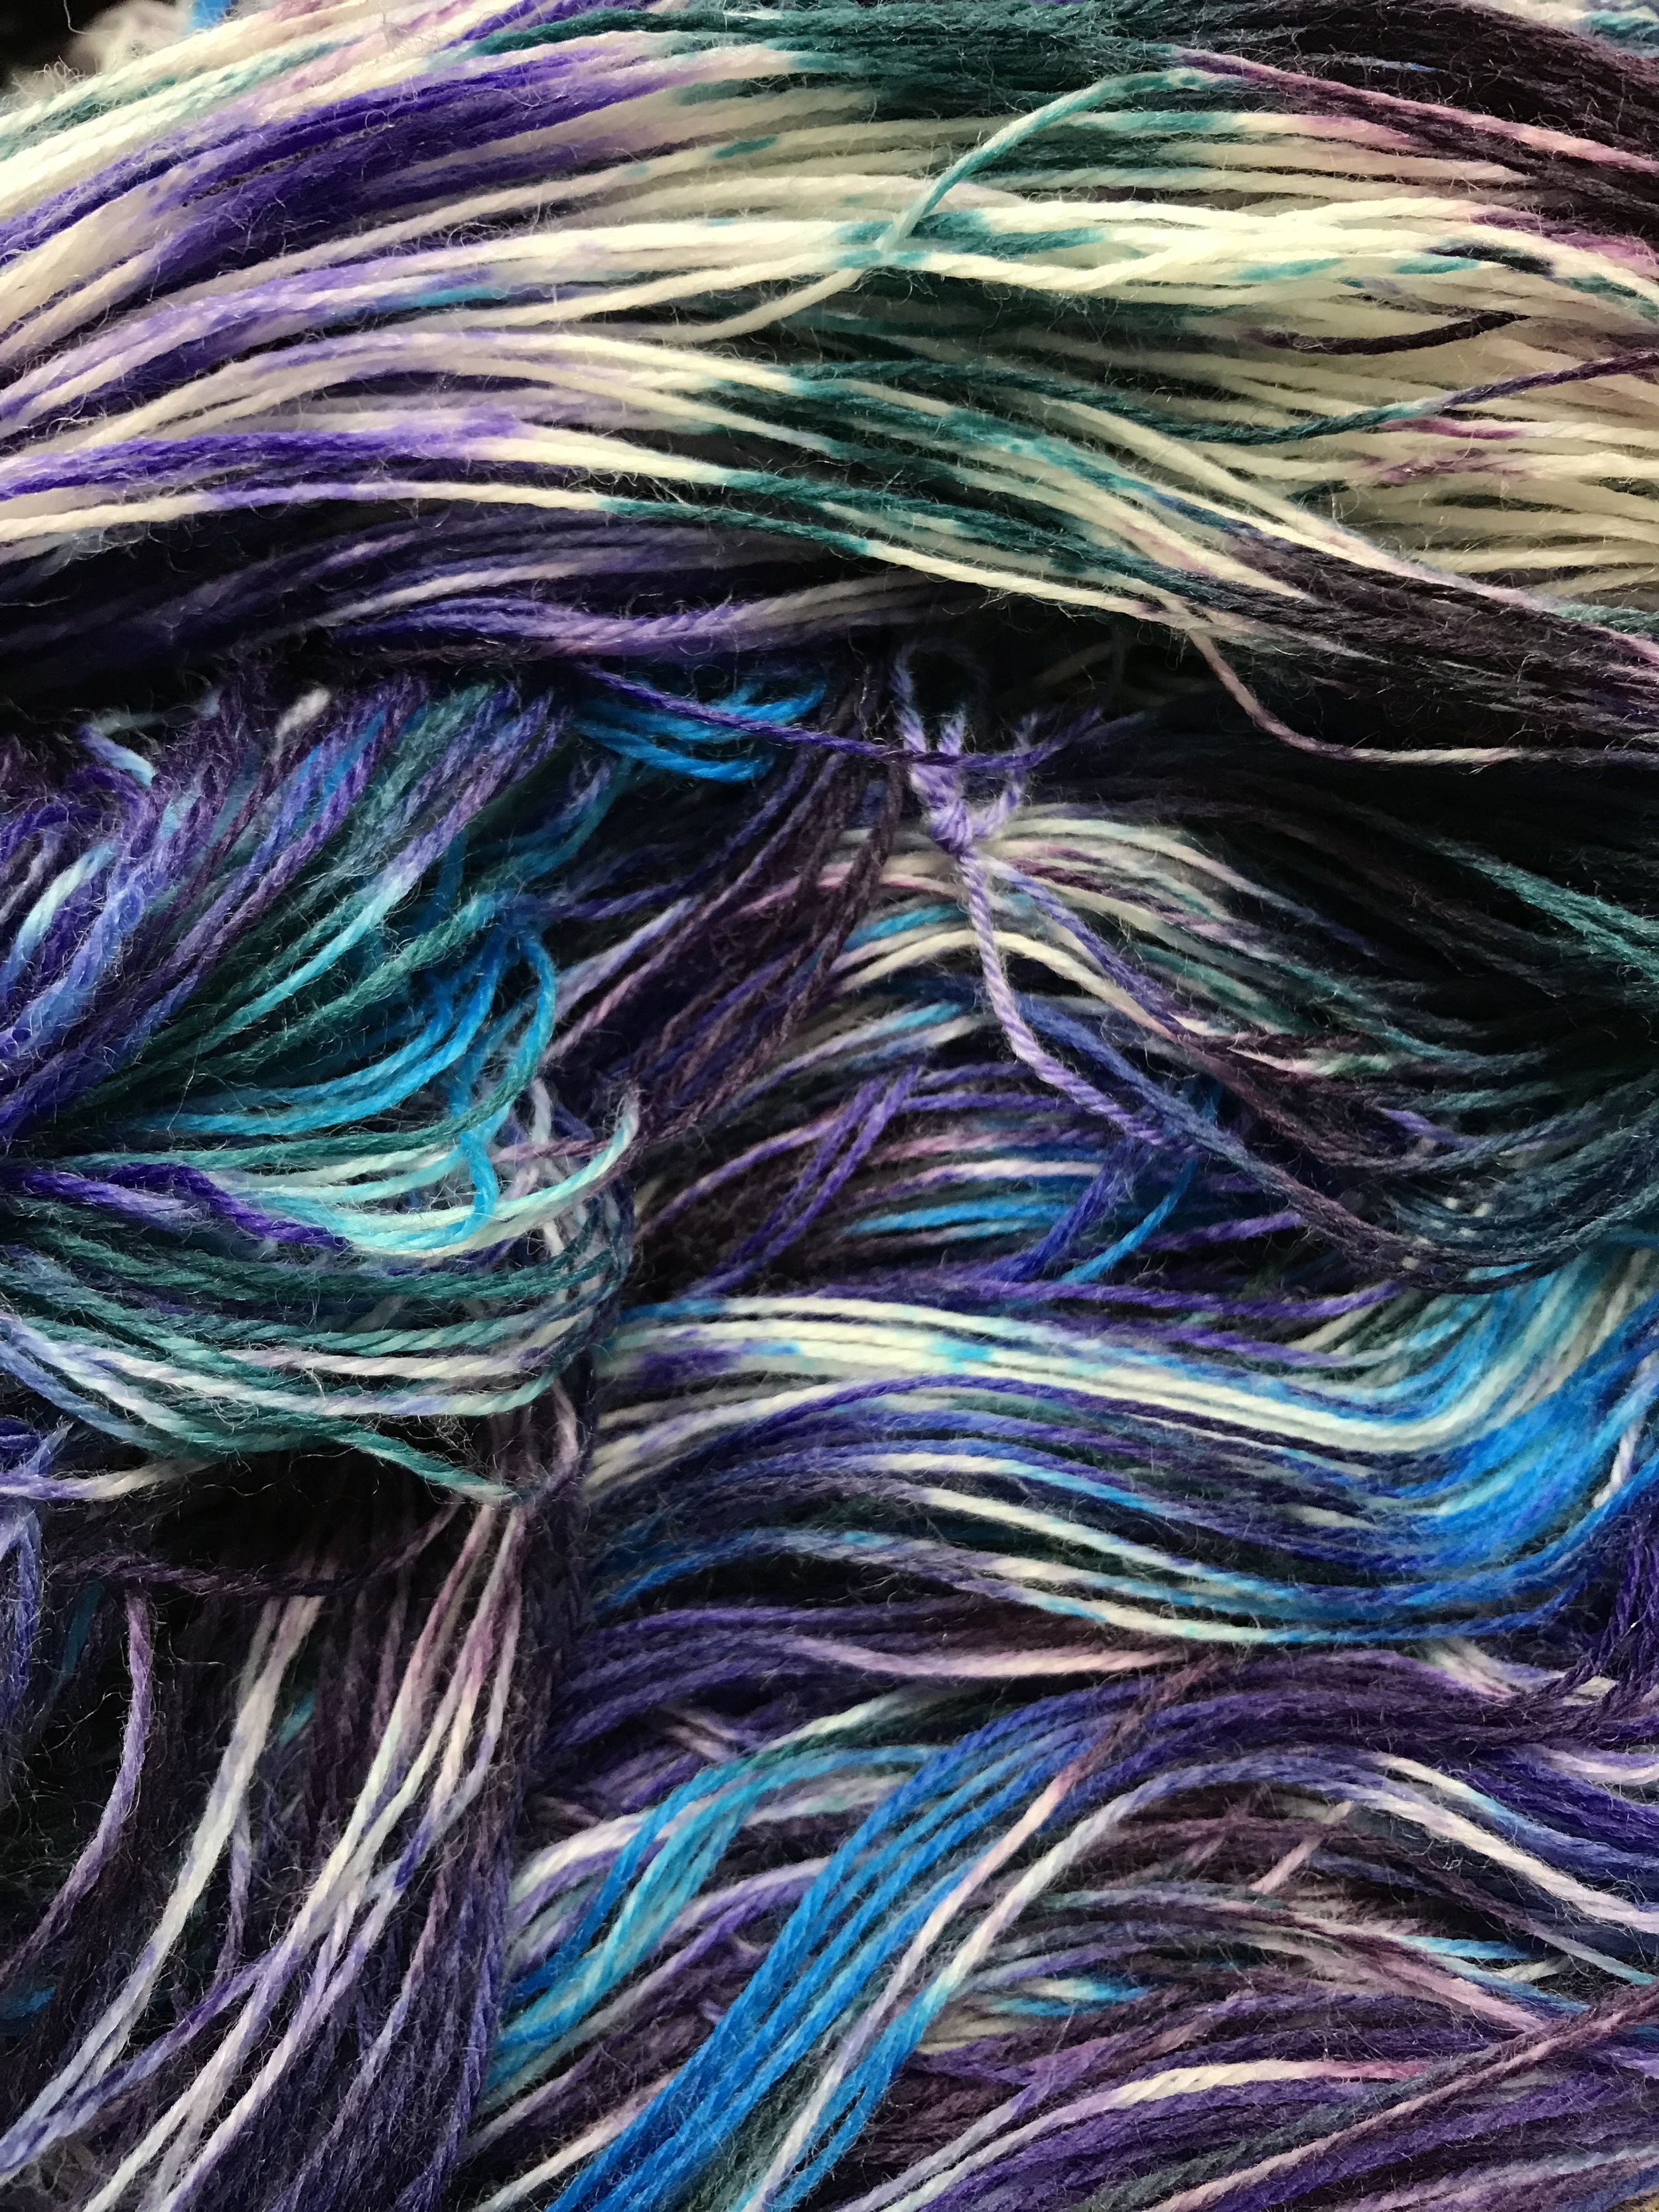
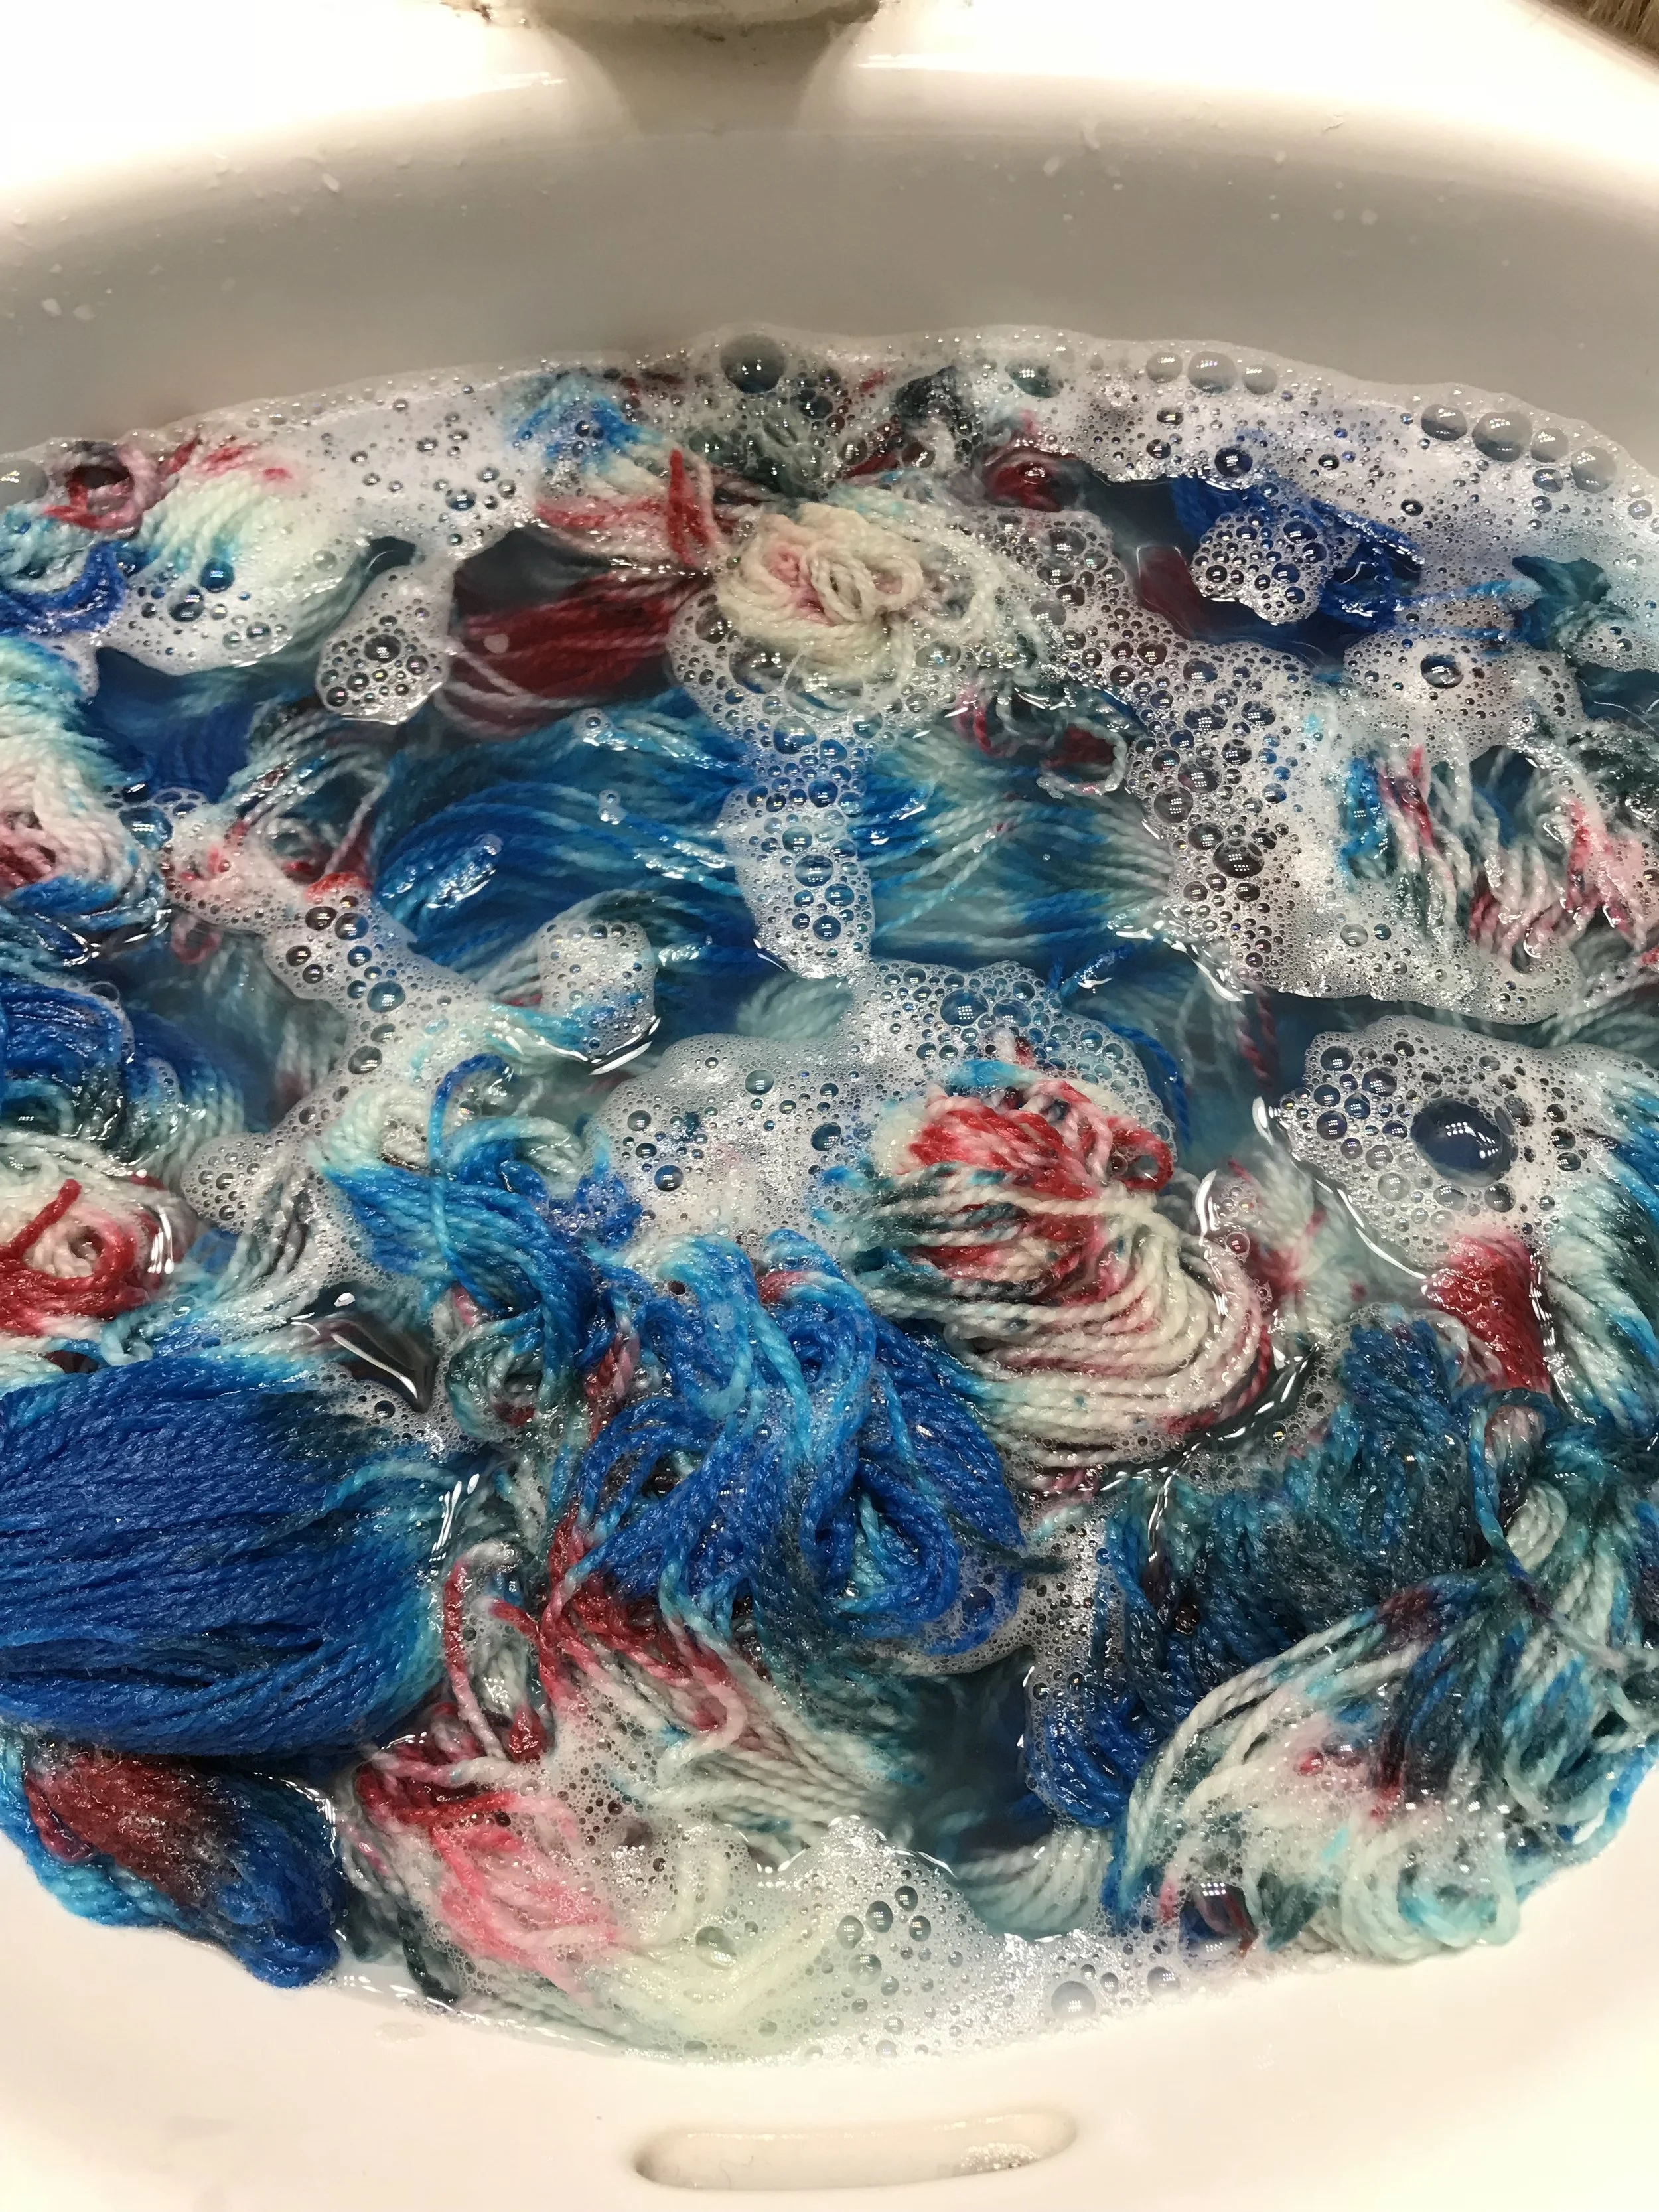
This is Sea Queen.

IMG_1687.JPG

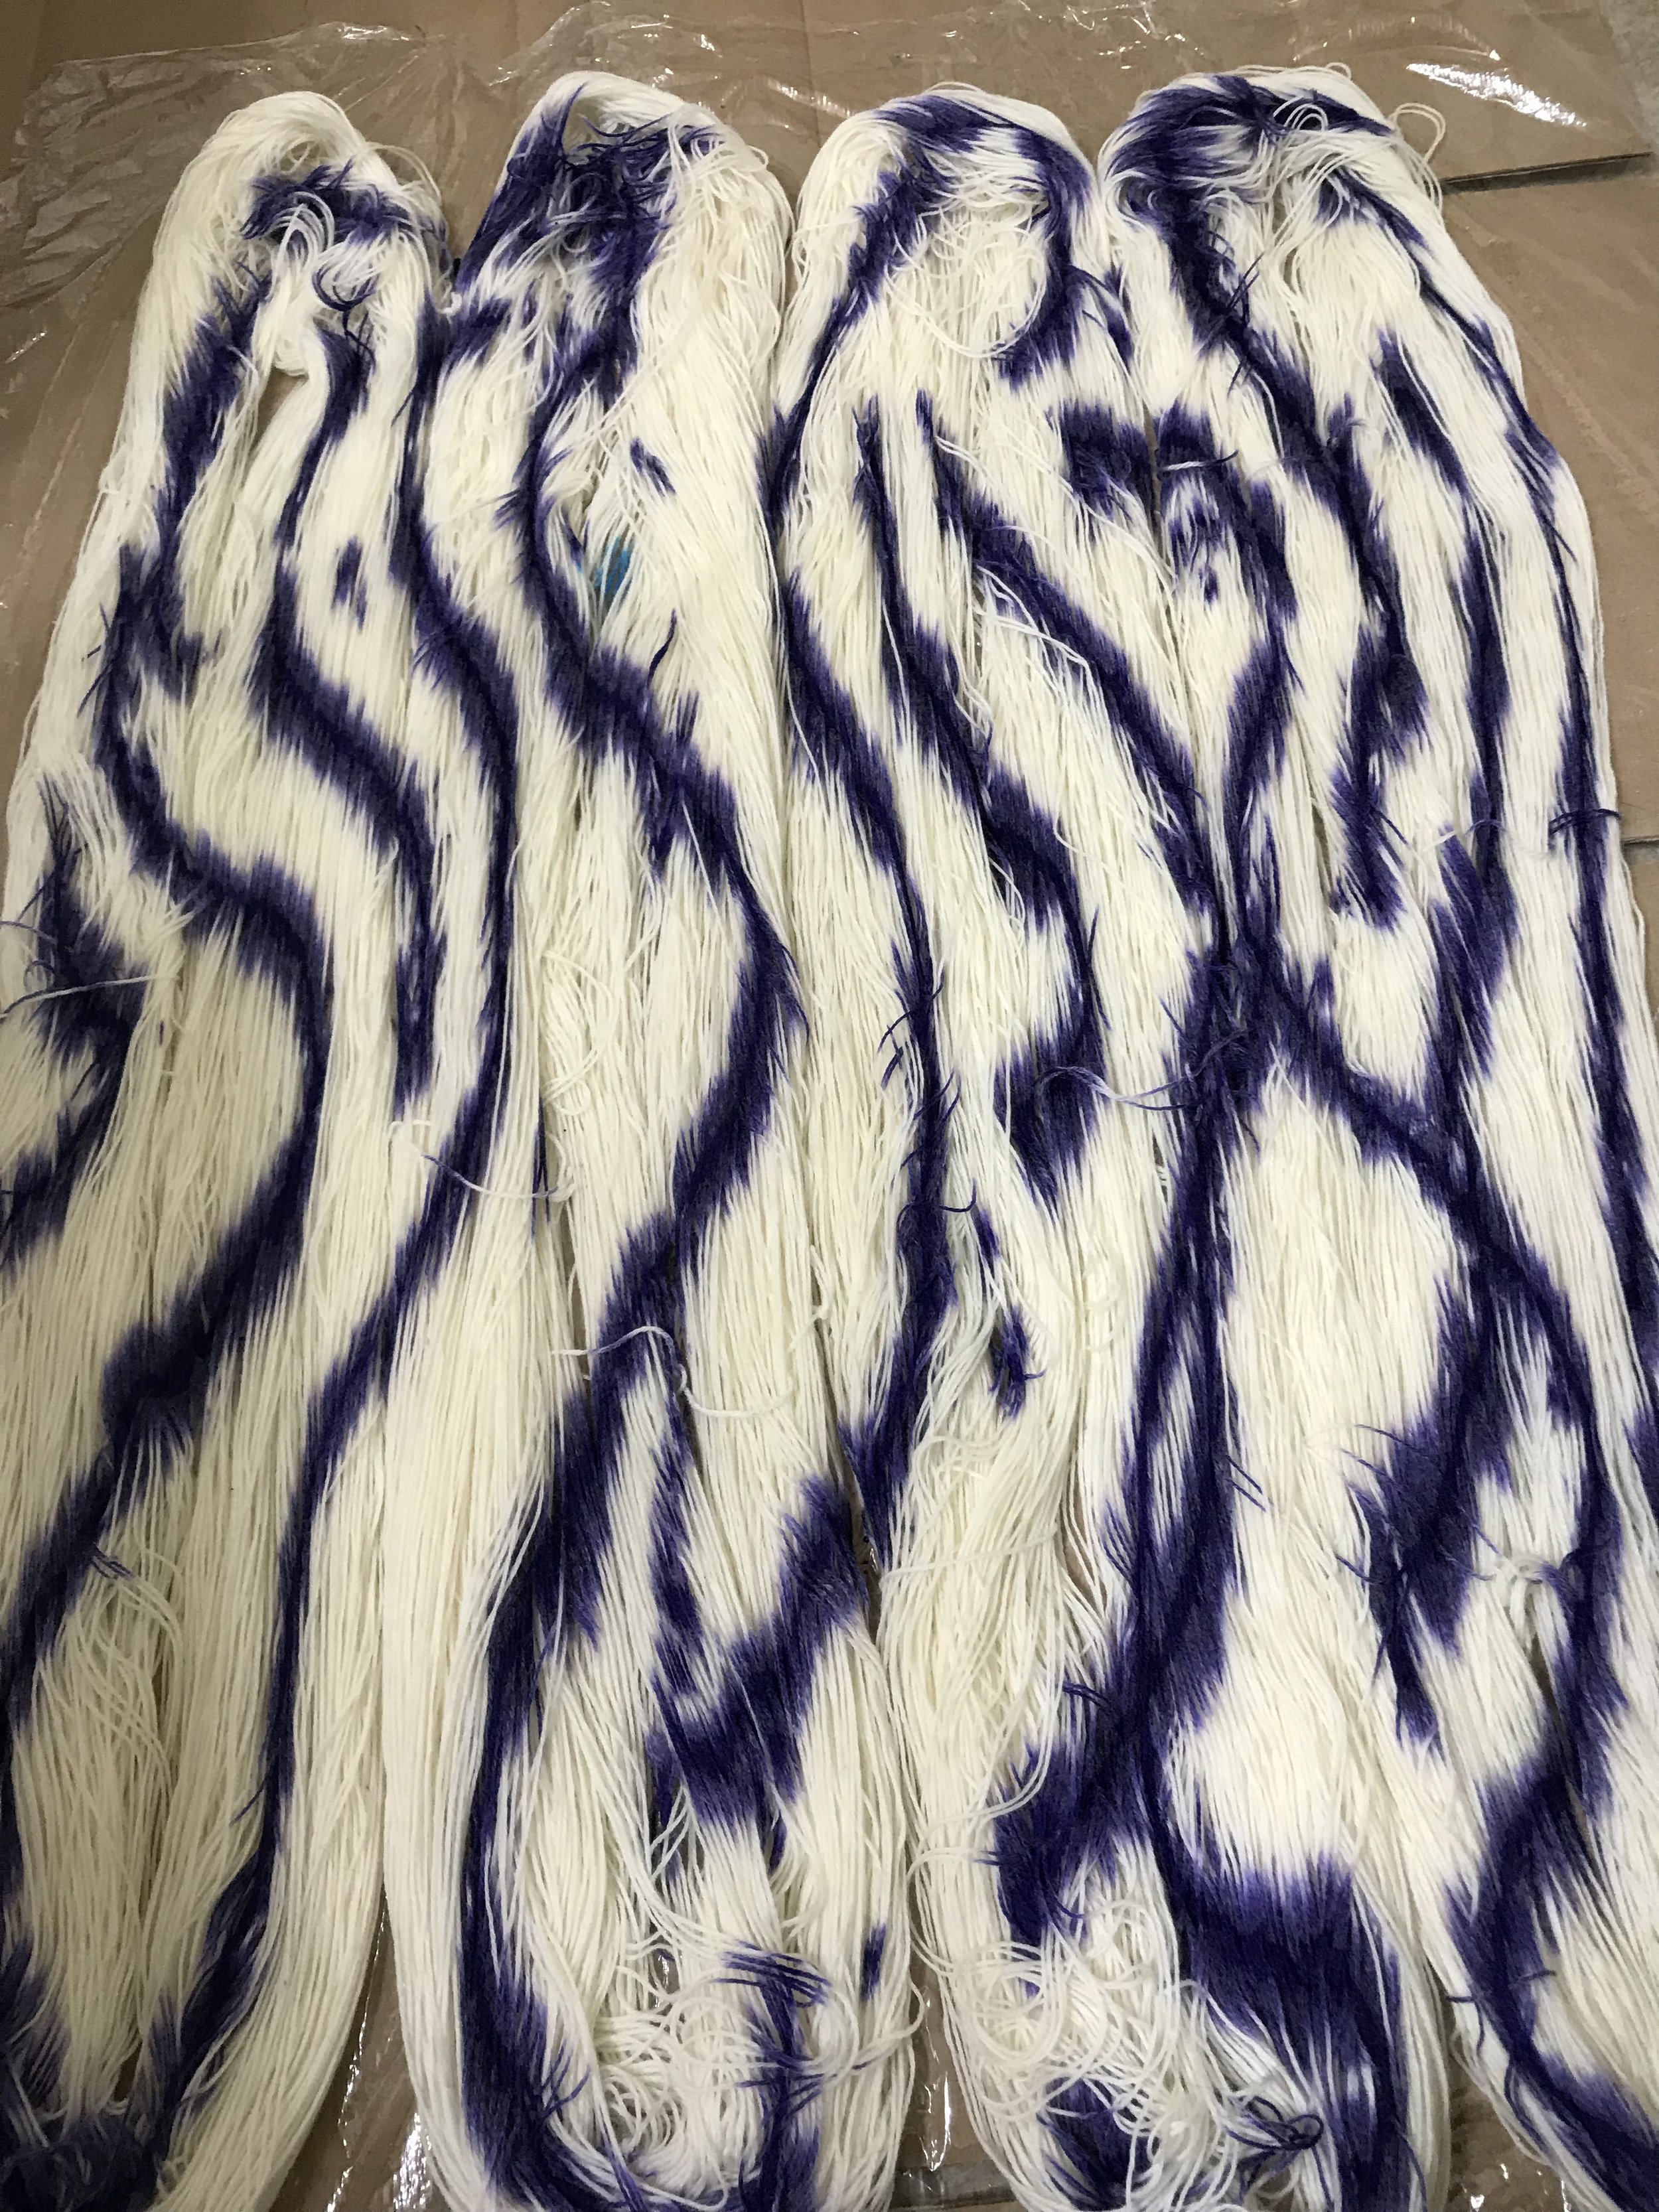
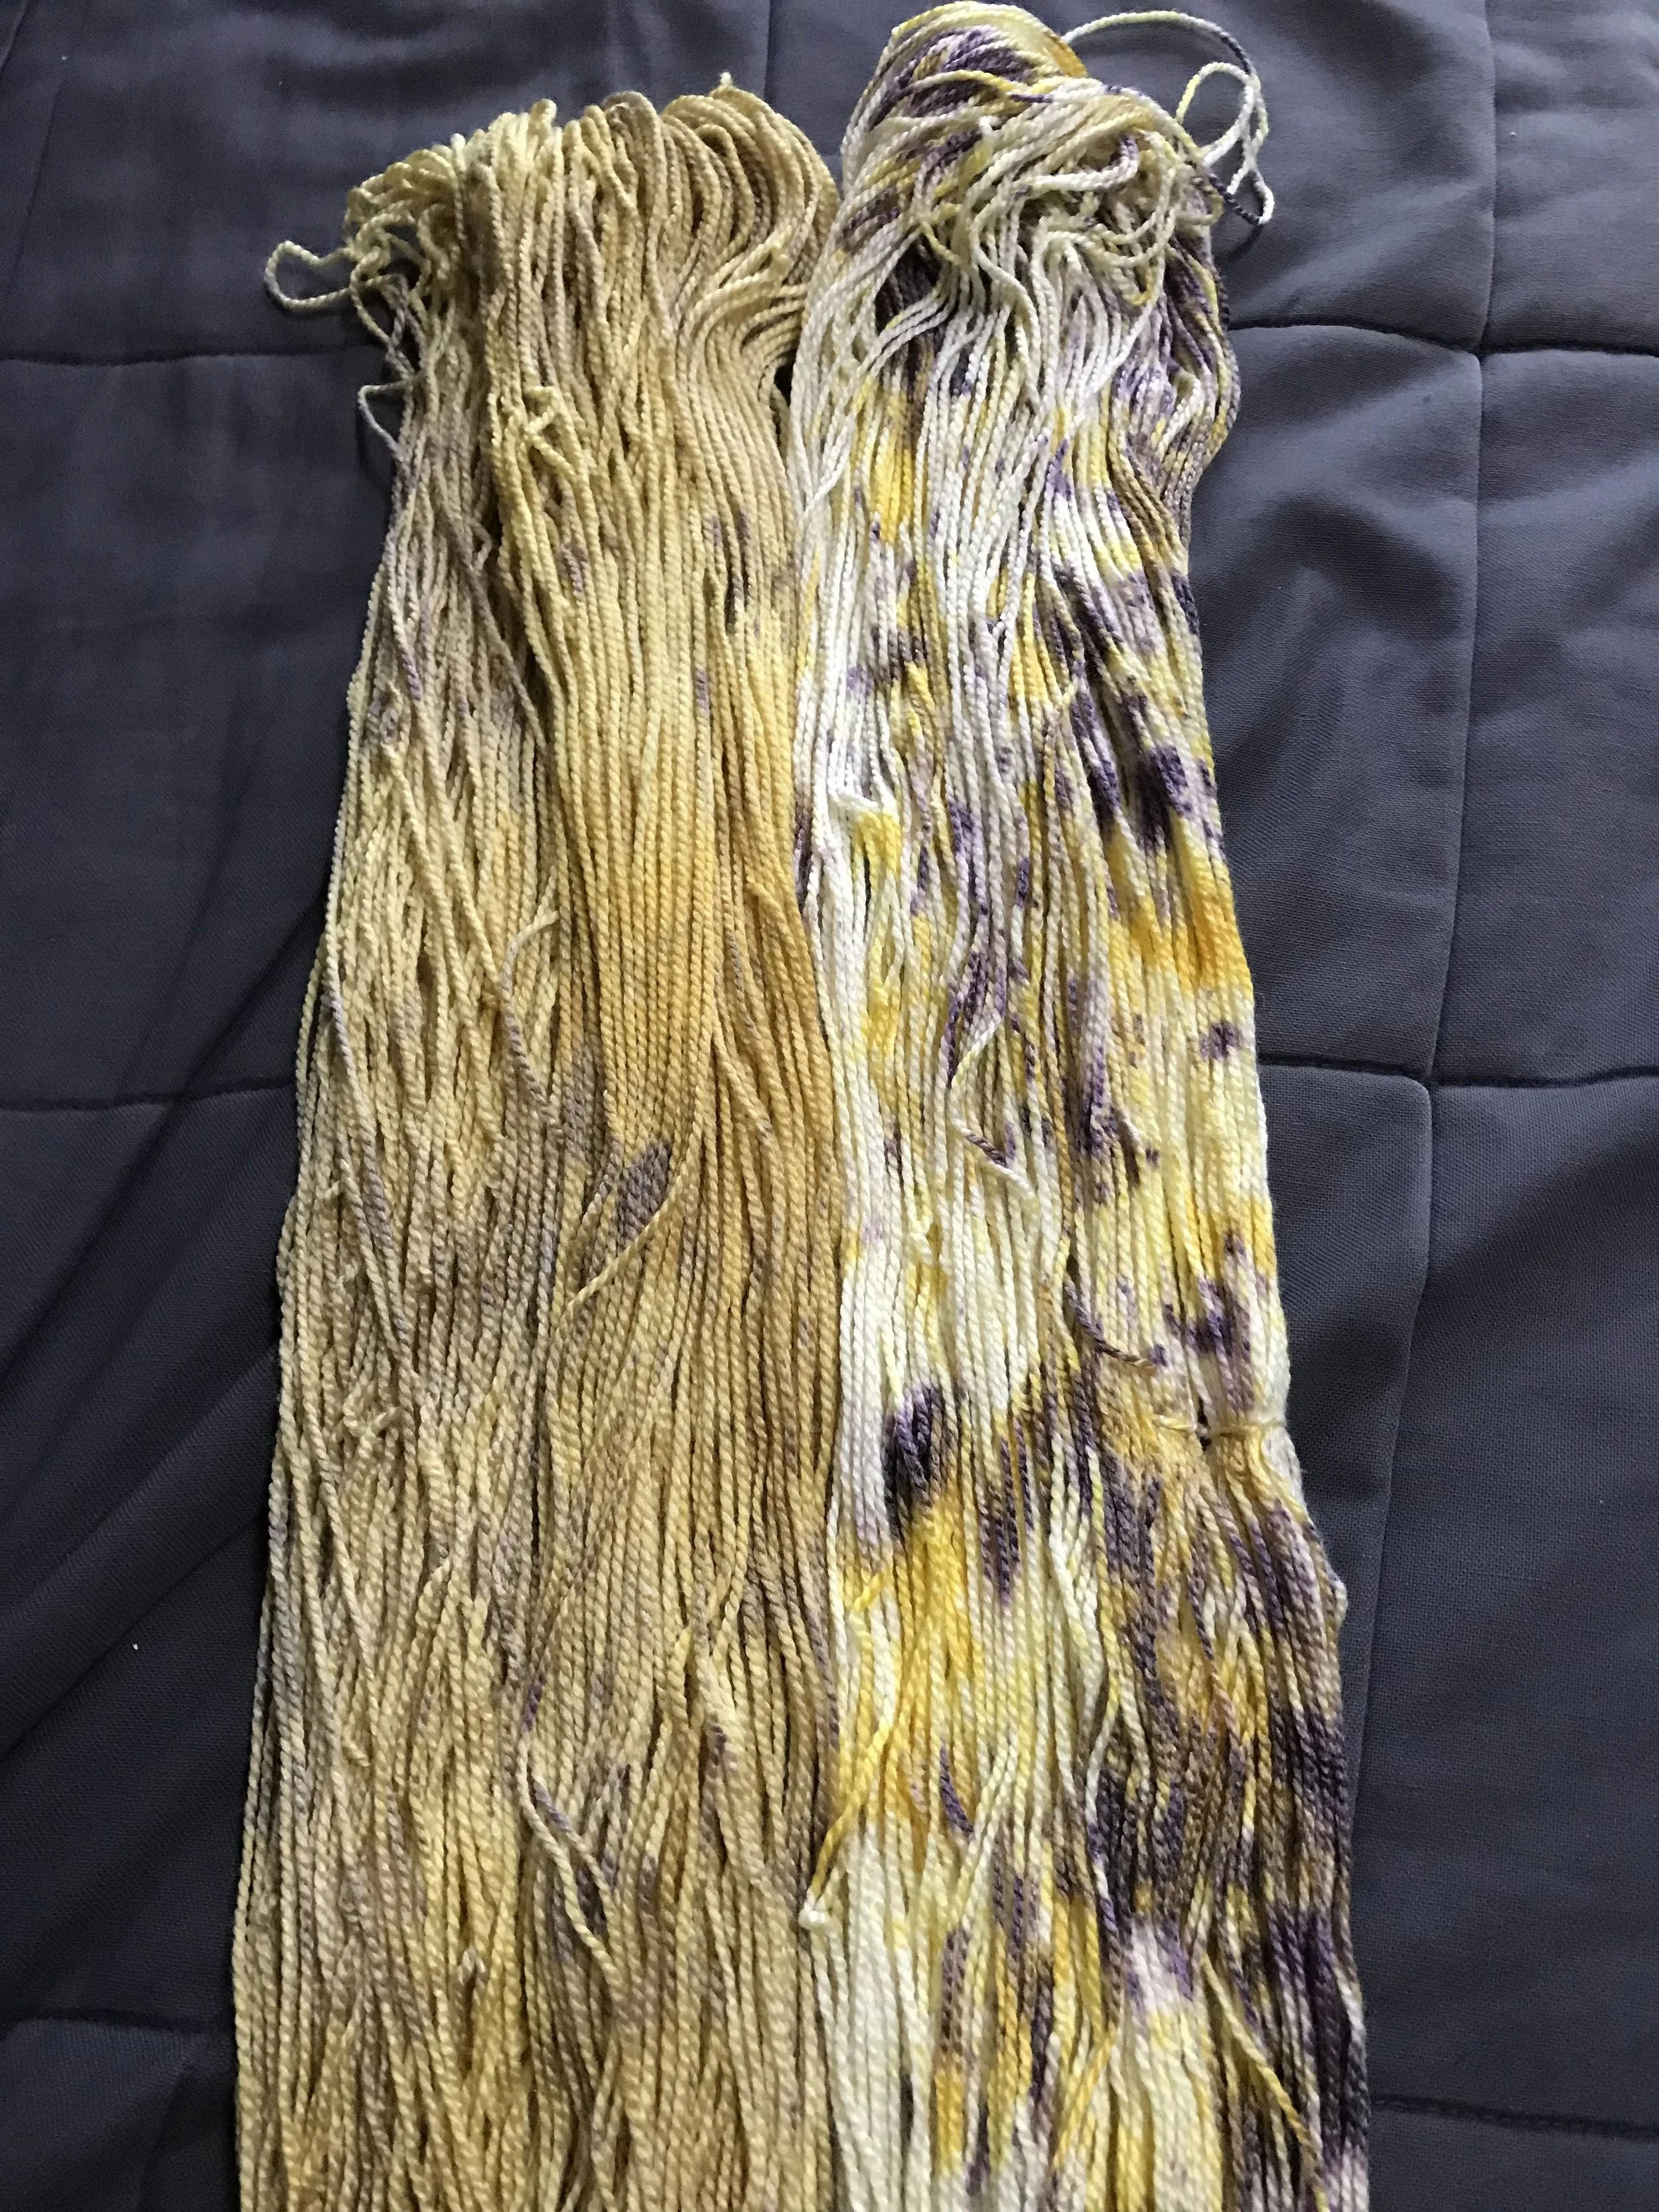
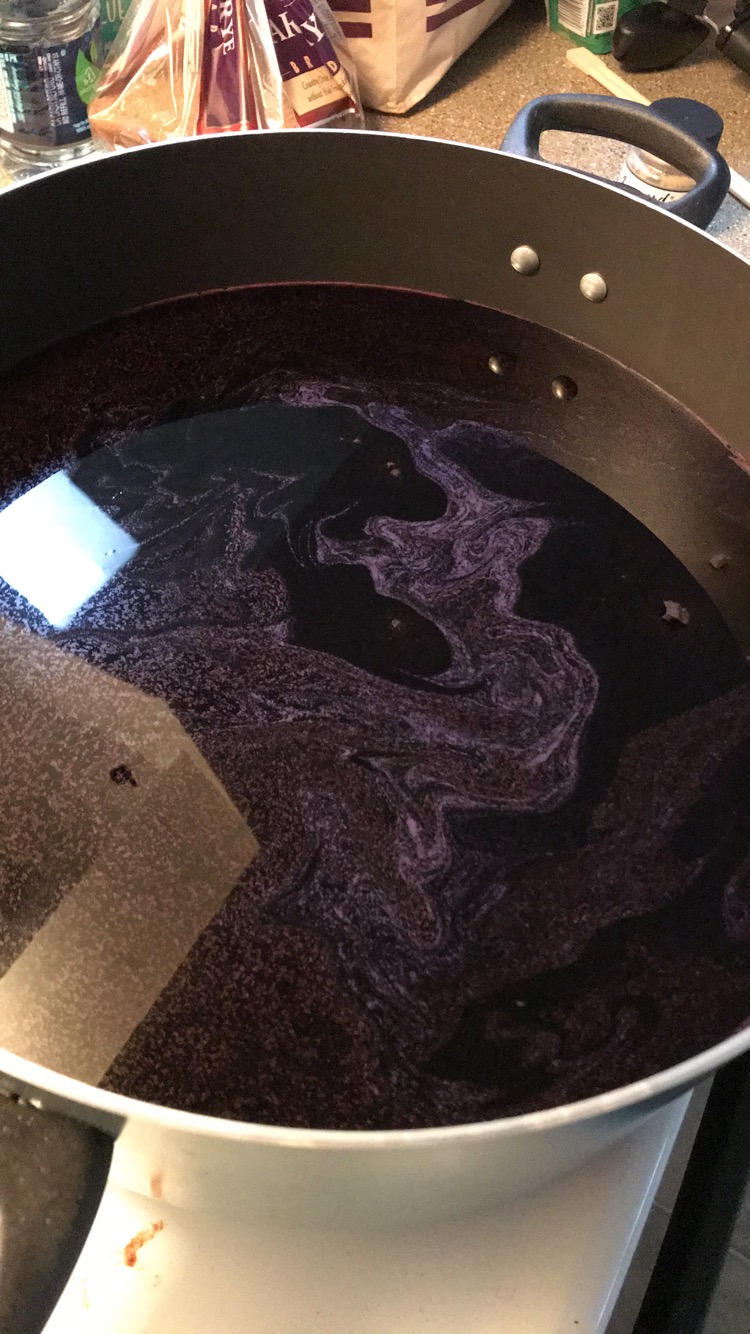
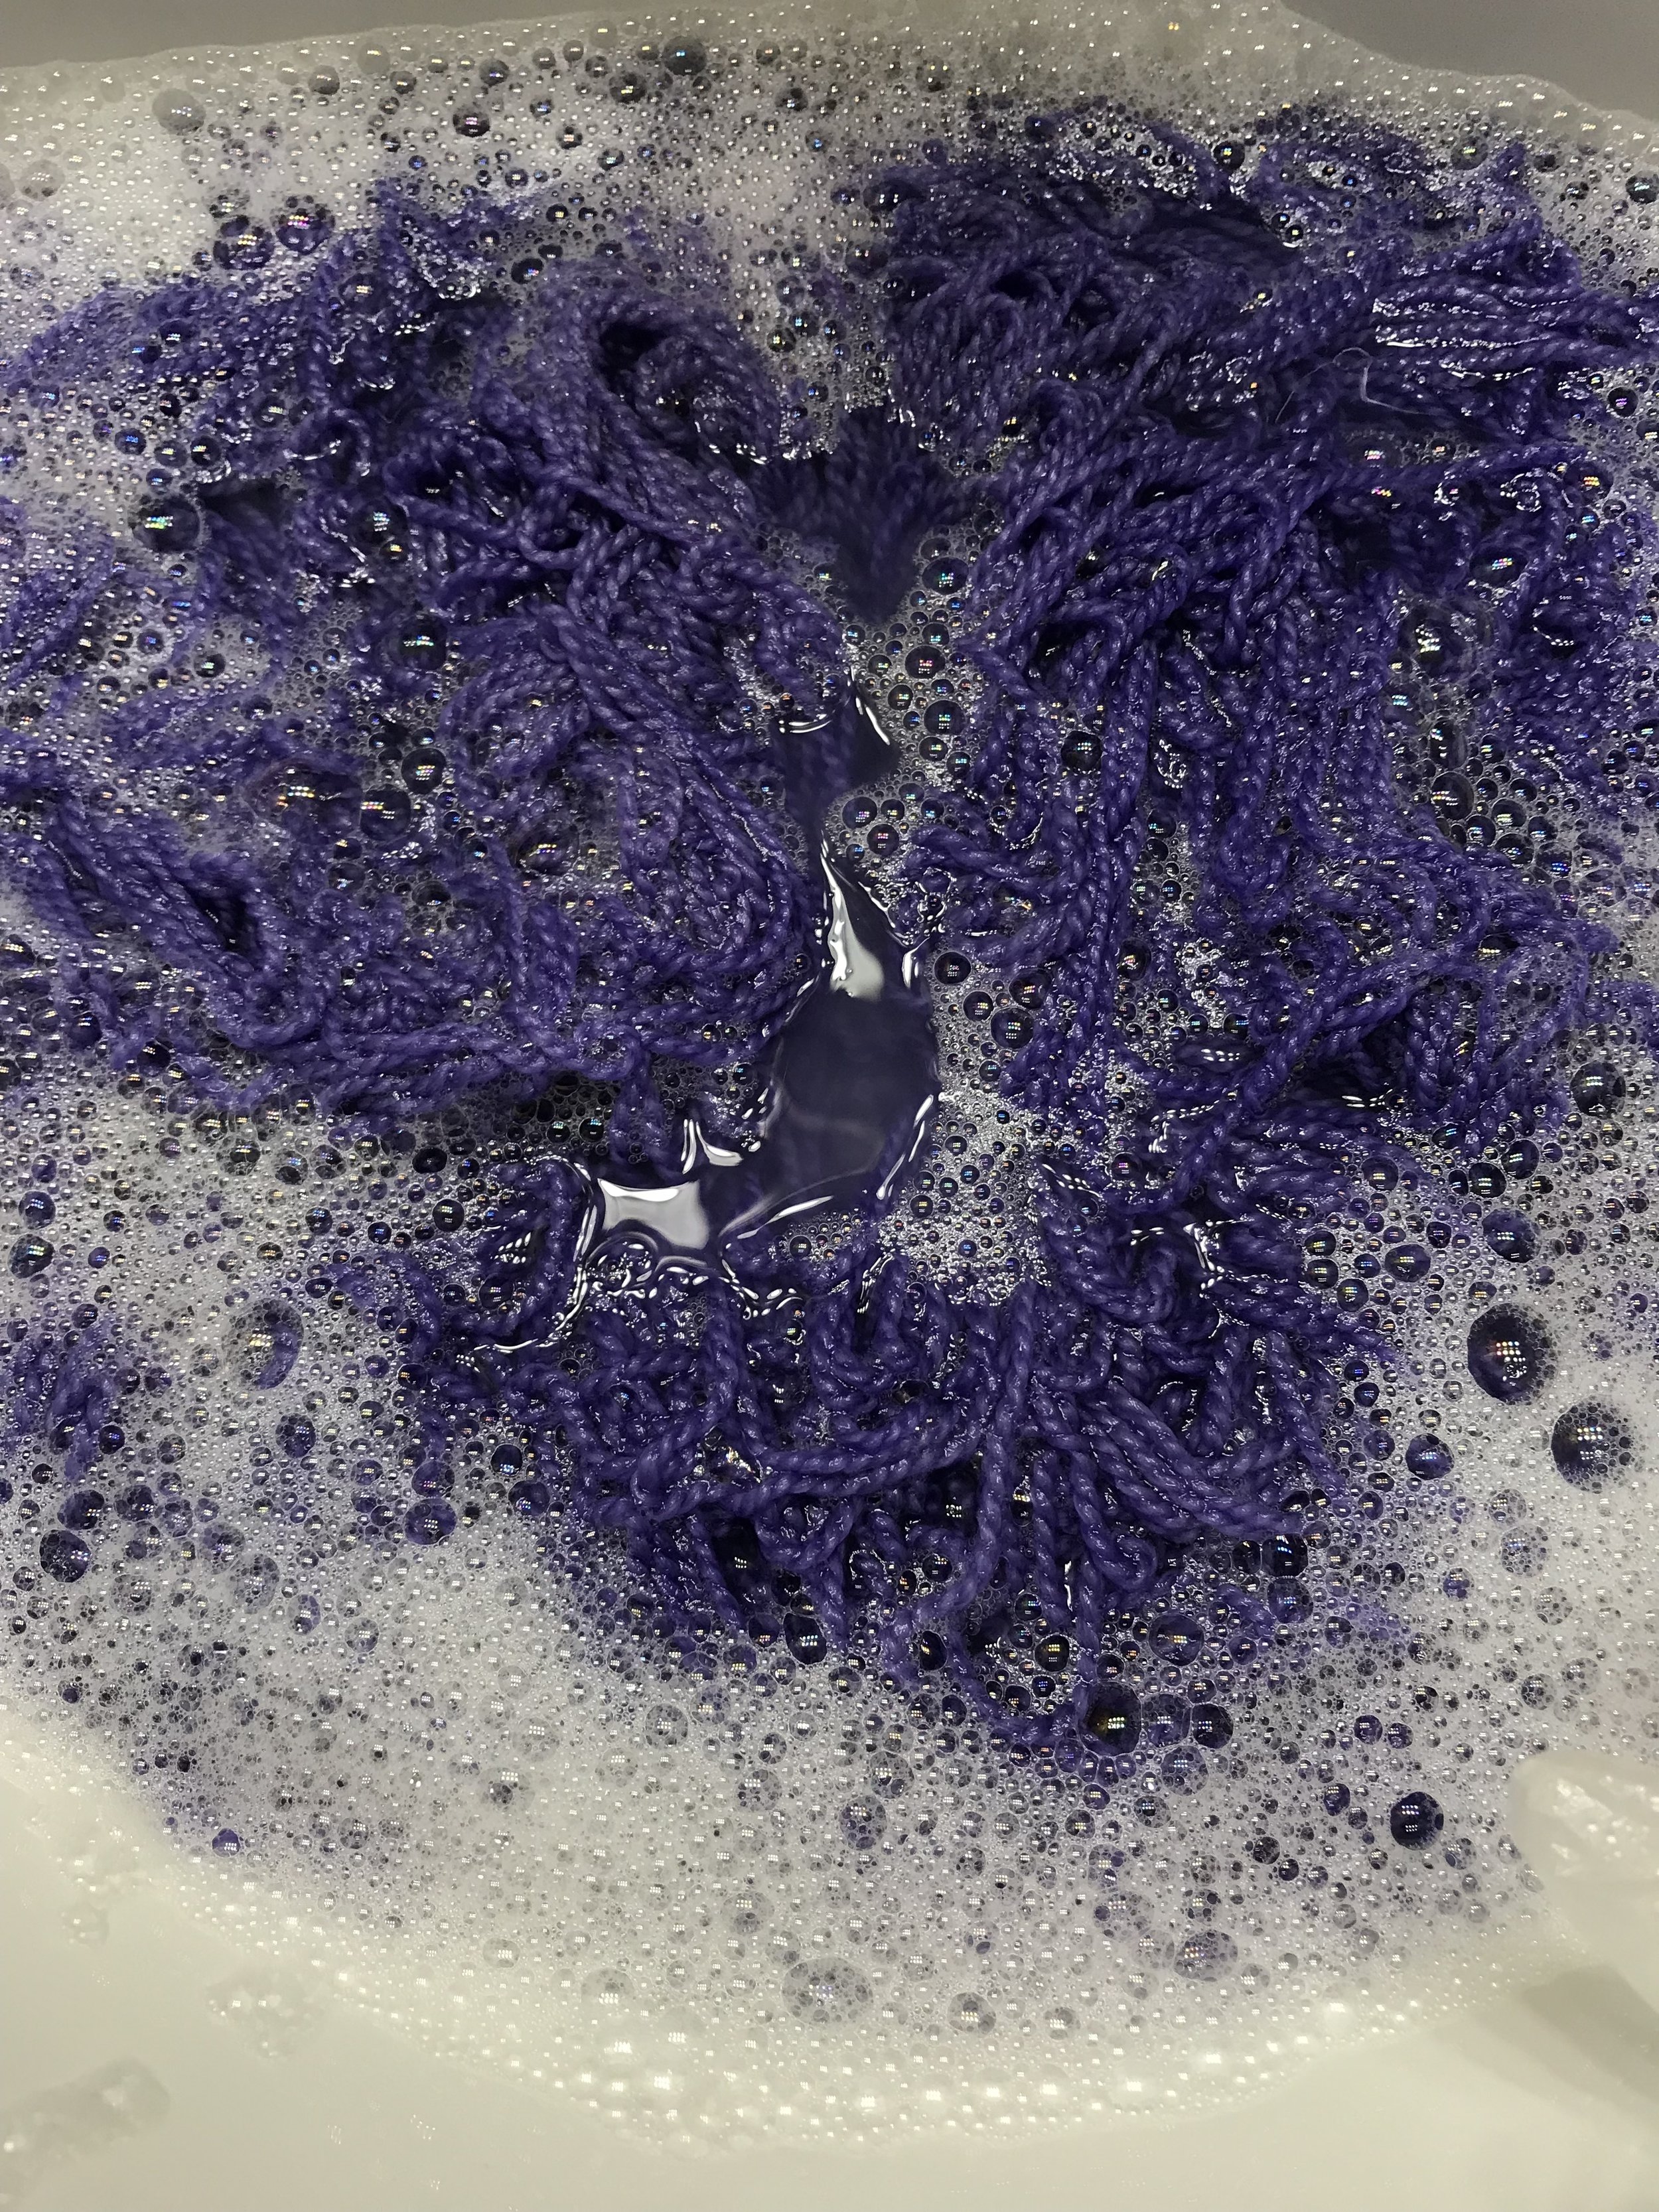
For this batch I decided to apply dye a little more consistently, and went for another sea-themed colour palette because it's what I gravitate towards when playing with colours and who doesn't want more fierce women commanding the ocean?  We all need a bit more of a strong and passionate force in our lives, right?

IMG_1684.JPG

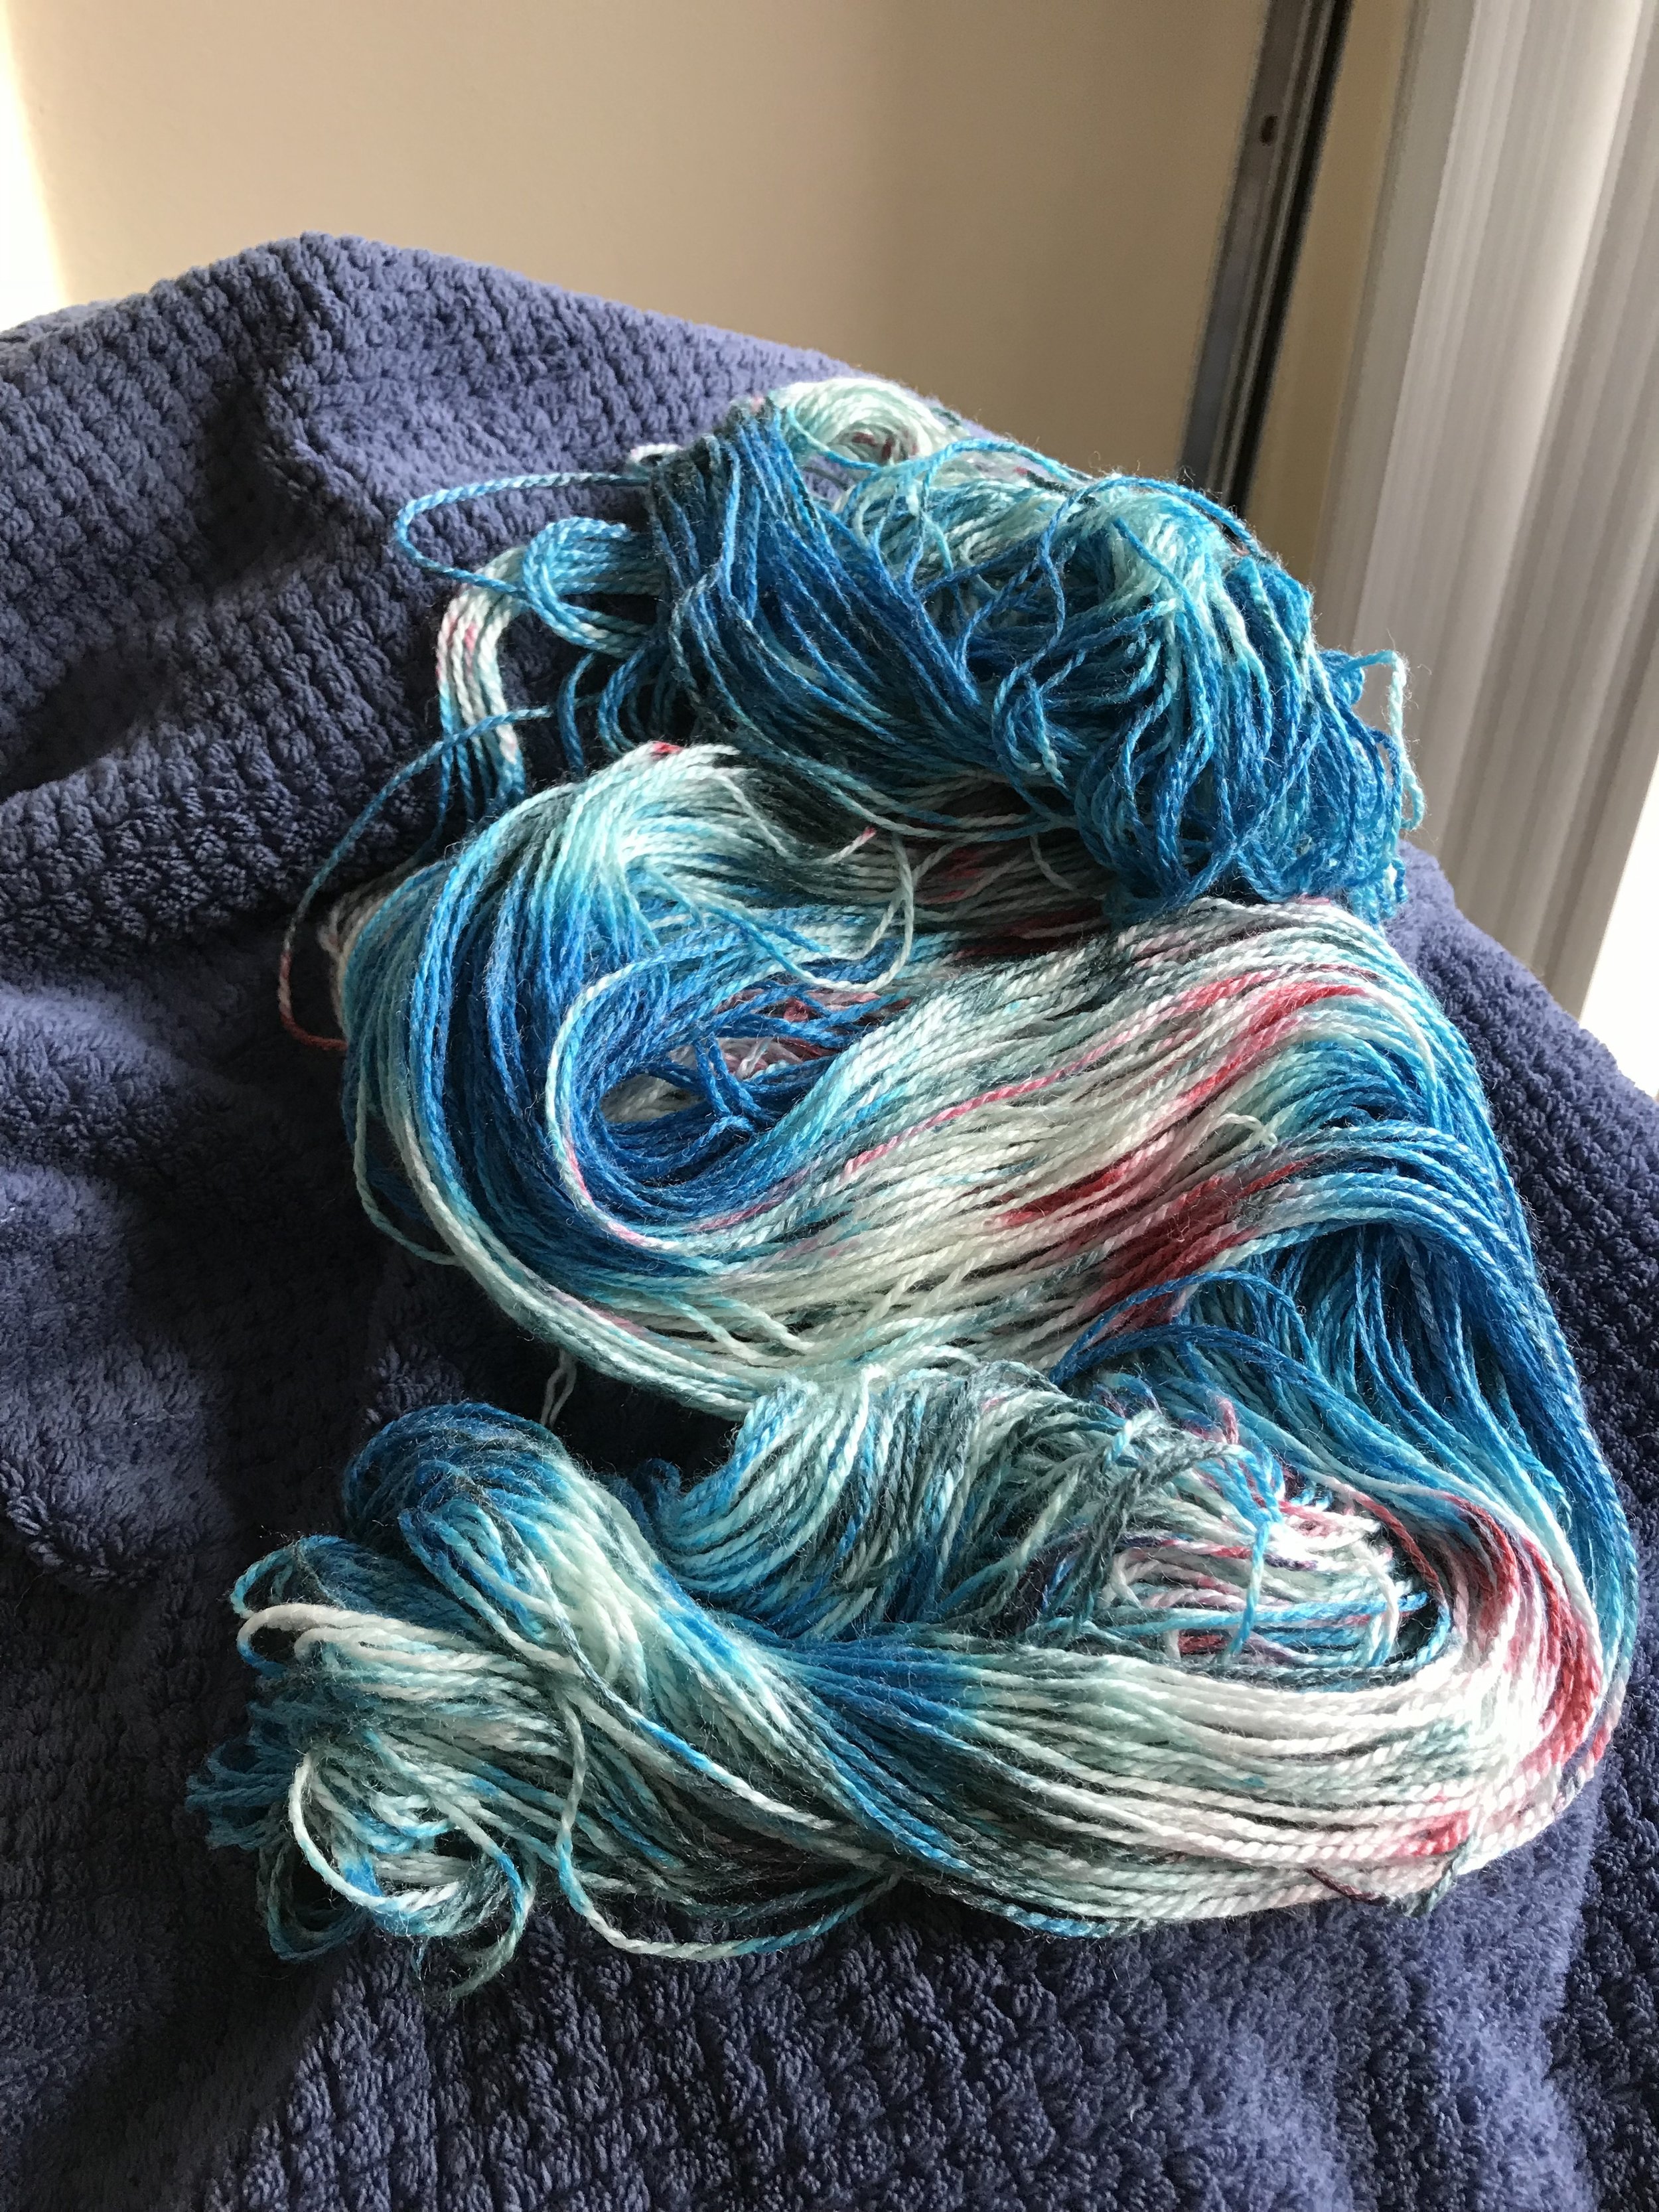
I am delighted with how much the colours pop while still playing well into each other.  

IMG_1934.JPG

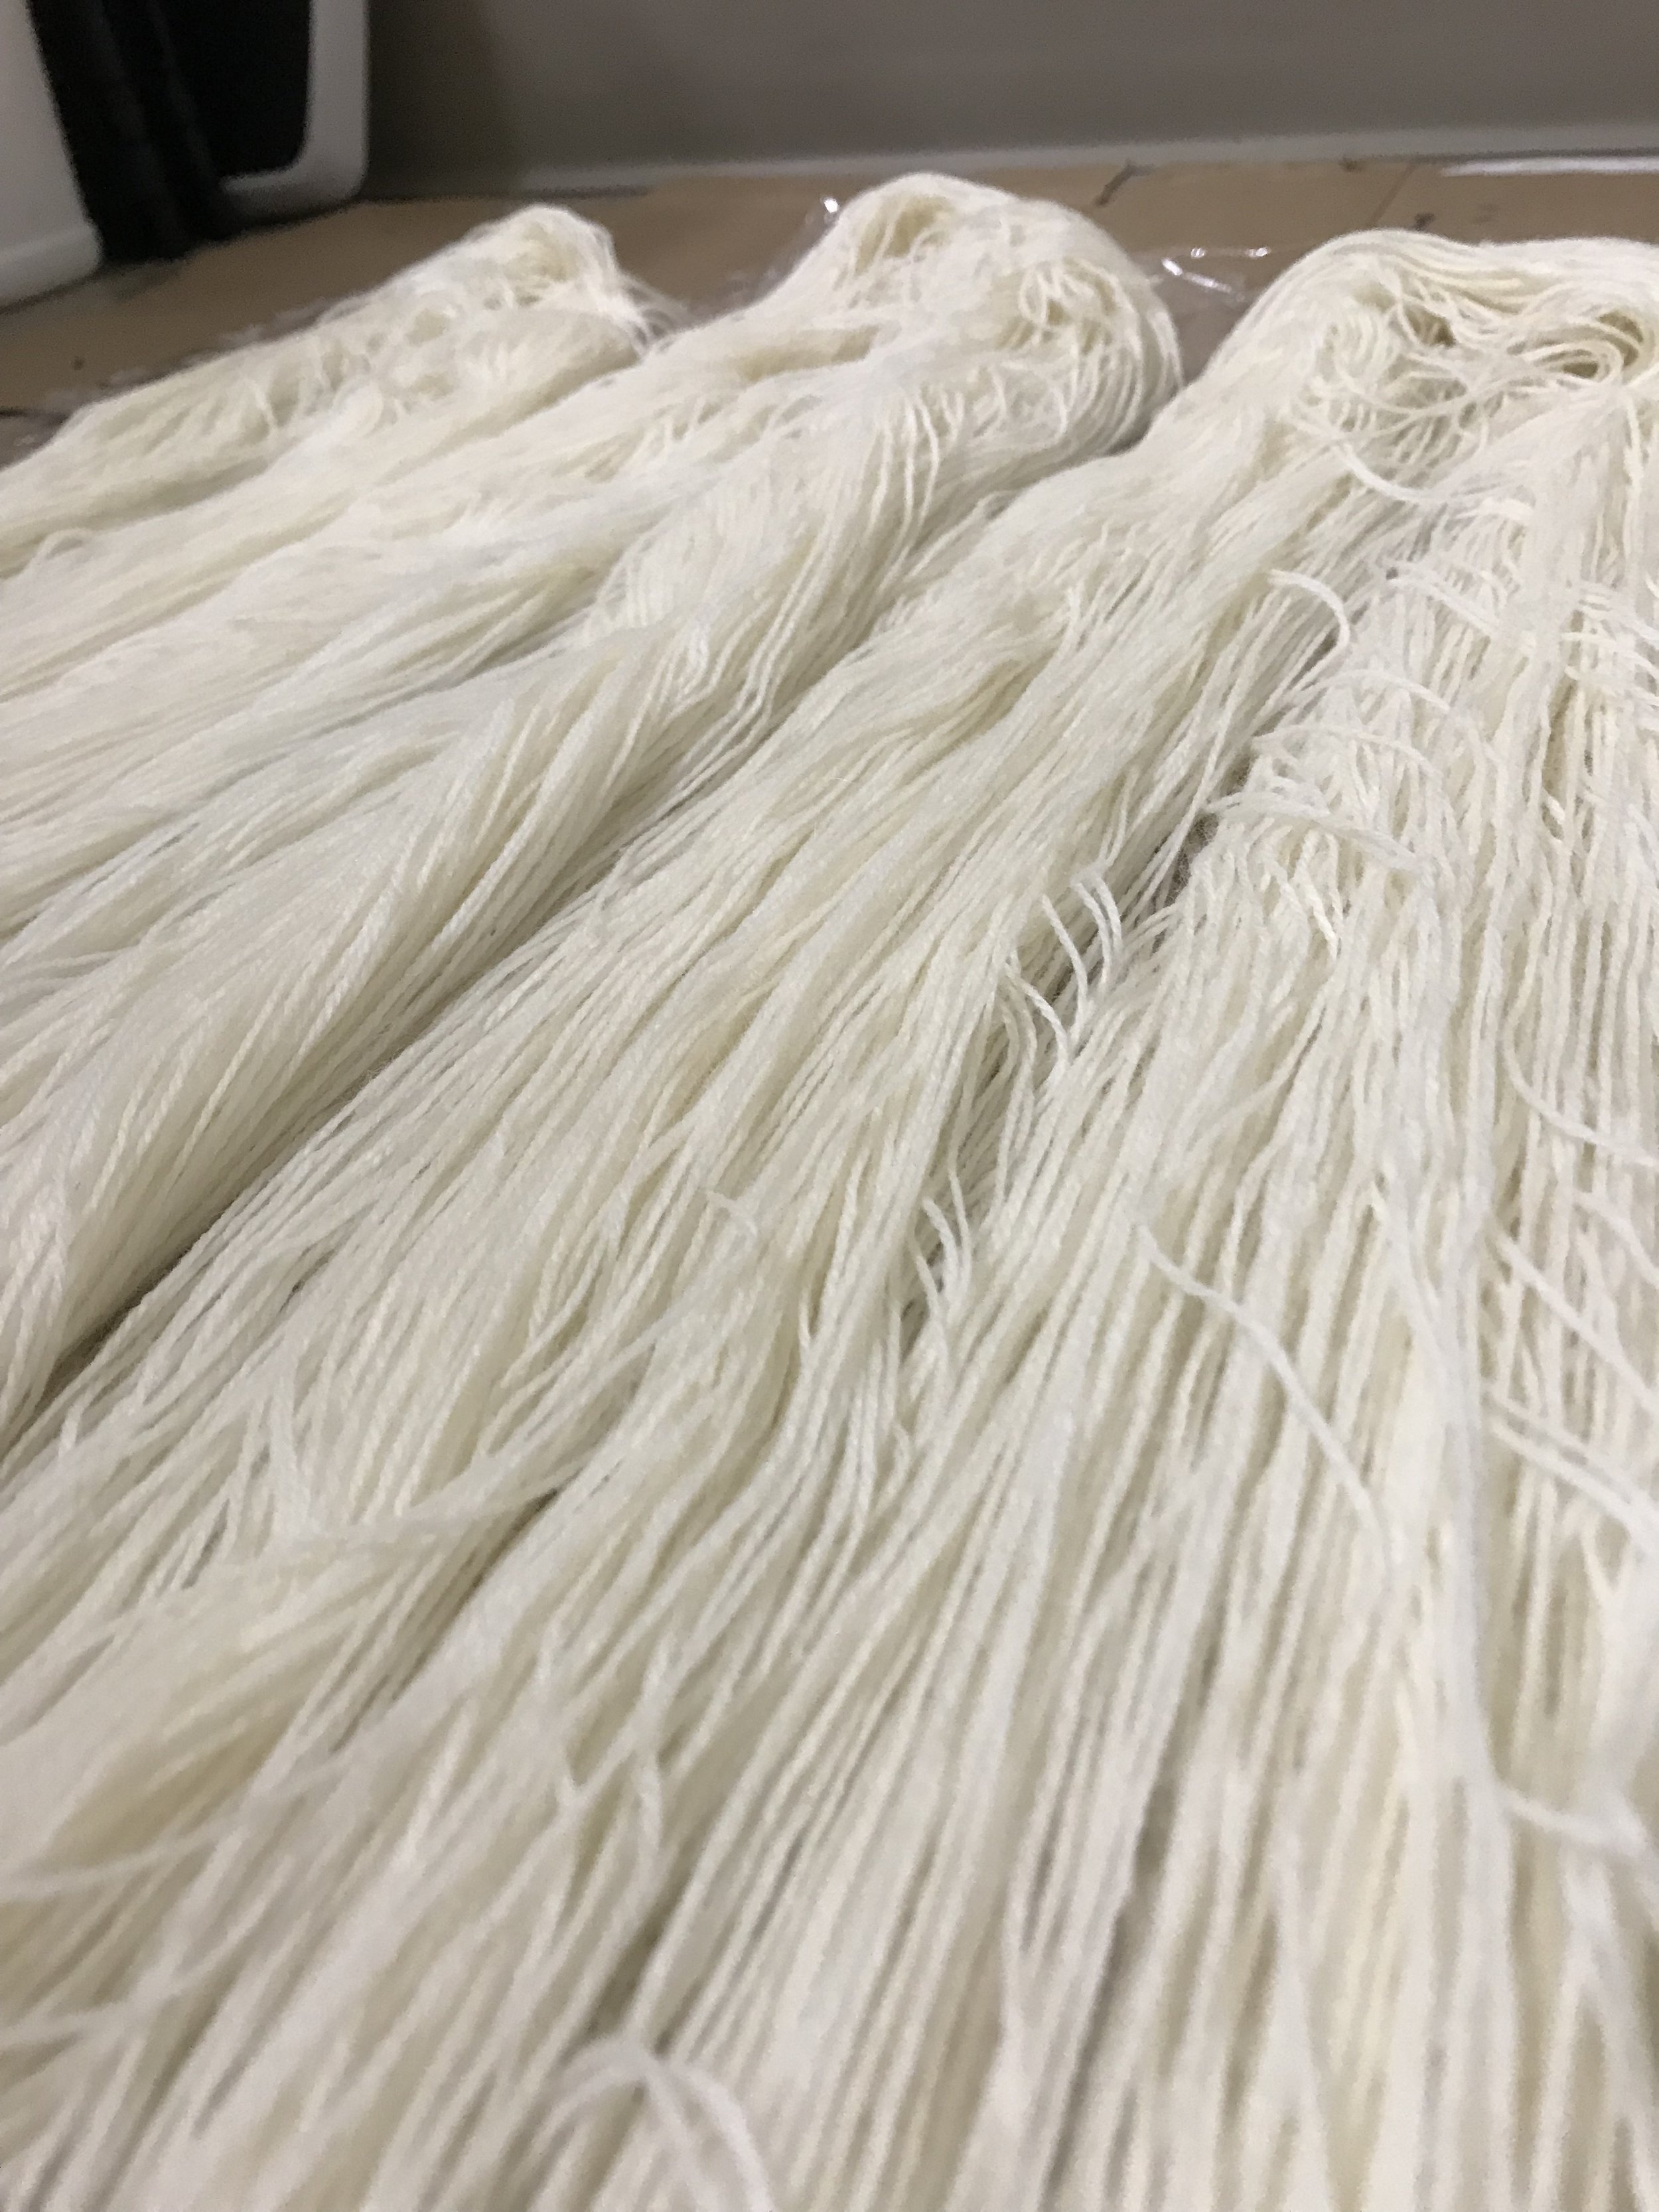
It looks a little more pooled in the original skein size that I dyed them in.

IMG_1935.JPG
IMG_1937.JPG

But distributed out superbly well when I wrapped them up as 2 yard skeins instead of 1 1/2.

IMG_1951.JPG

The most exciting part of all of this?  These will be going up in my shop soon!  You heard right, I'm making good on my resolutions this year.  I will keep you updated, as well as send out an email when my shop goes live- and to those of you who read my blog, there might just be a little extra something sweet in it for you!

Stay sweet, stay crafty, and stay tuned.

Tara Mae
Rose City Yarn Crawl 2018

Much to my surprise, a year has passed since the last Rose City Yarn Crawl, and therefore it is the season to lace up my witchy boots, agonize over which hand knits to sport, and set out on the town with my crafty coconspirator, Alexis.  

I know these aren't roses in the glass, I asked for the rose mimosa and they were out.  So here is a lavender and orchid mimosa that, while less symbolically nice for signifying the start of this adventure, was ultra delicious.  I'm not going to a look a gift mimosa in the bloom.  

IMG_1813.JPG

If you're not familiar with Rose City Yarn Crawl, I will happily explain (and if you already know, you can send your loving thoughts to those that have yet to experience such a wonderful time).

The Rose City Yarn Crawl is a 4 day event in which the yarn stores of the Greater Portland Metro Area are represented on a passport.  Each place has a drawing of their own that you can enter when you visit and put your name in the proverbial hat, and if you get stamps from all of the shops that are participating you are entered to win the fabulous Rose City Yarn Crawl prizes themselves.  In total, there are 75 prizes, if you don't count the gift of having such an incredible event to go to.  The Crawl is the first weekend of March and goes from Thursday-Sunday, and this year had 11 participating shops.  

Gallery Yarns from Knit Purl

Gallery Yarns from Knit Purl

My first blood of Saturday was this wonderful and deliciously soft alpaca yarn from Knit Purl.  This yarn also now smells like several different colognes and perfumes as I have thrust it upon anyone that looks like they need a bit of extra scrumptious softness in their lives.  I'm not complaining though, they got to experience some lovely yarn and it's a miracle it doesn't smell like the floor.  Winding this soft and slick yarn proved to be a challenge, as it would launch itself off the ball winder if I went any faster than a snail's romantic stroll in the park.   

IMG_1827.JPG

Despite my flinging yarn wildly, the crawl was remarkably relaxed this year.  Yes, the stores were stretching at the seams to let in all of these avid crafters, but it was like being in a house with a huge family.  There were few stores that Alexis and I went into that we didn't get complimented on our knit wear.  There was near endless positivity and excitement just to be there participating.  Granted, we spotted a person here and there that acted prickly- but we can just hope the yarn will warm their heart if the people haven't already.

In our journeys we also stopped by Knotty Lamb of Forest Grove, OR (a personal favourite of mine).  One would think that 11 shops would include every store in the area, but sadly Knotty Lamb is too far out of Portland to be included in the Yarn Crawl.  Instead, they hosted a massive sale on all of their yarn along with a raffle for their own prizes, rewarding anyone willing to come the extra distance to make the shop part of the crawling.  

Witching Hour from Knotty Lamb

Witching Hour from Knotty Lamb

Before I could even blink, Alexis and I had gone to every shop and submitted our passports to Starlight Knitting Society.  This Crawl went by quick and if it hadn't been for my crafty partner in crime and the amazing people still around me (including meeting the positively stellar individuals of Indie Knits), I would have felt a little sad.  I don't go out a whole lot anymore, health hasn't been in the best place for it, and so it was a tad bittersweet to realize the crawl was already over.  That my crafty community at large, this huge family, would be apart until the next event.  

Lucky for me, Alexis called upon her endlessly magical ways, and handed me the call to action I needed.  As can be seen below, there is a Lunar Phase Mystery Knitalong by Larissa Brown that we're just in time to prepare for.  I knew it was perfect just from the logo (few themes get me like moons and stars).  Always surround yourself with inspiring and lovely enablers.  

IMG_1846.JPG

Alexis discovering the Mystery Knitalong also made me realize that even if it's not the Crawl, or one of the many other fiber events we go to, I always have my crafty family.  My mother and I talk projects often (especially considering she's lovely enough to read my blog- hi mum!), I'm still friends with my spinning group that I grew up with that I find endlessly inspiring, and I happened to become friends with this remarkable human being that's to the right of me in the photo below.  We became friends at first through luck and chance, and close friends through talking and crafting.  

IMG_1745.JPG

If you're looking for more craftiness, and want to read a blog that's charming and well written, Alexis has her own place on the internet at https://alexis-findingmyknitch.blogspot.com/ .  Because we definitely all need more of a crafty family wherever we are.

Stay sweet, stay crafty, and stay tuned.

Back To It

As you may have been able to tell for the abundant knitting and dyeing projects I've been working on and writing about, my sewing machine hasn't seen a whole lot of action.  Other than a bit of occasional work on a few quilt tops, my dear Bernina has been downright lonely.  

Lucky for it, my partner's backpack had a thing or two to say about my diligent machine being underutilised.  

IMG_1536.JPG

This backpack has seen many countries, countless adventures, and has held up well when times were tough- and my partner wanted to invest in prolonging its life so that it may see many more wonderful years.  

The back part of the strap was perfectly solid, so I cut away the top part that frayed into nothingness and left the part that was strong.

IMG_1540.JPG

Using a quilting foot and a jean needle for my machine, I attached this heavy duty nylon backpack material to the strap that lasted.  I'm pretty sure my machine wasn't thrilled that this tough job was what got us going again, but it held up like the warrior it is and after a lot of fussing and turning, the pieces of fabric were locked in.

IMG_1674.JPG

As you can tell from the photo above though, there was only so much I could do with the machine.  Which meant the rest had to be done by hand.  

IMG_1676.JPG

The process of pushing and pulling the needle through these tough layers of fabric was enough to make my finger tips feel like I touched a pan that came right out of the oven.  For once in my life I actually considered getting a thimble.  Each side needed to be hand stitched in to ensure security and strength.  My finger may never forgive me, but I got the job done.  

IMG_1680.JPG

With the straps in far better shape, this rough and tough backpack got loaded up for our next adventure.

A little get away to one of my favourite places, Montana.  Here I rewarded my tired hands with delicious wool silk blends and a good bit of relaxing.  

Stay sweet, stay cozy, and stay tuned.

Enchantress Cowl

Because of the items I gravitate towards in knitting, my projects tend to be things that are worked on and finished in a matter of months or sometimes a year.  What can I say?  I like a commitment and adore a challenge.  

I realised recently though, that it can often curb my motivation and leave you- my dear reader, with only hand dyeing adventures to read about week in and week out.  So I thought for the sanity of all of us, I would do a nice cowl in beautiful Malabrigo Rios: Zazamora.

IMG_1512.JPG

The yarn itself was a present from my mother on the holidays, and I quickly remembered why she is the ultimate queen of colours.  The yarn flowed gracefully between greens, purples, and blues- which was all snuggled in by grey undertones.  

IMG_1672.JPG

And, just as I had hoped, it made for deliciously easy quick knitting.  I love working with changing colours, and this was a perfect taste of that to make this cowl fly off the needles in a matter of days.  

IMG_1672.JPG

Which is especially lovely since it seems the weather has decided on snow no matter where I'm going.  The universe appears to find it fitting to have people snuggle on in and get to knitting (or whatever it is that people do).

IMG_1598.JPG

Stay sweet, stay crafty, and stay tuned.

Weird Autumn

Lately when I've had a moment that hasn't been taken by knitting, dyeing, spinning, sewing, weaving, or one of my numerous other crafty passions, I've been playing a wonderful game called Night in the Woods.  It follows the story of a 20 year old woman finding her footing in her life and how things change when you're technically no longer a kid.  It's based in a small town, and having so much in common with this delightful feline protagonist, I wanted to start a series of hand dyed yarns that encapsulates some of the lovely scenery that the artists of this game so lovingly created. 

Night in the Woods Developed by Infinite Fall (2017)

Night in the Woods Developed by Infinite Fall (2017)

The first of this series is an homage to a song you're able to play in the game called "Weird Autumn" and the colour palette the landscape is painted when this moment comes up.  

I used a lot of stark orange stretches and then mixed varying shades of brown and black in so that it got the feeling of a bright autumn in a woodsy town.  

IMG_1515.JPG

For this dye lot I also tried squishing the yarn more so that the colours would blend into each other more, giving some nice fades in and out of each colour.

I'm thrilled with the results too, it made the orange and brown far more rich and complex, making a single colour of orange (pumpkin) look like I used several different kinds of orange and the brown mute the white enough that it wasn't too much of a contrast to the earthy tones.

IMG_1558.JPG

In total, I used 2 brown dyes (chestnut and brown), 1 black dye (jet black), and then the Pumpkin Orange I mentioned previously.  

IMG_1555.JPG

As I continue to dye yarn I am working towards honing my skills enough to make sure that when I start selling my yarn it will be the quality you deserve and something I can be proud of, it's taking a little time to make sure I'm there- but it is coming and will be showing up on this site, so as always...

Stay sweet, stay crafty, and stay tuned.

Meddling in the Deep Sea

I'm back with more adventures in dyeing yarn and deciding what the colours mean.  

The colours for this were, as the title might lead you to believe, inspired by spiraling depths and mysteries unknown lying within the vastness of the ocean.  

I imagined sirens with sinister secrets, giant squids with long histories of destroying magnificent ships that stranded too far off written paths, mermaids with longing and fanciful dreams, and spectacular scales of creatures never witnessed by human eyes.   

IMG_1428.JPG

Even though last week i said I wanted to work more on the pastel range in future projects (which I still do), I wanted these colours to be rich and vibrant.  Colours that make you want to live a life at sea.  

IMG_1435.JPG

Overall, I think it turned out delightfully sinister and magical all at once.  There are areas that are illuminated by the white contrast to the colours, and there are stretches that are dark where I squished the colour into the entire section so that no light could escape through.  

I have no idea what it's going to be yet, but I love that it holds potential along with the mystery.  Full of adventures and secrets.

Stay sweet, stay crafty, and stay tuned.

Ode to a Calico

In full acceptance that this outs me as a crazy cat lady, this colour palette is only coming around because I'm madly in love with calico cats- especially my family's cat.  I could give you some magnificent story like I did with the Great Unagi, but honestly I just miss my cat.  She stays with my parents, and there isn't a day I'm not lonesome for her.  So here I am, making a tribute to her lovely colours and delightful soul. 

IMG_1372.JPG

That being said, I did add some colours inspired by other calicos I've encountered that reminded me of my dear cat.  I figured if I go out of my way to pet them whenever I get the chance, they should probably feel this fibery love and appreciation.

IMG_1374.JPG

Other than giving you sappy feelings about my cat, I also thought it was worth while to talk about what I've been learning with the more frequent hand painted yarns I've been doing.


IMG_1375.JPG

This yarn in particular showcased how less can be more.  I was going for a far more light yellow that would blend well, and instead ended up with an electric yellow that quite clearly stands out.  For anyone getting into the dyeing game, I would highly recommend trusting that the colour will show even if there is only a little bit of dye powder getting mixed in (if you're going for less intense colours).  

IMG_1379.JPG

The colours do fade a bit after being washed, but not too much (as long as the fiber was prepped properly).  

IMG_1380.JPG

Here's the part where I get sentimental again.  I love this yarn even though it's not what I expected at all, which reminds me even of the very feline this represents.

IMG_1381.JPG

My dad, brother, and I brought her home in a cricket box from a very small pet store in the town I grew up in.  She was the runt of the litter and terrified of everything.  My mother told me years later that she feared this little fraidy-cat wouldn't last if for no other reason that her heart would give out from being startled by the slightest sound.  

She changed though, she got braver and started to warm up to the family we brought her into.  She's 15 years old, 13 pounds, and the most delightful creature I've ever met, and even from a thousand miles away she makes my heart melt and want to be more.  

IMG_1389.JPG

I think of her because she reminds of why it's nice to take chances even if you're not sure things are going to work out, especially if what motivates you is love.  

You'll be noticing some changes around the site in the next couple of months.  I'm filling out the website a little more, I've added a link to where you can donate if you so feel inclined (don't worry, blog posts and adventures will keep coming no matter what), and I'm taking further steps to making the Sweet Crafterlife a permanent fixture of my life, and hopefully yours.  

I'll keep you updated, but until then-

Stay sweet, stay crafty, and stay tuned.

A Bit of Warmth for the Winter

At the last Oregon Flock and Fiber Festival I had immense amounts of fun just wandering around the booths and indulging in beautiful creations sold by talented people, but I also went there with a goal.  To find undyed fiber from a long time friend of mine, and enough of it that I could make my partner a sweater and not have to worry about running out.  

This is three pounds of fiber for that very purpose.  

IMG_1069.JPG

The spinning and plying took me a good while, especially considering that I've been changing things up and spinning thinner than I did a year ago.  And no, I'm not putting the fiber on a diet, I just like working with a smaller gauge because I like to punish myself and make all of my projects take longer.  I like a challenge.

At the end of it all I ended up with 2,857 yards, which is perfect.  If I run out of yarn for his sweater with that much, I wasn't supposed to have enough yarn in the first place.  I'm so destructively hopeful about this yardage that I'm even hoping I will have enough leftover to either make myself a sweater too, or a matching pair of socks for the original sweater.  We'll see.  

IMG_1287.JPG

I used the colour Scarlet from Jacquard's acid dyes, and promptly fell in love.  

Not just for the usual reasons either.  This time there was an added perk, but first I need to explain that I am a red snob.  Red is often done dishearteningly bad.  The worst culprits are lipsticks- they almost always have pink undertones or are simply puny and incapable of making anyone feel any emotion other than "eh".  Reds should make you feel something.  Red is powerful and fierce, in the best of ways, and to let it be a dull sizzle of evocation is criminal.  

If you're a snob like me, Scarlet won't let you down.  The photo below does it a disservice by making it look a shade or two on the pink side, but it's not pink at all.  It's red the way red should be.  Bold and strong.  

IMG_1307.JPG

It will make for a perfect sweater (or hopefully two).  

Stay sweet, stay crafty, and stay tuned.

The Great Unagi

Dyeing has quickly become an obsession.  I thought that I would just do this for fun here and there and now I'm daydreaming about what new and fun colours to put together and taking pictures of inspiring colour combinations in the world wherever I go.  

Despite the fierce passion though, I'm still working out the kinks with how much dye to add to water to get the colour I'm picturing and coming to grips with the fact that I need to start ignoring the little voice in my head that always insists to add "just a few more dashes" to a bottle, even though it's supposed to be a light and subtle colour.  

IMG_1267.JPG

When I first started adding the blue to this yarn, I realised I had definitely indulged that little voice far too much.  This was supposed to be a very light turquoise (practically pastel) and then I was going to do small hints of the green with proper spatters of the cherry red.  After I added the blue and red, and it looked like an aggressive fourth of July decorations, I decided that the green needed to swoop in and save the day.  

Even though it wasn't what I was originally going for, it did start to capture my heart and eventually my brain took to the new input and started conjuring strange and mystical scenes where this yarn would belong.

My favourite tale for this was the story of the Great Unagi, an eel of colossal proportion that makes its home in a vast lake that fishermen attempt to trek and fish on.  It would be a magnificent creature with mostly blue and white scales with the occasional red and green- as if it were calico like a koi fish.  

If the fishermen on this lake didn't 

If the fishermen on this lake didn't show respect to the waters or to the upkeep of their boats or fished in a reckless or greedy way, the Great Unagi would awaken from its slumber and rise to attack their ships, leaving them stranded with their only option for survival being to try to swim ashore.  


I imagine these people who fished going home to their families, and reminding their partners and children to be mindful of how they treat the lake and to always be cautious when going out onto its waters.  They would gather around the table to eat, and tell stories of the most exquisite and sturdy ships being pulled into the depths, never to be seen again.    

Then of course, you would have the old fishers of a forgotten age that would know to share their biggest fish with the Great Unagi, and so long as they stayed kind and humble in the face of this magnificent being, they knew they would go unharmed.

IMG_1283.JPG

Someone then would of course have a story about how a bad storm came one night when they were trying to get home, and the waves caused the ship to capsize.  Frightened and struggling to stay above the crashing waves, they called out for help.  It would be then that they feel a strong yet slightly ridged form underneath their feet, and before they realise what is happening, they find themselves held slightly above the rough water's surface and being taken to land.  

The person would tell the story with a wistful tone, as if in that moment this fearsome creature had become a friend they knew they would never lose.  

At least, that's the story I hear when I see this.  Maybe it says something different to you.

Stay sweet, stay crafty, and stay tuned.

Welcoming a New Year

As one might tell from the lateness of this blog, my thoughts for new year and reflections of the last has taken a bit more time than I had fully anticipated, but I feel like my conclusions and dreams were worth the extra pondering (thanks for waiting for me to get my show on the road).

IMG_1231.JPG

First off, I'd like to address last year's list of resolutions.

  • I quite obviously have not opened my shop yet, and while I hope to do it this year, I'm a little glad I didn't this year.  As much as I want to make a living doing what I'm passionate about, I never want to sacrifice the quality of my work for my own convenience.  Last year was busy and a lot of changes happened- everything from getting my degree, driving well over 5,000 miles, getting my first job out of college, and picking up fantastic crafts and techniques to enrich my life.  And yes, being too busy can be an excuse to the last breath, but I'd like to think this time was reasonable.
  • I did start dyeing, and I am madly in love with it.  You will absolutely see more dyeing this year, and maybe all of my hopes and dreams come true I can become an indie dyer (aim for the moon, right?)
  • Scrap projects were also a thing last year!  You were able to share in my delight (hopefully) over the honeycomb quilt I've been making with odds and ends of fabric that I fell in love with over the years, and saved a smidge for a mysterious something special that only revealed itself recently.  Plus, while not published, I have been working on scrap rugs and have been secretly collecting remnants of yarn to do a Bee Keeper's Quilt!
  • As any sane person would imagine, I did not get through cleaning all of my raw fiber.  It didn't help that I bought more of it last year.  I know I have a problem, but I'm working on it, and by working on it I mean that the stairs in my home are COVERED in raw fiber that has been washed and is awaiting me picking through it.  Officially I'm not allowing myself to buy anymore raw fiber until it's all been cleaned and spun, but who knows- I smell alpaca and next thing I know I have 30 pounds of fiber.  It's a slippery slope.  
  • I did do some stitch showcasing in the last year, though not as much as I had intended.  I do plan to do it here and there, but I'm not sure if it will ever become a big part of my blog- I get far too caught up in finished projects.   
  • Last but not least, last year this time I hoped that I could bring some joy into the lives of the people who take the time to read my blog.  I have received so much warm and loving feedback from people I've spent my life looking up to or wonderful people that my mother knows/is family.  While I'd like to think that I could have a positive impact on your lives, I'm not sure how it could ever outshine how much joy your love and support has brought me.  Everyone from my mother's dear cousin to the strong and inspiring women that raised me to be the fierce and unrelenting crafter I am today has made 2017 unforgettably special.  It's because of all of you that I never stay down when the going gets tough.  Thank you. 
IMG_1251.JPG

As for this next year,

  • I do want to get my shop open.  I won't ever sacrifice quality, so if it doesn't happen that's just the way it is, but I'm setting that hope anyway.  
  • I want to keep dyeing fiber, and hopefully fabric, to make beautiful and lush colours that make all of you drool (prepare the towels now, this one is in the works already).  
  • As unreasonable as it may be- I would like to have at least 100 honeycombs sewn together for that quilt, and I would like to make similarly staggering progress for the beekeeper's quilt.  Yes this is madness, but my mother always told me that if I didn't have enough to do that I would get myself into trouble.
  • I would like to get better at embroidery- because it's a fabulous skill that I'm terrible at.  I do love a good challenge.
  • THE 30 POUNDS OF RAW ALPACA IS GETTING PROCESSED THIS YEAR.  I don't care if I have to become a hermit through November and December to make it happen, it's happening.  
  • Finally, because it's a major part of why I do this- I hope this blog can bring you some joy, I feel like it's the least I can do with all the joy you've brought to me.
IMG_1078.JPG

Stay sweet, stay crafty, and stay tuned.

Tara Maenew year, resolutions
A Bit of Colour Work for the Holidays

Now and then I feel like my knitting takes longer than it reasonably should.  It's not particularly fair of me since I always get drawn to big projects that are bound to take forever, but it doesn't particularly help with morale.  I often end up feeling like a turtle wading through molasses and as one might imagine- I get a bit frustrated.  Not to say I don't knit for the fun of it, because I definitely do, but I also like to be productive.

So what do I do?  I decide to make a couple of small projects all at once to make me feel a little more effective when it comes to my passion.  Including a pair of nice hats, and the one I'll focus on is this colour work beauty.

IMG_1191.JPG

I decided to do a bit of speckling fading into the next colour with this hat.  I thought it would be a fun way to do some Fairisle, and make the transitions into the starkly different colours a little less jarring.  

What I didn't realise is that the colour work made me knit notably faster than I had for the previous hat that was all grey.  I came to notice that I got excited for the transitions and pattern development, so my hands worked a lot more quickly.  The grey hat took me 2 weeks of intermittent work while this hat took me less than one week of intermittent work.  

IMG_1204.JPG

Now that I've noticed this, I see that projects that I do Fairisle with, or the yarn has colour variation that I want to see expressed, knit up far more quickly in my hands than their more basic counterparts.  Which is a blessing and a curse because while I love the changing colours, I also love very basic and simple knitting projects that let the yarn speak for itself- but the knitting hands want what they want, and that's challenge and change.  

IMG_1213.JPG

So here's to the next year of challenge and change (at least in moderate doses).  I hope all of you have had a wonderful winter, and that you set the New Year off right- with lots of projects brewing in your head and inspiration guiding your forward.

Stay sweet, stay crafty, and stay tuned.

Tara Maefairisle, colour work, hats
Making Dreams Happen

Part of the reason I started this blog was to get some footing in making a crafting business for myself, but as you may have noticed I tend to make most of these fun creations for myself.  I suppose there's a part of me that always worries that these sweet little creations won't be loved as they deserve, which is silly I know- but I hear so many stories about unloved hats and discarded sweaters that I've become a bit reluctant to craft for just anyone.

Lucky for me, the first custom order for knitting I got was from an endlessly inspiring person that I've admired for years.  She asked for two hooded cowls to be made, and in a heartbeat I was doing my best to get them knit up and ready to be loved by her.  

She might not know it, but the relief to have her be my first hand knits customer was immense.  I couldn't imagine a better home.

IMG_0769.JPG

While it may have not felt like it on the outside, I was so delighted how relatively quick they knit up.  I made basic rectangles for the hoods, then stitched them up the back, and then attached them to a long strip that buttons in the front.

IMG_0940.JPG

Maybe it was the pure excitement of making these for someone, or the practice I've been getting as of late, but I've never felt so chipper about how well my knitted items were stitched together.  

IMG_1042.JPG

Soon enough my dreams of selling knits to a good home were made a reality.  Over a cup of tea she opened up the package where they laid in wait and scrunched the fabric of the knitting to make sure it had the proper feel.  

IMG_1048.JPG

I never realised how easy it could be to sell a knitted item until I saw how much other people can value the time and love that's put into something.  Here I've been, hoarding away all my creations (save for minor moments where I make something for my mother or partner), yet seeing my friend take these hoods home was just as good as the first time I wear something I've made out (and it doesn't take up as much space in my home!).  

So in the season of sharing and loving, know that even if you've heard the horror stories or experienced them yourself, there will always be wonderful people out there that appreciate your time and energy, all you have to do is know the difference.

Stay sweet, stay crafty, and stay tuned.

Tara Mae
The Hot and Steamy Post We've All Been Waiting For

Like I promised, I'm back again this week with a different dyeing technique that is supposed to keep my colours bright and in their place.

Steam bath.

IMG_1056.JPG

I followed Anette of Fiber Artsy's Tutorial because I wanted clear directions and to be a little more sure of what I was doing.  I love to improvise and take chances, but there's a time and a place and I for this round of dyeing I wanted to do it right.

Yet, despite following a tutorial that was well documented for being successful, I did get a bit nervous at this stage because of what happened to my colours last week.  

I love this intense dark purple with sunshiny yellow, and didn't want to see them muddy into nothingness like they did last time, because while I do like the look of the yarn, it wasn't what I was going for. 

IMG_1063.JPG

However, it doesn't do any good to worry at this step in the process so I wrapped it up anyway and let it steam for an hour and cool overnight.

Waking up and unrolling this in the morning before work felt like a special present.  Not that I expected the tutorial to have lied to me, I just expected that some gremlin I forgot to pay off would have hopped in the pot and mixed my colours to the point of hideousness.  I mean, what kind of universe would let my colours turn out so nice?

The steam bath outcome is on the right, and last week's dye bath result is on the left.  As you can see the colour is perfectly preserved and well defined with the steam bath, whereas the dye bath melded the colours together completely.  They were given the exact same amount of dye, had the dye painted on them the exact same way, and the dyes applied were mixed to the same proportions (because science is only reliable when you repeat the steps with diligence).  

IMG_1075.JPG

I found this to be a fantastic learning lesson, and am also pleased to say that I love both of my outcomes, just for different reasons.  I plan to make sweaters out of both of them, and fondly consider them the sister sweaters.

IMG_1076.JPG

So until those sweaters come around, or at least until I get another project on the books...

Stay sweet, stay crafty, and stay tuned.

More Adventures to Dye For

Since I've started practicing more and more with acid dyes, I thought it would be fun to do a small demonstration of the difference between setting dye in water and setting dye by steam when using multiple colours.  This week I'm going show what happens with the water setting and next week I'm going to show what happens with the steam setting.

IMG_0977.JPG

For both batches I'm going to do a speckling of yellow and purple on white, because it's one of my favourite colour palettes and it will better show if colours bleed or muddy.  

I added the colour to these skeins by dipping my (gloved) finger tips into the dye mixture and dripping and smearing the dye where I thought it should be.  It wasn't the most elegant system, but it was fantastically fun and almost certainly how I'll be doing it in the future.  

IMG_0982.JPG

With how much fun it was to hand paint the yarn, I did get a little disappointed when the yarn pretty immediately lost the vibrancy of colour in the water.  The longer it sat in the water, the more the colours faded and bled into the white spots.  The citric acid did very little to save the fleeting colour as well.  

IMG_0984.JPG

Once all was said and done, this is how the yarn turned out.  The yellow (oddly enough) dominated the yarn and there were only faint ghosts of the vibrant purple I so loved.  

IMG_1040.JPG

If you're dreading that this whole process was a wash (pun intended) don't worry, I still like how this yarn turned out for some reason and it is in the project queue to become some lusciously tall socks that keep me warm and give me further practice in turning heels.  

Stay sweet, stay crafty, and stay tuned

Tara Mae
Lilac Love Letters

With holiday deals zipping around my inbox in the last week, I decided to get some ready-to-dye yarn and try my hand (at long last) with Jacquard's Acid Dyes and share the experience with you.  So here we go!

IMG_0853.JPG

First thing's first- Jaquard Dyes' website is LOVELY, and I'm not being sarcastic or paid by Jaquard Dyes.  They did a proper good job.

On the website for the dyes, there is a clear and direct PDF that directly states exactly how to best use their dyes.  I love when you can tell that someone actually put thought into what they create, because far too often instructions seem like the product of being at the wrong end of a bottle of vodka.

Since I was dyeing only a couple of ounces of fiber I used 0.25 ounces of the lilac dye and a dash of silver grey (yes I should have measured but I just wanted to play with dye today- don't judge).

From the very beginning this fiber was immersed in my magical cauldron of swirling purple I started feeling a strong preference for acid dyes over natural dyes.  The natural dyes are fun to use, but I couldn't get over the vague disappointment that the colour was never as brilliant as it looked in the dye pot.  With acid dye, the colour is there and it's there to stay- and that's what I want.  None of this "will we, won't we" nonsense- it's a colour that can commit and I respect that.

And as if this experience wasn't magical enough- I discovered the pure wonder of chemistry that is citric acid in a dye bath.  It creates a process that Jacquard Dyes refers to as exhausting the dye bath, which basically is when citric acid (or vinegar) is added to the dye bath and it makes the fiber soak up all of that luscious colour.  If you look closely at the photo above and the photo below, after the citric acid is added, the water that was once dark and mysterious is suddenly miraculously clear, as if the water had never known the presence of the dye. 

IMG_0871.JPG

To further my love for using acid dyes, the colour didn't bleed at all when I washed it afterwards.  The water I used to wash my yarn looked just about as clear as it did before I added the freshly dyed yarn.  

IMG_0881.JPG

This process was so overwhelming positive that I will warn you now, you will be seeing my hand-dyed yarn from me.  I'm hooked and I think there's nothing that can be done to save me, this is my life now and I'm happy with it- so consider yourself warned.

IMG_0882.JPG

Until then though,

Stay sweet, stay crafty, and stay tuned.

Learning Tough Lessons

Recently I've been feeling more antsy than usual to get my raw fiber in a place where I can spin it and make it into the things I've dreamed of it being.  I contacted one of my local yarn stores about their drum carder rental and decided to set out on what I hoped would be a relatively quick trip of processing all 30 POUNDS (yes I weighed it) of my alpaca stash.  

IMG_0654.JPG

The owner and employees of Black Sheep were more than gracious in letting me pack my heaps of alpaca into their back room and gear up to start running it through, and I immediately started noticing problems.

IMG_0655.JPG

It had nothing to do with equipment I was using or the quality of help I was provided (the people at Black Sheep did all that they could and gave me some spectacular advice in the end).  The problem was that I assumed that, like how I assumed a mill worked, the drum carder would be a good quick fix to hours and days of hand carding all of this. 

While the motorized drum carder does do a good job of turning raw fiber into bats, it can only do so much about the clumped in plant matter.  It was catchy enough to get caught in the fiber, the likelihood of it continuing to catch is pretty good.

Don't get me wrong, the drum carder did its best to clean out a good chunk of the plant matter, but as you can see from the "processed" fiber below, the work only went so far.  

I'd like to think I should have known better, but I honestly got stars in my eyes and hoped this would be the cure-all.  Feeling defeated, I walked out to my car and put all 30 pounds back in the backseat and ran into the owner of Black Sheep herself, Tina.

She gave me these words of wisdom:

  • Wash it first: It may seem pretty clean, but it's not and the washing process helps significantly.
  • Take the time and pull the pieces apart:  Sit down in front of a good show with a newspaper or drop cloth on your lap, and pull apart each pieces until it's all just fluff.  It will get rid of a good chunk of the vegetable matter, and will make the fiber go in and out of the drum carder with wonderful smoothness.  
  • Then come back to the drum carder:  It's not great that it didn't work as well as you hoped, but it's not hopeless.

I allowed myself to sulk for 10 minutes in the car and then drove myself home to think about all of this and do something more productive than feel sorry for myself when I should have known better.


Other than the wisdom imparted by Tina, I had two more takeaways from this:

1.  Just because cheap fiber at Oregon Flock and Fiber Festival seems tantalizing and amazing, it doesn't mean it's actually worth it.  Up front you don't pay much, but you end up paying the difference and then some with time and equipment.

2. This is why processed fiber costs what it does.  People like me think that by having raw fiber and animals that you save a lot of the costs, and it's just not so.  Yes, people who raise animals and dye fiber up charge a bit for their time and materials (as well they should obviously), but they're also saving you the trouble of doing it yourself.  I love to dye yarn and fiber, but I don't always want to do it for every project I have.  I also appreciate that there are creative and talented people out there making beautiful yarns and fiber for me, and I want them to be able to make a living off of their hard work.  

While I was frustrated for 10 minutes, it's good perspective on why fiber costs what it does, and why cheap deals are fleeting savings.  I'll probably still look into unprocessed fiber in the future because I have a problem, but I feel less inclined to sit with 30 pounds of fiber that needs hours upon hours of attention before it's usable.  Life is all about learning.

Stay sweet, stay crafty, and stay tuned.

Tara Mae
Stellar Staples

As I get emboldened by these fashion-sewing successes, I've gravitated more and more towards simple basics that make a wardrobe strong and versatile.  One such lovely type of garment, is a pencil skirt.   

IMG_0400.JPG

To start, I folded over this piece of jersey fabric and cut two pieces that looked like this nice robust pot shape when folded over.  

I left the bottom connected on both pieces, so when unfolded it looks like this.  I did this so that the bottom of the skirt would more easily stretch and be forgiving of my strange activities like walking or generally moving while wearing the skirt.  I know it sounds crazy, but I loathe a skirt that feels like a straight-jacket for my legs.

IMG_0405.JPG

The other nice thing about cutting out the fabric like this is that when I fold one half of it over the other half, all of the seams are hidden away inside the fold, rather than being exposed on the inside of the skirt.  

Here is the lovely hem of the skirt that allows for movement. 

IMG_0407.JPG

For the waistband of the skirt I applied the same sort of principle- two long pieces that are sewn together and then folded in half to conceal the side seams and to allow for strange things like breathing.  

IMG_0409.JPG

I sewed the waistband to the skirt in such a way that the seam was present on the inside of the skirt, but everything else was concealed.  It was exciting that it turned out so well on the first try and it will be nice to have a bit more colour in my professional wardrobe.  I tend to gravitate towards executive goth.  

IMG_0461.JPG

This skirt was pretty straight-forward in design and only took an hour to make, so if you're in need of a good basic- this might just be your friend.

Stay sweet, stay crafty, and stay tuned.

Tara Mae
The Sweetest Dreams

As we wear the things we love, they get a little tattered and rough around the edges.  Or in my partner's case, he gets a massive hole in his pajama pants.

So what do I do with his birthday coming up?  I decide to make him two pairs of pajama pants to replace the ones that are beyond repair.  

IMG_9976.JPG

I've been working on a lot of pants designs lately, so I will do a blogpost directly about how to get the fit for the butt right and what to aim for with the legs.  With that in mind, I thought I'd focus on what's a little more unique to men's pajamas.  The mysterious little buttoned up hole that I recently found out is not just for aesthetic appeal, i guess I don't ask enough men about their pajamas.

I sewed on a strip of fabric for the cut I made for the opening, and then folded said strip over.  I attached it by sewing in the ditch of the first seam so that my second seam would be invisible from the outside of the garment.  I did this because it will make where the fabric was cut more durable, and so that when I make the button and buttonhole, both will be more secured since they will have more to grab onto.

Once finished with either side of the opening, I lined the bottoms of each together and sewed them thoroughly together so that from the outside you can only see one side of the opening (look three pictures below for reference).

IMG_0010.JPG

For both pairs of pajama pants I used buttons that would be fun accents (because I refuse to let my previous notion of this opening being a fashion choice die in vain).  

IMG_0012.JPG

After all of those pieces lined up, I needed to do the waistband.  For that I used elastic and a draw string. 

IMG_0045.JPG

To sew in the elastic, I made a sewn together loop of elastic that is as big around as my partner's hips, and then I folded the fabric over and under the elastic loop, giving myself enough room with the fabric so that I would have a small allowance to sew on the top and bottom of the elastic without catching the elastic in my stitches all the way around.  As soon as I was finished with a section, I would scrunch up the fabric around the elastic inside, and work on the next stretch so that I would have plenty of room to pin and sew.  I also lined the cord up with elastic while doing this so that I wouldn't have to thread it through when I was finished.

IMG_0059.JPG

For the pockets, I left a long opening between the front and the back on one side and then sewed the pocket's matching slit to the one for the pants' hip.  I gave myself a bit of a deeper slit on both so that I could sew the up all together (sewing together four layers) so that the pocket would be less likely to tear at the bottom of the opening.

Then when I was working on the waistband, I sewed the top of the pocket into the waistband in the front so that the pocket would stay in place.

IMG_0060.JPG

Both pairs turned out quite splendidly, and I only have to make minor adjustments to both now that my partner's birthday has come and passed and he's given them a bit of test driving.

IMG_0047.JPG

I will happily make the adjustments and enjoy the fact that he wears things that I made.

Stay sweet, stay crafty, and stay tuned.

It's the Bee's Knees!

No, this isn't about the quilt that's going to take me the rest of my life.

I figured out how to make a honeycomb patterned scarf with fall colours.  Oh my heart.

Oddly enough, a lot of the clothing I either purchase or make for myself are inspired by my numerous day dreams.  There's something about making my life into something that I find ideal that makes even the smallest things or the seemingly most insignificant days feel a little extra magical and purposeful.  Much like crafting, it helps me feel like I'm making my dreams real.

IMG_7531.JPG

I designed the idea on www.stitchfiddle.com.  To make this pattern work with all of my various different colours.  I originally attempted to keep all of the colours separate, but found that with so many changes in yarn that it simply wouldn't hold together very well.  I attempted a couple of times, but quickly realised that I was merely bashing against a brick wall repeatedly, anticipating an entrance.

To keep everything together and solid, I took the dark grey yarn as the base, then introduced each colour where they were needed.  Lucky for me, the colours managed to stay bright and happy even though the grey was present.  

IMG_7533.JPG

After that was figured out, all I really needed to do was keep knitting until it was long enough- and considering my ridiculous standards for scarves, that was going to take a while.

IMG_9868.JPG

I just didn't fully appreciate just how long it would take.  

This scarf took me a year to make.  Granted, I got distracted by MANY other things, as you may have noticed, but nontheless.

IMG_9021.JPG

This scarf saw me through many adventures.

Everything from some dear memories with my childhood cat to adventures with my mum and brothers.

IMG_9093.JPG

I kept promising myself that I would only need 12 more inches, and yet there was always more.  When I got to the end, it didn't seem possible that it could be finished.

And it wasn't!  The best part of doing colour work is running in all of those itty bitty ends! 

IMG_9908.JPG

At a certain point I felt like I must have died and this was my everlasting punishment for something I did but couldn't remember doing.  I always felt tantalizingly close but still had a million more ends to run in until they all stopped reappearing by the hundreds, and one by one all of the ends disappeared into the fabric.

IMG_0111.JPG

I couldn't be more happy.  I loved this scarf so much that I had dreams about it long before it was finished.  This has been a year and a half in the making and I can't believe it's real.

Stay sweet, stay crafty, and stay tuned.

Dressing in Moonlight

I've always loved the moon, much of my jewelry has moons and stars on it, and since i spent most of the other sleepless night kept company by these dear celestial bodies  I thought it would be fitting to make my moon dress.

I wanted to make it a simple but elegant dress since I rarely work with jersey fabric, and still feel the pains of being terrifically terrible at sewing clothes.  

IMG_0089.JPG

Though, despite my simple design for the dress- I still ran into some snags.  Primarily that when I was sewing lines for this, the fabric would still stretch but the stitches would not.  Meaning stitches would break and I would make lamentations and groans that almost certainly startled any person within the general area.

I discovered the trick though!  When sewing jersey, pull it so that about 50-75% of the stretch is being used, and sew it that way.  It makes it so that the stitches don't bump and rumple too much, but the stitches are far more flexible and won't make your neighbours call the police on you for all of the swearing.

IMG_0090.JPG

Once that was discovered, the rest of the dress was quite simple!  

IMG_0092.JPG

It fits well and after my growling and cursing, I remember why jersey is used in so many clothing items.  

IMG_0098.JPG

More sewing projects will be coming soon since I just got a box of fabric, so stay sweet, stay crafty, and stay tuned for more adventures, and even more likely misadventures.  

Tara Maesewing jersey